- 15 Dec, 2025 *
TL;DR: I turned a tinybox Green v2 into a private AI server, media hub, and home automation brain—all accessible anywhere via Tailscale, with as limited as possible cloud dependencies.
I’ve been wanting a proper local AI box for a while, as well as a home server, so why not both in one. Not a hosted playground, not "GPU hours in the cloud", but a machine that sits on my own network in my house, runs my own models and doesn’t leak anything to anyone unless I deliberately push it there.
Through a series of weird events from running and then selling my data science agency SeerBI, I ended up having a "spare" tinybox Green v2 I could use as I wanted.
—…
- 15 Dec, 2025 *
TL;DR: I turned a tinybox Green v2 into a private AI server, media hub, and home automation brain—all accessible anywhere via Tailscale, with as limited as possible cloud dependencies.
I’ve been wanting a proper local AI box for a while, as well as a home server, so why not both in one. Not a hosted playground, not "GPU hours in the cloud", but a machine that sits on my own network in my house, runs my own models and doesn’t leak anything to anyone unless I deliberately push it there.
Through a series of weird events from running and then selling my data science agency SeerBI, I ended up having a "spare" tinybox Green v2 I could use as I wanted.
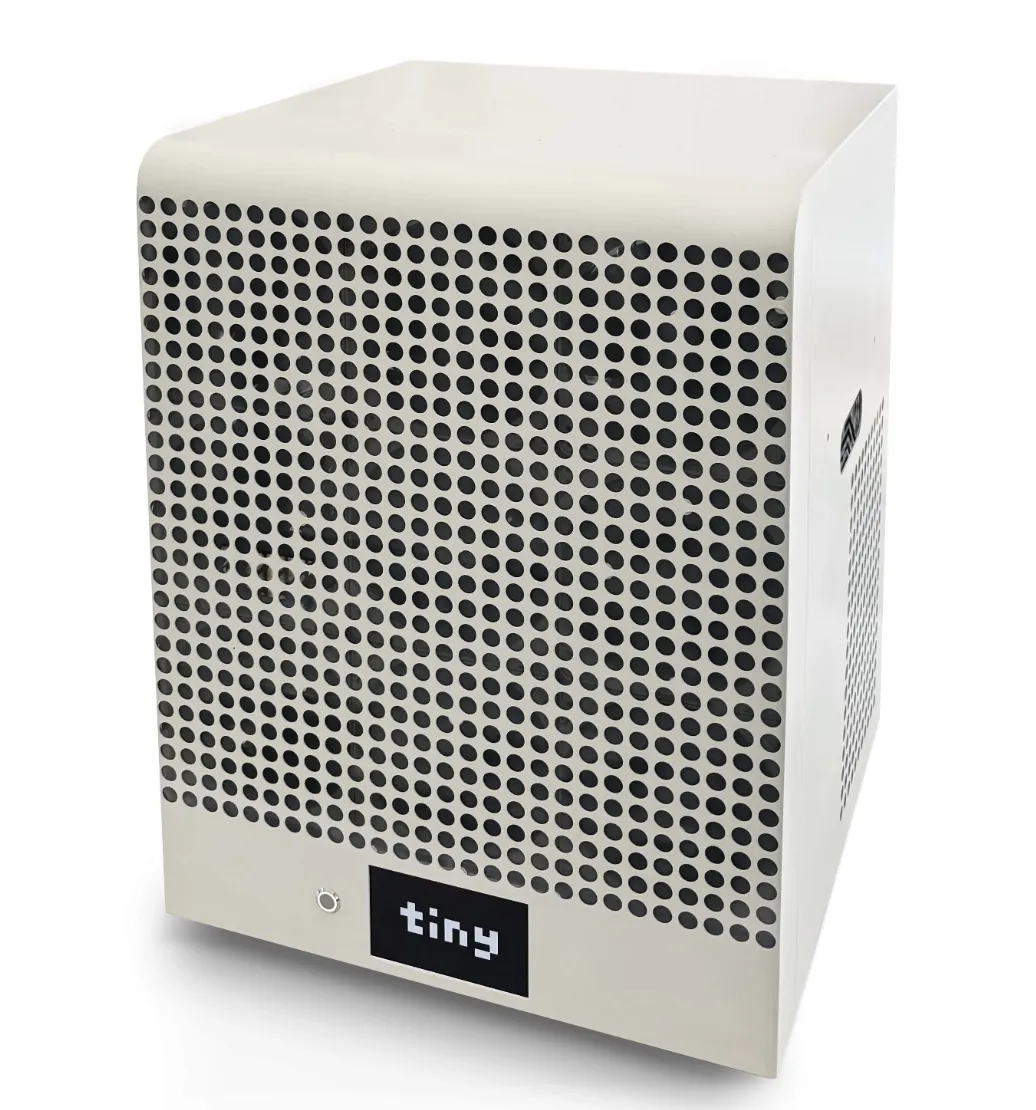
The Hardware
The tinybox is an awesome piece of kit by George Hotz’s company Tinygrad, it comes fully loaded with:
| Component | Specification |
|---|---|
| GPU | 4 × Nvidia RTX 5090 |
| RAM | 192 GB |
| CPU | 64-core AMD EPYC |
| PSU | 2 × 1600W |
Further details here — the spec I am running is the Green v2 (non-blackwell).
It ships with Ubuntu, a tiny user, and enough preinstalled tooling to be useful but not confusing. It’s very much "here is a Linux server, go do something interesting", which is exactly what I wanted, and what George Hotz positioned this as.
"While we develop tinygrad, the box is universal hardware. Use whatever framework you desire, run notebooks, download demos, install more things, train, inference, live, laugh, love, you aren’t paying per hour for this box so the only limit is your imagination" — tinygrad docs
Power Considerations
The first reminder that this isn’t a Raspberry Pi comes from the power side: this is a machine that can pull real wattage. For now, I’ve kept things simple — two outlets, default power limits.
The documentation is clearly written with the US market in mind, where typical household power is 120V and individual circuits are far easier to saturate.
🇬🇧 UK Note: Our 230V supply and higher-rated domestic sockets give a bit more headroom, which made me comfortable running the system on normal household outlets — with sensible power limits in place and each PSU on a separate socket. It’s still not something you plug in casually, but it’s far less sketchy than the same setup would be in a US home.
If you want to read more on this subject, Tom Forth has some great opinions on UK vs US power on his blog/X.
The Network Situation
The "cloud" part of my house lives in a very UK 2024s new build setup, which I haven’t spent a huge amount of time messing with yet:
- Fibre ONT in a cupboard by the front door
- ISP router bolted on nearby
- Absolutely no obvious Ethernet upstairs
The tinybox, of course, lives upstairs in my office.
After a bit of wall archaeology I found the expected chaos: blank faceplates, a white cable coiled up behind one, coax on another. Exactly the sort of "structured cabling" that looks useful until you actually want to use it.
For now, I just wanted to make sure the tinybox has a reliable wired link to the router and a stable IP. I bought and set up a simple TP Link Powerline adapter, connected it to a switch in my office and connected the Tinybox. Anything more clever can come later with proper Cat6 installation.
I do not want to play port-forward roulette. Whatever I build, it won’t rely on poking holes in the ISP router and hoping I remember what I did three months from now.
The router got told to always give the tinybox a static IP, and that’s the last time the WAN side of this project needed to be interesting.
BMC
One of the big advantages of tinybox over a normal supe’d up gaming PC is the BMC (Baseboard Management Controller). It gives you exactly what you’d expect from proper server hardware:
- Power control
- Serial-over-LAN console
- The ability to fix your own mistakes without walking upstairs
Initial Setup
- Boot with the simple on switch — only button on the nice clean front plate
- Note the BMC IP and default password on the tinybox display
- From my Mac, as per the docs:
ipmitool -H <BMC_IP> -U admin -P '<password>' -I lanplus sol activate
Once I’d confirmed I could get to a console that way, I treated it with the respect it deserves:
- Changed the default admin password
- Removed the password file so it’s not written on screen at boot
TODO: Later I’ll move the BMC onto its own VLAN or management network. For now it’s protected by the usual common sense: no port forwarding, no random guests on the LAN, and a strong password.
Hardening the Box
User Setup
Out of the box, you log in as: tiny / tiny
I updated the system, created myself a real user, and added it to sudo.
I changed passwords. I reset them again. I tried something deliberately stupid-simple to rule out keyboard mapping issues. SSH continued to say Permission denied.
The problem, once I actually looked, was very on-brand:
I was connecting to the wrong device.
The router had happily taken the IP I was testing against. The tinybox was sitting there on a different address, wondering why I was yelling at it. hostname -I on the console and a quick sanity check later, and suddenly SSH worked exactly as it should.
If it wasn’t obvious, I am no master at Linux or networking.
SSH Lockdown
Once I had the right IP and a working key, I locked down SSH:
- Keys only
- No root login
- No password auth
UFW
Firewall-wise I’ve kept it as unexciting as possible:
sudo ufw default deny incoming
sudo ufw default allow outgoing
sudo ufw allow from xxx.xxx.x.x/xx to any port 22 proto tcp
sudo ufw enable
The interesting access control story lives at the Tailscale layer, not the raw packet filter.
Tailscale
I have been following Tailscale for a few years, so when I finally got an excuse to use them I was very excited. The whole stack and setup just makes sense for this kind of project. I have had previous run-ins with OpenVPN self-hosted on AWS and other self-hosted solutions but was always let down by the long installation process and management. Most importantly I trust the tailscale network and like how simple and zero trust it is to allow me to confirm only "x" and "y" person can connect to this device.
So everything goes over Tailscale.
Installation
Basically one command to install and a login:
curl -fsSL https://tailscale.com/install.sh | sh
sudo tailscale up
Then jump to a given link, register for tailscale and link the device in their web console.
Suddenly the tinybox has a stable identity like: tinybox.tailfxxxx.ts.net
Why This Matters
The tinybox then only has to trust one thing on the outside: Tailscale. Everything else rides on top of that and I open and close access as needed.
No ports exposed, and with Tailscale’s admin dashboard I can see all of my services, network logs and add any family members to the service.
Exposing Services
sudo tailscale serve reset
sudo tailscale serve --bg --https=443 http://127.0.0.1:xxxx
sudo tailscale serve status
Now the status reads:
https://tinybox.tailfxxxx.ts.net (tailnet only)
|-- /    proxy http://127.0.0.1:xxxx
I had some misconceptions on how tailscale worked going into this but found that tailscale serve isn’t "run a web server in this terminal"; it’s "tell the Tailscale daemon to proxy this local port". Once I started treating it as a config tool on the terminal, not a foreground process, it became one of the nicest parts of the whole setup.
The Docker Stack
With networking, access, and SSH sorted, the actual "what runs on this box" part is surprisingly straightforward.
Everything lives in a single Compose file under /srv/stack with persistent volumes under /srv — all using our old friend Docker.
The Core Services
| Service | Purpose |
|---|---|
| Ollama | LLM runtime — download any model with a single command |
| Open WebUI | Chat interface with knowledge store, MCP tools, multi-user support |
| Jellyfin | Media server |
| Home Assistant | Home automation brain |
| Netdata | Real-time monitoring |
Best Part: When I add a new model over terminal, I don’t have to update the docker service — it sees the updated model list and is available to use for all of my users, the library of models ollama serves can be found here ollama.com/library
Port & Exposure Strategy
| Service | Binding | Access Method |
|---|---|---|
| Ollama | 127.0.0.1:xxxx | Tailscale only |
| Open WebUI | 127.0.0.1:xxxx | Tailscale only |
| Jellyfin | 0.0.0.0:xxxx | LAN via UFW |
| Home Assistant | Host network | mDNS/UPnP discovery |
| Netdata | Host PID/network | Full system visibility |
Compose Structure
services:
ollama:      # 127.0.0.1:xxxxx
openwebui:   # 127.0.0.1:xxxx
jellyfin:    # 0.0.0.0:xxxx
homeassistant:
network_mode: host
netdata:
pid: host
network_mode: host
volumes: ...  # /proc, /sys, etc for visibility

volumes:
netdataconfig:
netdatalib:
netdatacache:
It’s boring in the best way:
docker compose up -d, and the whole stack snaps back into place.
The AI Experience
With Ollama + Open WebUI running, the "AI" side of this starts to feel real:
- I pull models once, locally
- I talk to them through a nice interface at
https://tinybox.../ - Everything stays on the box unless I deliberately send it out
Adding Models
sudo docker exec -it ollama ollama pull qwen2.5-coder
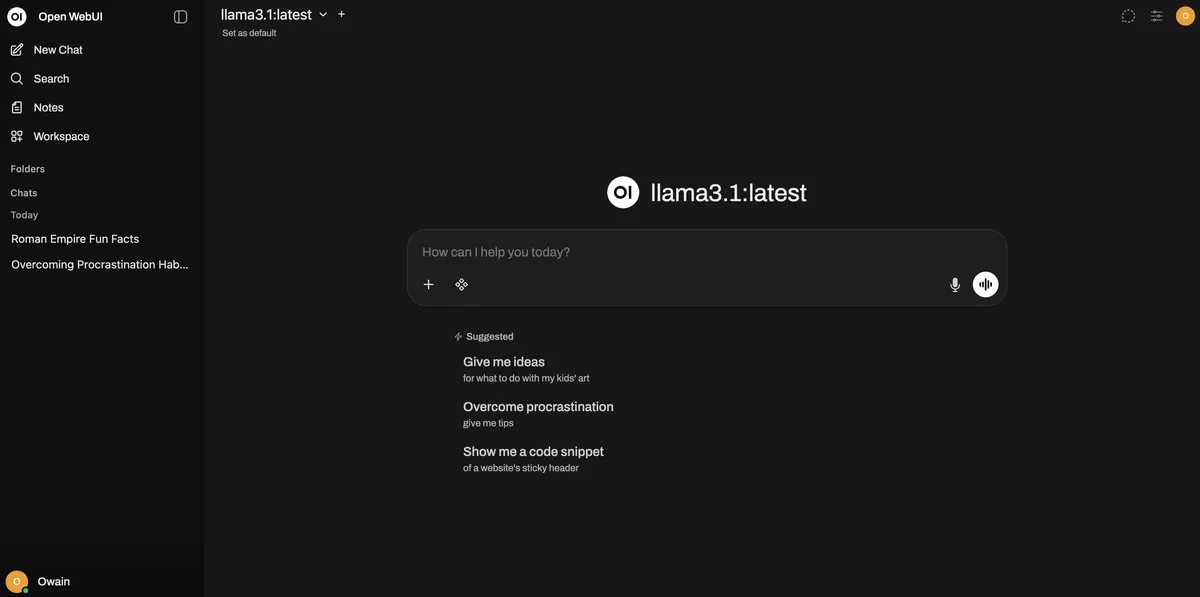
The fun part: Thanks to Tailscale, this feels the same whether I’m on the sofa, in the office, on desktop or mobile. It’s just "make sure VPN is connected, hit a URL and talk to the model", with the nice side effect that the entire graph is mine.
Next step: Adding some agent services here — long research and other more "advanced" use cases than just chat to the model. Currently this feels a bit 2022.
Observability with Netdata
The bit that turned this from "cool toy" into "actual system" was adding Netdata and exposing it via Tailscale.
Dashboard Metrics
- CPU usage per core, in real time
- RAM usage and swap behaviour
- Disk I/O and filesystem utilisation
- Per-container metrics (Ollama vs Jellyfin vs HA)
- Hardware sensors and temps
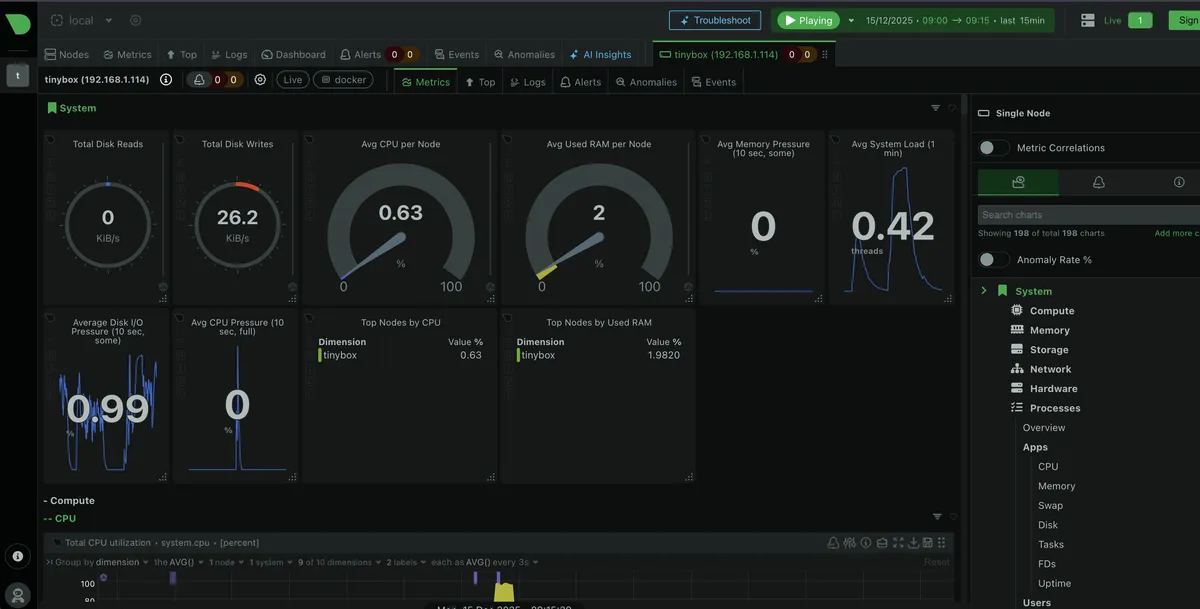
Why This Matters
It’s one thing to know, in theory, that a certain model size will stress memory or CPU. It’s another to literally watch:
- GPU memory jump when you load a model
- CPU spikes when inference kicks in
- Disk activity when a big model gets pulled off storage
The Workflow
┌─────────────────┐     ┌─────────────────┐
│   Open WebUI    │     │    Netdata      │
│   (Tab 1)       │     │    (Tab 2)      │
└────────┬────────┘     └────────┬────────┘
│                       │
└───────┬───────────────┘
▼
Kick off model run
│
▼
Watch the graphs move
│
▼
See the actual bottleneck
TODO: The GPUs are missing from Netdata. I can check on these via
nvidia-smifor now, but adding those to Netdata is on the to-do list.
Lessons Learned
A few things that bit me along the way:
| Mistake | Lesson |
|---|---|
| SSH to the wrong host | I spent too long resetting passwords on the router while wondering why the tinybox was ignoring me. hostname -I on the console is your friend. |
| Locking down SSH too early | Turning off password auth before keys were confirmed is a great way to practice using the BMC console. |
| Overcomplicating Tailscale | I was thinking it was a lot more complex than it ended up being. It’s just: install → config → choose exposures. |
None of these are catastrophic. They’re just the normal little cuts you get when you’re wiring a system yourself instead of clicking through a cloud wizard.
One very helpful thing in this whole process was having Claude Opus 4.5 on hand from helping me write the original plan, troubleshooting logs, it was a great model for this back and forth technical work.
Current Capabilities
- Private LLM access from anywhere
- Media streaming around the house
- Home automation hub
- Observability good enough to see problems before they bite
Future Plans
- Hook GPU metrics properly into Netdata
- Add JupyterLab behind Tailscale for experiments and notebooks
- Set up backups for
/srvvolumes so I can nuke and pave the host OS without fear

Why Bother?
You can absolutely rent this kind of capability from the cloud or pay for a SaaS license for all of this. You can hit plenty of hosted AI APIs. You don’t need a tinybox to use LLMs.
But owning the whole path from prompt to silicon does something to your intuition:
- You feel what a "big" model is, not just read the parameter count
- You see the cost of context length in CPU, RAM and latency
- You understand how your home network and your hardware actually behave under load
The Real Win
Every token, every request, every bit of context lives on your box, on your network, under your control.
I now know I have models and context that can follow me wherever I go, and I have the hardware to scale to bigger models that release. I can experiment and test without fear of "you have reached your token limit" or blocking topics that a model provider doesn’t believe in.
The Vision
Next steps:
- Fine-tuning some of these models on device
- Running larger experiments
- Pushing the box with agents I can trust running for a long time on complex tasks
My eventual goal: A "Jarvis"-like assistant I can run and own fully locally — which, tbh, with a few agent services (like LangChain), a voice, and some calendar/mail/external connections may not be too far away.
Final Thoughts
As I add more services, experiments, etc., I will be updating this blog — so feel free to follow along or never look at this blog again.
For me, that’s worth a weekend of wrestling with SSH, BMC, Docker and Tailscale.
AI Has been used to refine the wording / markdown in the article but not in writing / ideation