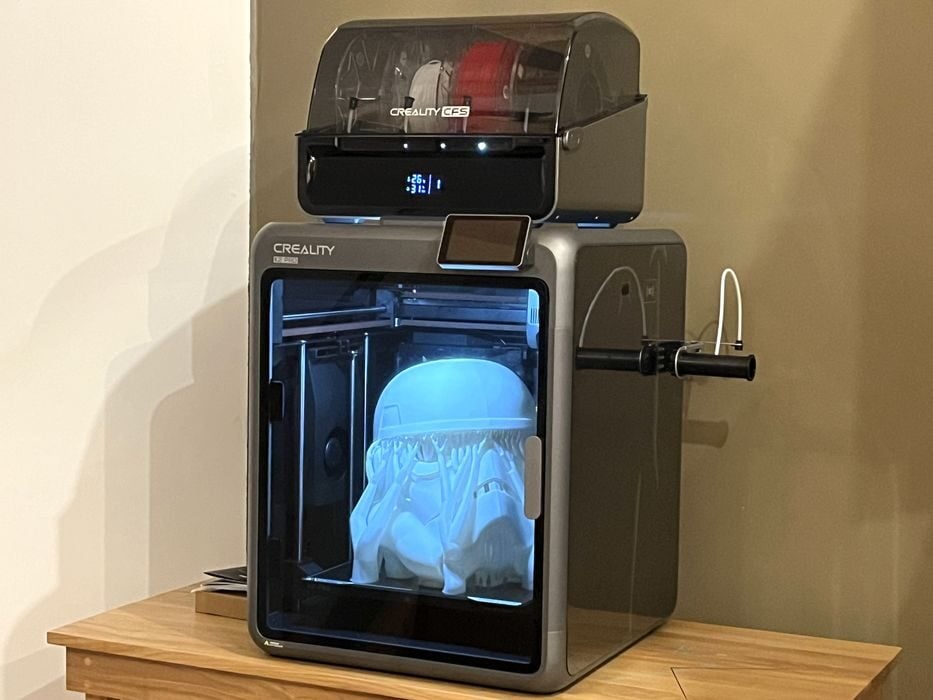
 The Creality K2 Pro Combo 3D printer [Source: Fabbaloo]
Our review of the Creality K2 Pro Combo 3D printer continues with a look at print results.
This is part three of a four part series, please read parts one, two and four.
Creality K2 Pro Combo Print Results
 Batch of calibration prints made on the Creality K2 Pro Combo 3D printer [Source: Fabbaloo]
The first job we sliced …
The Creality K2 Pro Combo 3D printer [Source: Fabbaloo]
Our review of the Creality K2 Pro Combo 3D printer continues with a look at print results.
This is part three of a four part series, please read parts one, two and four.
Creality K2 Pro Combo Print Results
Batch of calibration prints made on the Creality K2 Pro Combo 3D printer [Source: Fabbaloo]
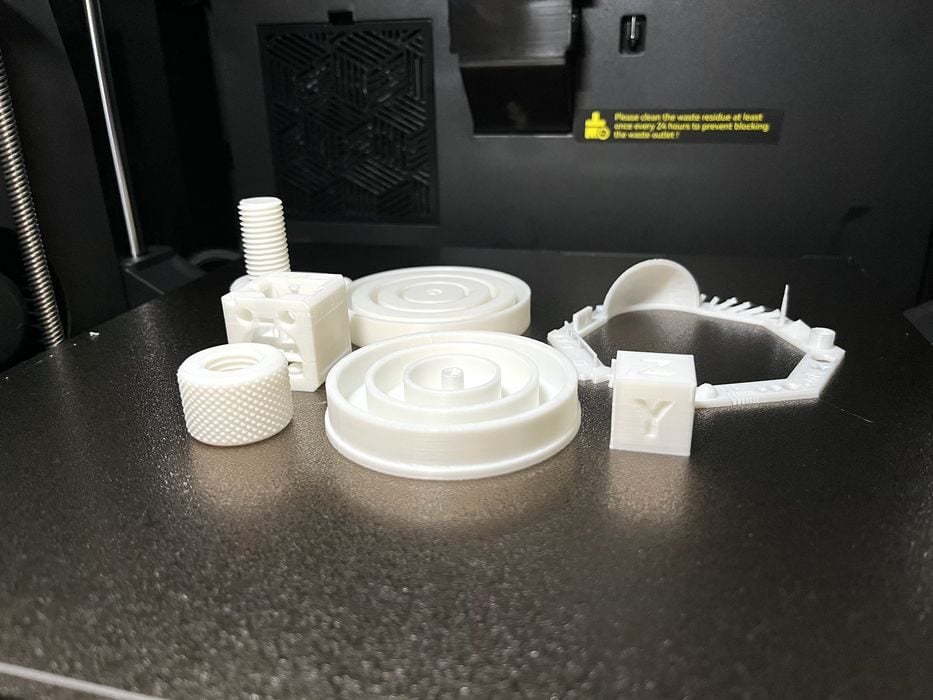
The first job we sliced consisted of several calibration tests that we typically run, all combined into a single print job. When we tried to send the file to the printer we found we didn’t have connectivity.
The reason? We weren’t at the lab and on the same network as the K2 Pro. No problem, we simply sliced the job in Creality Print, sent it to the cloud, and then launched it with the handy mobile app.
The job had an estimated print time of 3h14m using 84g of filament. When we returned to the lab, we found that the job had completed in 3h16m with no failures. For the most part all the models had turned out quite well. The Knurling Nut & Bolt easily fit together, as did the Cylindricity Test, but there were a few visible lines on the slides of the XYZ Cube.
Remember those two calibrations that occurred when we printed the presliced #3DBenchy? They are the K2 Pro’s newly added Auto Pressure Advance and Flow Ratio Calibrations. We decided to test out those features and see if we would get a better XYZ cube.
To see cause and effect we sent the job to the printer normally, and then sent it again but this time with the Calibration option enabled.
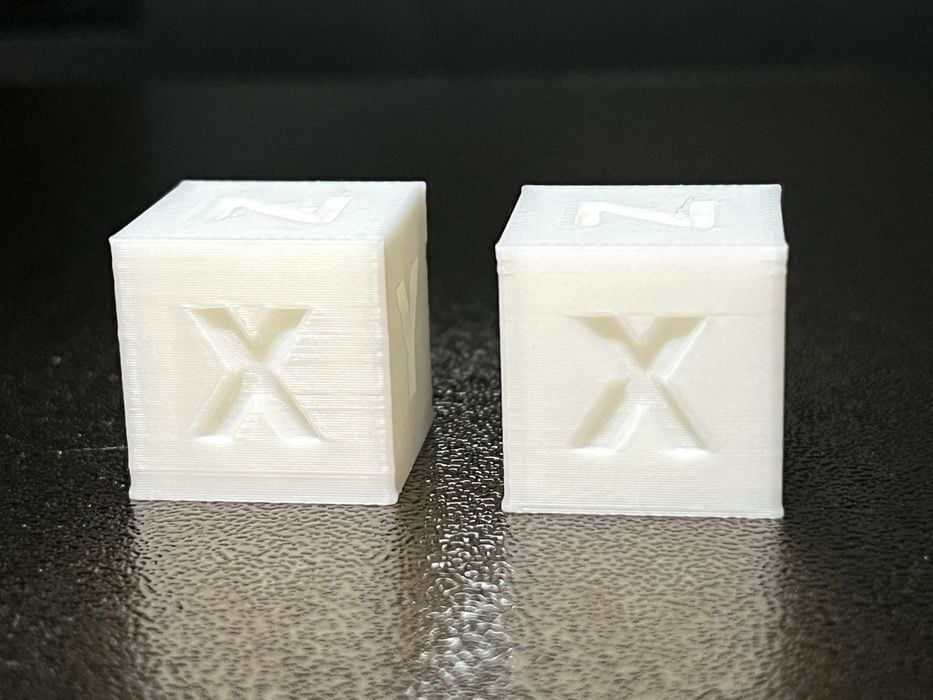 Comparison of a test cube with and without flow calibration on the Creality K2 Pro Combo 3D printer [Source: Fabbaloo]
When we compared the two finished prints, we found the surface quality to be noticeably improved on the calibrated version. We are quite familiar with Pressure Advance and Flow Rate calibrations on other Creality K2 Pro Combos and the features really do make a difference in overall print quality.
However, Creality hasn’t supplied much information on the use of these functions in the manual, or on the Wiki as to what they do. You could choose to use them for every print, or just enable them when you have a flow rate or print quality issue that they could correct.
Our next test involved trying to see how close we could come to matching the 21m print time of the presliced #3DBenchy, We set up the standard speed boat parameters in the Creality Print, getting an estimated time of 26m. To further speed things up we switched to Ultra Fast mode, with no calibration. The job completed in 28m and looked very good, with just some slight drooping in the bow.
We made a few adjustments to our slicer settings and switched to a 0.28mm layer height, getting a 24m print time, that when paired with Ultra Fast mode completed in 25m, with the print looking about the same for quality. Given that we didn’t know the specific parameters that Creality used in their pre-sliced print, we decided it was close enough and concluded our speed test, switching back to using default filament profiles moving forward.
Now it was time to attempt some multicolor prints. We unloaded the current filament from the spool holder and made sure to pull the spool holder PTFE tube from the rear filament port on the K2 and reconnected the PTFE tube from the CFS.
If we didn’t do that, then the filament would surely end up all over the floor.
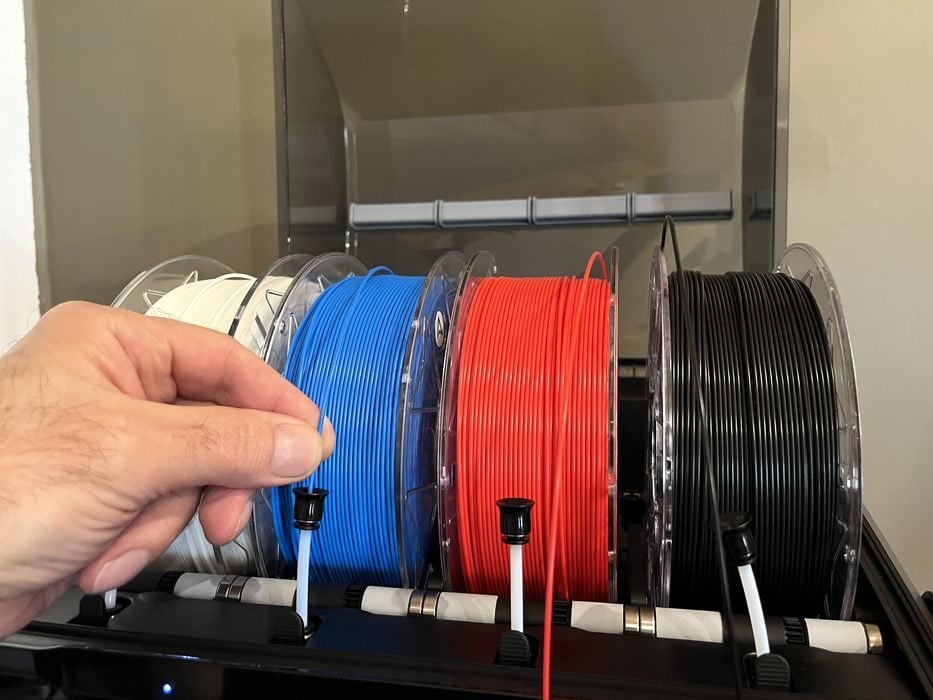 Loading the CFS on the Creality K2 Pro Combo 3D printer [Source: Fabbaloo]
We placed a roll of Creality branded RFID chipped Hyper PLA filament into each of the 4 bays of the CFS, taking turns loading the filament individually into each feeder tube until it was pulled from our fingers and into the unit. The printer automatically registered each spool filament type and colour thanks to the RFID readers inside the CFS.
We went to Creality Print and loaded up some Dual Colour Poker Chips – red/white, white/blue and white/black. When all the corresponding filaments had been properly mapped and our file sliced, we were given the warning, “the flush multiplier setting is too low, value is 0.70” and that we should recalculate flush volumes.
This was similar to a situation we found ourselves in during the K2 review. Then we found that a recalculated multiplier of 1.3 suggested by the software was far too high, and that in the end 0.70 was quite adequate.
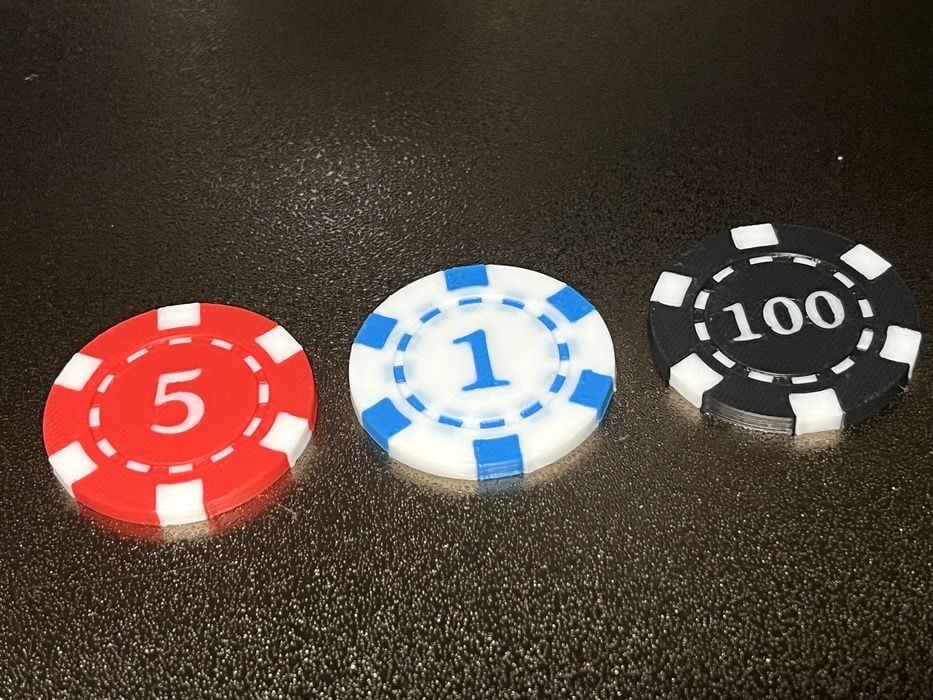 Excellent multicolor PLA print made on the Creality K2 Pro Combo 3D printer [Source: Fabbaloo]
So we left everything as is and sliced the file, getting a print time of 2h that used a total of 35g of filament – 12g of model, 20g of flush volume and 4g prime tower. The print completed in 2h24m using a total of 49g of filament with all three chips looking perfect.
That said, the multiplier setting would obviously need to be recalculated for different models, given the various colour combinations in play in any particular instance. What was too much multiplier for one scenario might not be enough for another.
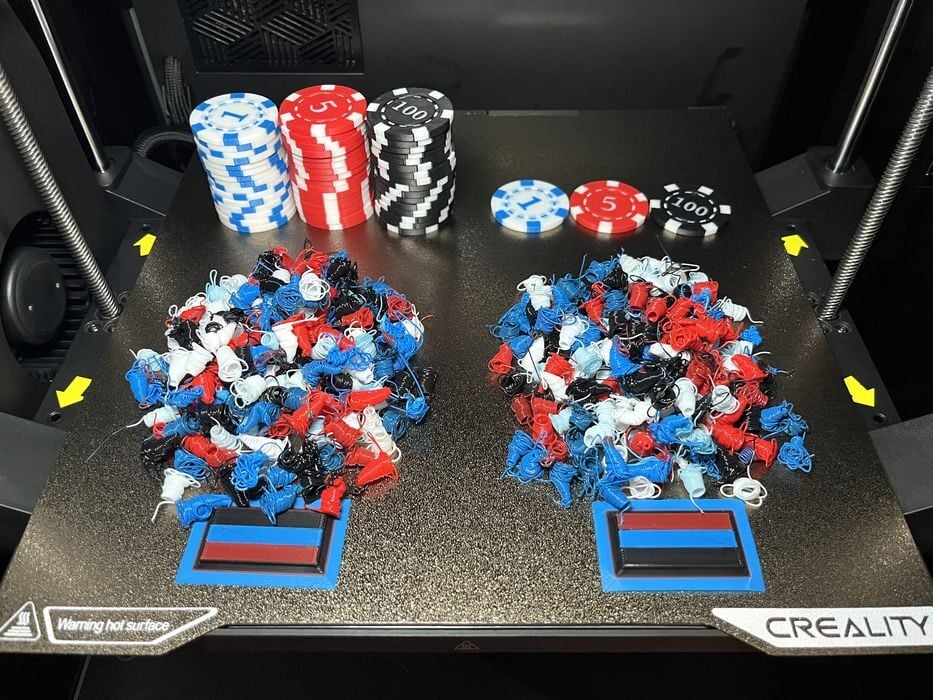 Waste comparison of two print jobs on the Creality K2 Pro Combo 3D printer [Source: Fabbaloo]
Given the amount of waste generated by the print, we decided to see how efficient we could be. We ran the job again, but this time loaded the build plate completely full of poker chips. A total of 47 poker chips had an estimated build time of 12h21m using an estimate of 205g of filament with 182g for model, 20g of flush volume and 4g prime tower. The print completed in 12h37m with fantastic print surface and clean colours.
Given that the same amount of filament was wasted for 3 chips, or 47 chips, if you want to lower your waste ratio, then make sure to plan out printing duplicate items all at once and not spread it out multiple print jobs.
We did a few more multicolor prints to demonstrate less waste scenarios.
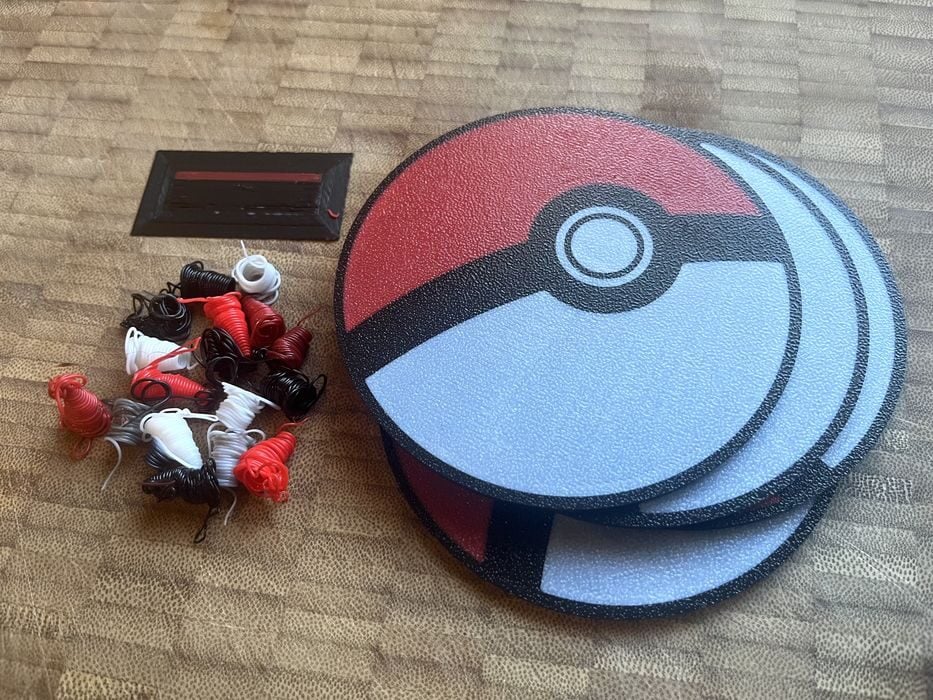 Coasters made on the Creality K2 Pro Combo 3D printer [Source: Fabbaloo]
Pokeball Coasters sliced at 1h46m using 72g for model, 2g for flush and 1g for tower, giving us four coasters that turned out very good.
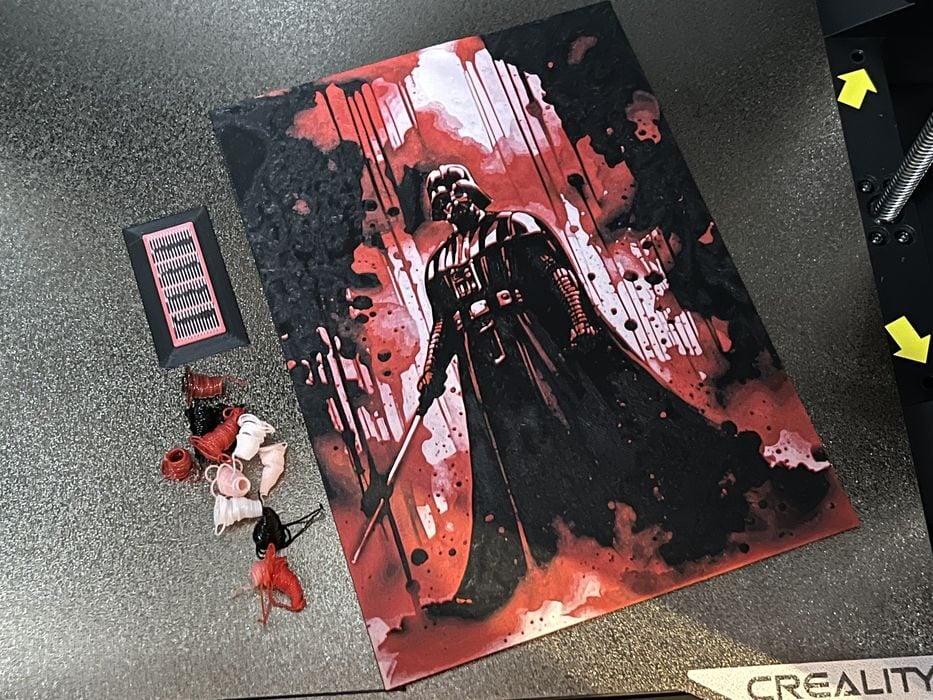 Hueforge print made on the Creality K2 Pro Combo 3D printer [Source: Fabbaloo]
A Darth Vader HueForge model sliced at 5h8m, using 45g model, 1g flush, and 1g tower, which we printed in a layer height of 0.08mm. Starting with black, it swapped to red at layer 14, and then to white at layer 26. The print completed in 5h23m and looked quite impressive.
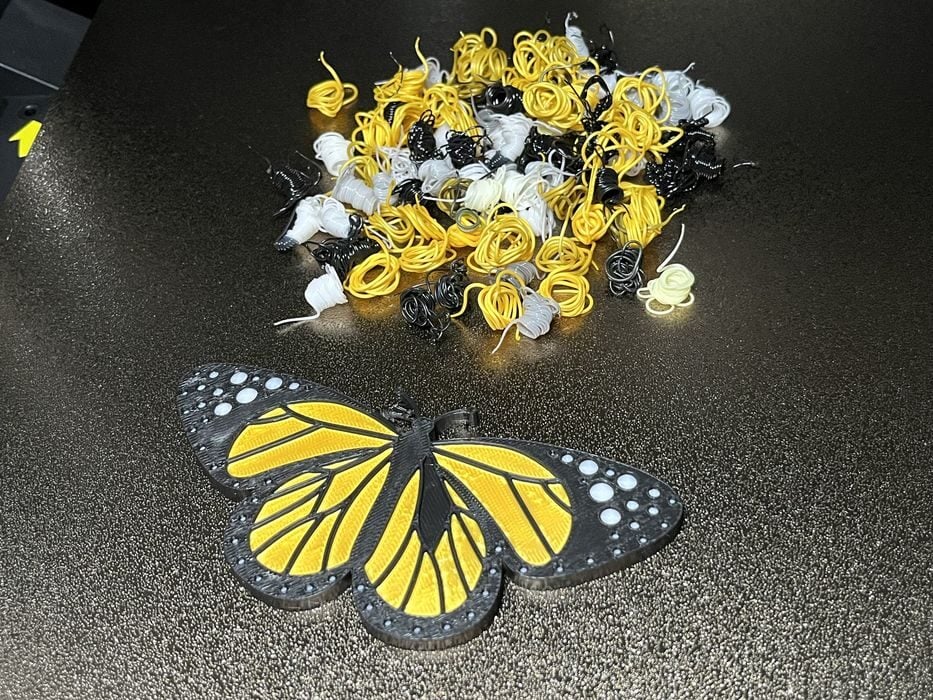 Butterfly print made on the Creality K2 Pro Combo 3D printer [Source: Fabbaloo]
We also sliced a Butterfly, getting an estimated build time of 1h, using 13g of filament for model, 7g for flush and 2g for tower. The print completed in 1h24m and looked very nice.
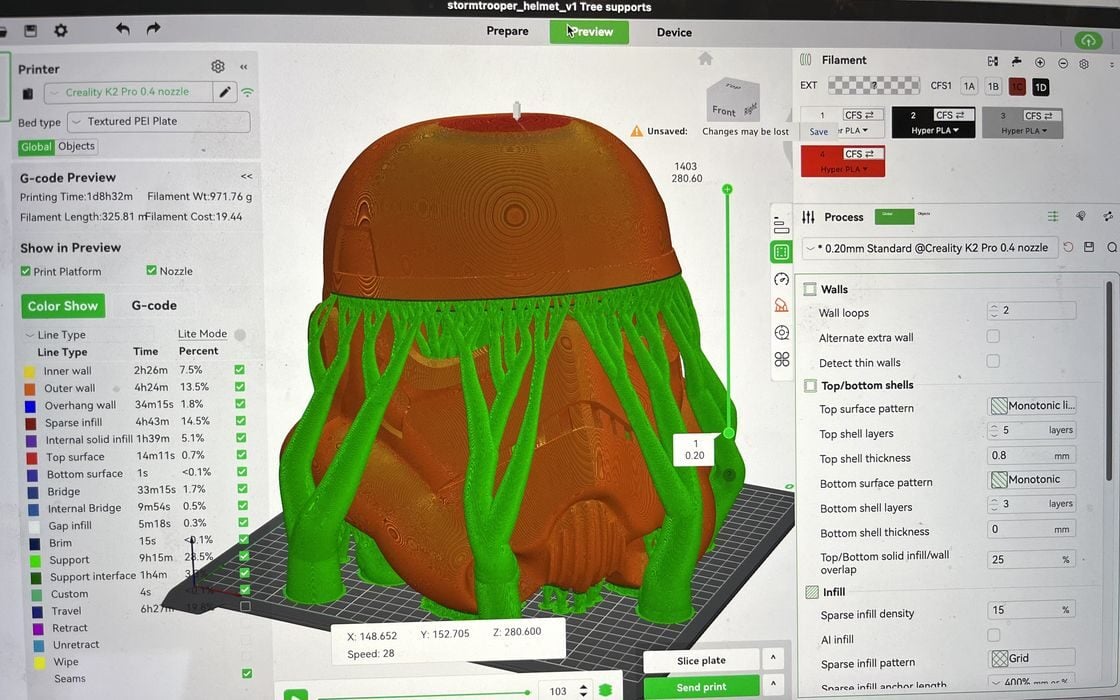 Slicing a large helmet print in Creality Print [Source: Fabbaloo]
We decided to take a break from color printing and demonstrate the large build volume of the K2 Pro, slicing a full sized single piece Storm Trooper helmet, getting estimated build time of 1d8h32m using 972g of filament.
Given that we’d be starting with a partial spool of White PLA filament, we made sure to toss another spool of the same material into the CFS, because if two rolls of the same material are present in the CFS, then the printer automatically switches over to the next identical spool to complete the print.
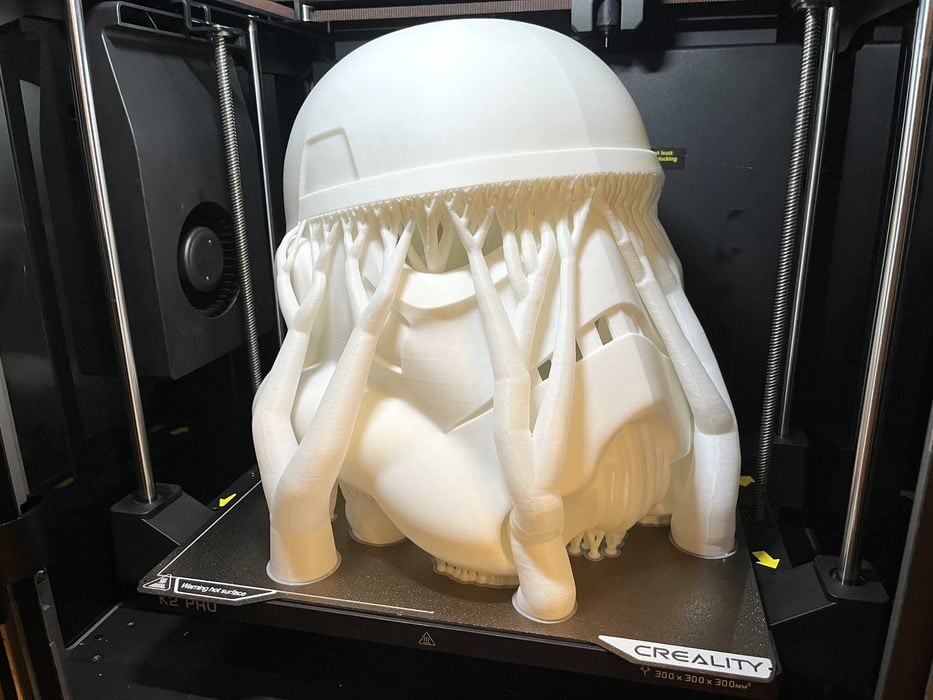 Huge helmet successfully printed on the Creality K2 Pro Combo 3D printer [Source: Fabbaloo]
In the end the job finished in 1d8h42m with excellent quality. Besides the effort of removing supports, the model would require additional post processing work in order to closer resemble an actual movie prop, much more work than were willing to do for the review.
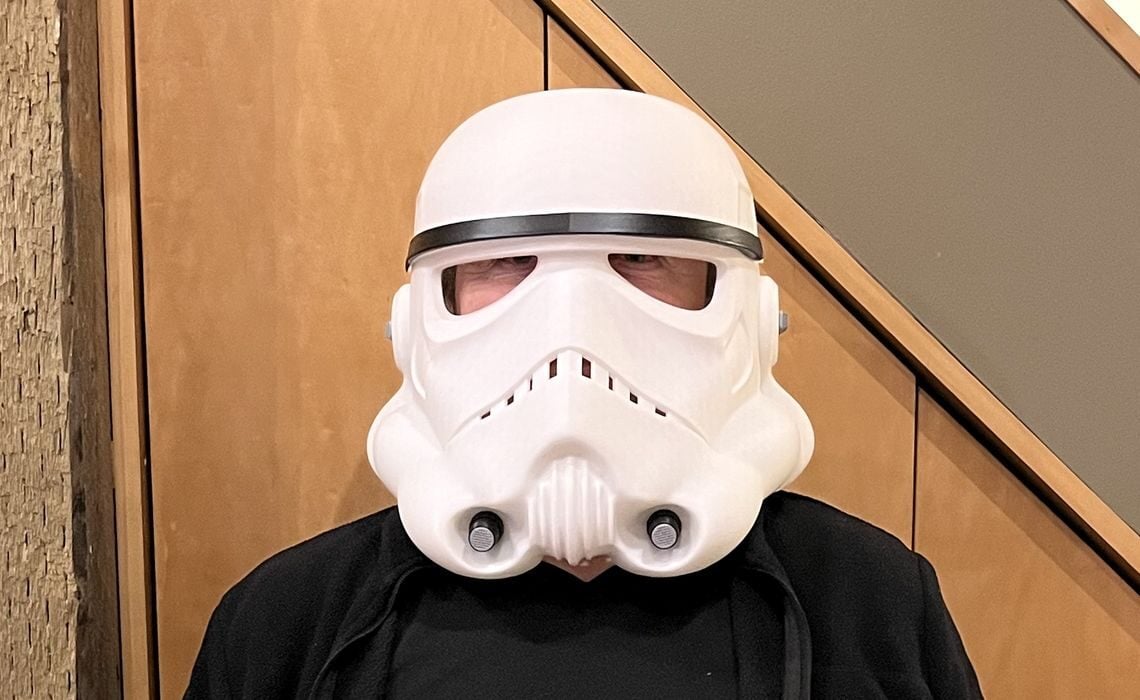 Wearing a full helmet printed on the Creality K2 Pro Combo 3D printer [Source: Fabbaloo]
For the purpose of taking a pic, we printed a few extra greebles to stick onto the exterior of the helmet, added a piece of black electrical tape for the stripe on the front, tucked some black foam into the helmet cavity to give contrast for the eye sockets & mouth vents and voila we were done. The finished result looks great! You can print a full, wearable helmet in one piece on the K2 Pro.
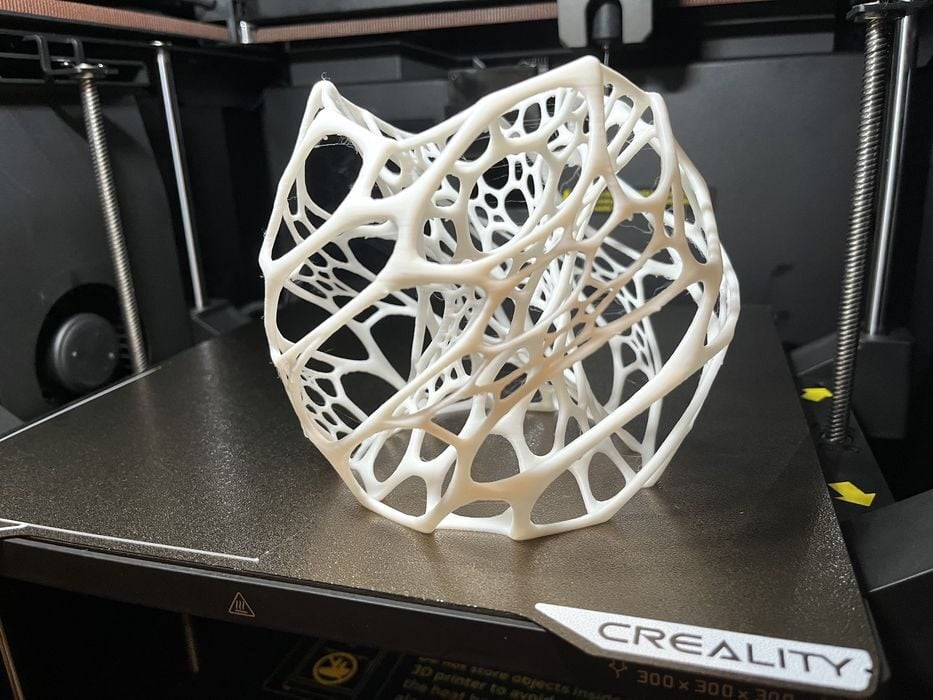 Nervous lamp 3D print made on the Creality K2 Pro Combo 3D printer [Source: Fabbaloo]
We gave the printer a bit more of a challenge with a Nervous Lamp print, slicing it with White Hyper PLA and getting an estimated build time of 4h47m using 53g of filament. The print completed in 4h58m minutes and looked quite good.
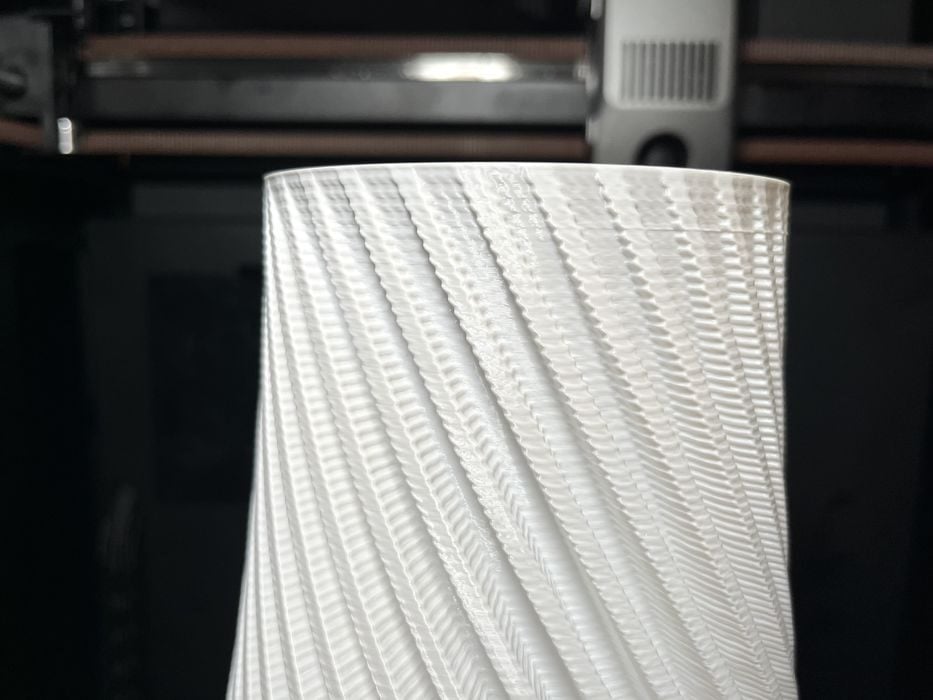 Top of a vase PETG vase print made on the Creality K2 Pro Combo 3D printer [Source: Fabbaloo]
We switched over to some non-Creality, non-RFID PETG spools to print a Spiral Vase, manually entering the filament type for the CFS. We scaled the vase to 300mm tall, getting an estimated build time of 6h25m, using 130g of filament. The finished print was 5h47m — quite a bit less than the estimate. The print surface had some odd striations that got worse at the top of the print. We re-sliced and reprinted using a different spool of PETG, getting the same issues. We switched to PLA, sliced and printed and the quality was much better. There must be some difference between the PETG and PLA profiles causing this effect.
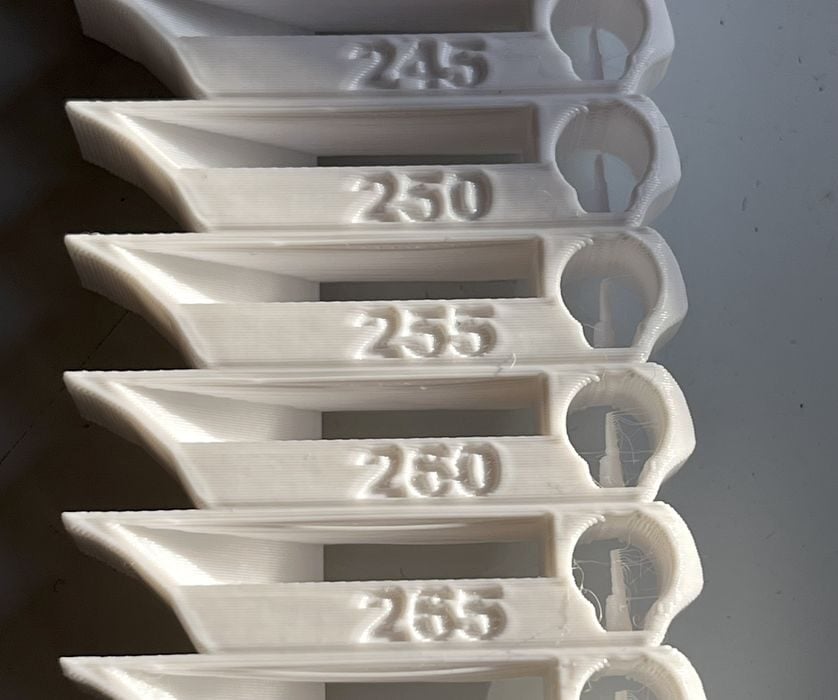 PETG temperature tower 3D printed on the Creality K2 Pro Combo 3D printer [Source: Fabbaloo]
We decided to use the built-in calibration feature in Creality Print and generate a PETG temperature tower that started at 220C and ended at 250C with 5 increments. The results of the tower showed that the temperature we were working with for the generic PETG profile of 250C was indeed extruding properly.
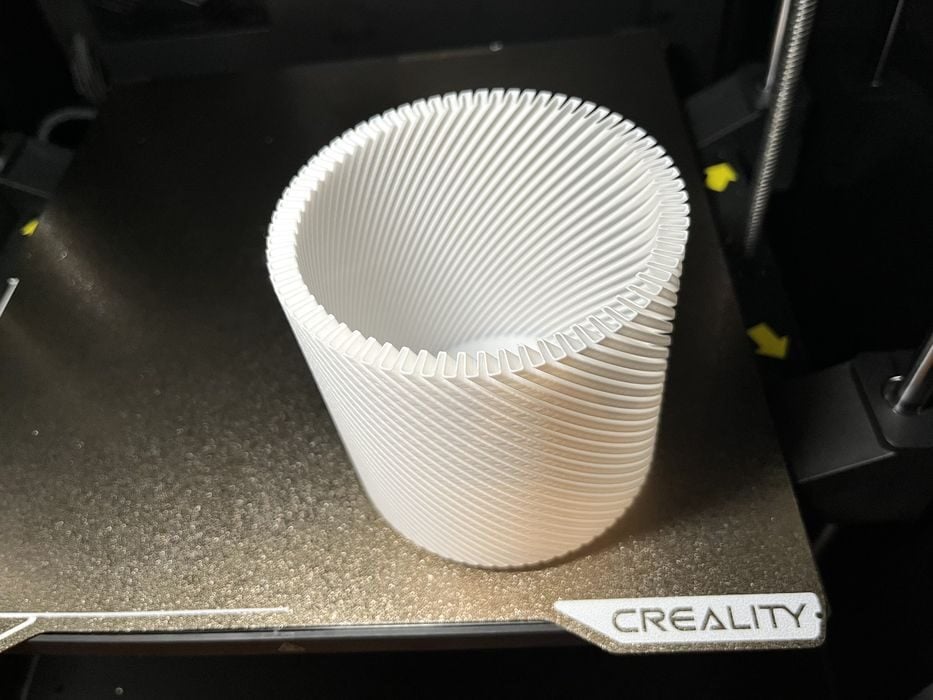 Nice vase print in PETG made on the Creality K2 Pro Combo 3D printer [Source: Fabbaloo]
We did a final test in PETG with a different smaller spiral vase model and slowed the print speed down to 125mm/s outer wall and 175mm/s inner wall, getting an estimated build time of 3h5m using 53g of filament. The print turned out much better, so we went with the assumption we were just printing the off-brand PETG filament too fast.
 ABS print made on the Creality K2 Pro Combo 3D printer [Source: Fabbaloo]
We switched over to ABS filament and sliced a bottle opener whistle, getting 26m using 4g of filament. The K2 pro has a heated build chamber, so instead of applying the usual brim, we decided to rely on the internal 50C temperature of the build chamber to stop the ABS from warping and detaching from the build plate. There was no need to manually turn this feature on, as it was built into the filament profile.
The build chamber was not heated up to the full 50C by the time the print started, but did manage to mostly do so during the duration of the 16m print, reaching a total of 48C by the end. The finished print turned out great and showed no signs of warping. The build chamber could be preheated in advance of launching a print by simply selecting the build chamber icon on the LCD screen and then setting the appropriate temperature.
 PLA CF print made on the Creality K2 Pro Combo 3D printer [Source: Fabbaloo]
We switched over to PLA-CF to print a small shifter knob getting an estimated build time of 45m using 20g of filament. The print completed in 46m with exceptional surface quality.
 Unexpected successful TPU print made on the Creality K2 Pro Combo 3D printer [Source: Fabbaloo]
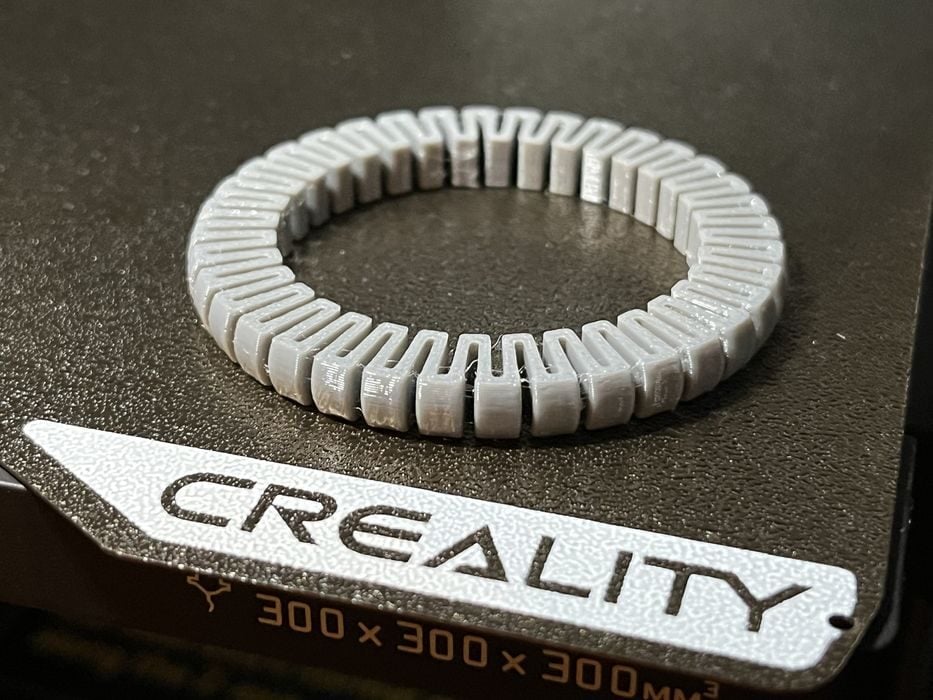
The K2 Pro is not advertised as supporting TPU filament, but since we found an entry in the spool holder filament type selection, we loaded up some 95A HF, sliced and attempted to print a bracelet to see happens. The print completed in 37m with no issues with excellent quality.
 Failed PETG-CF print made on the Creality K2 Pro Combo 3D printer [Source: Fabbaloo]
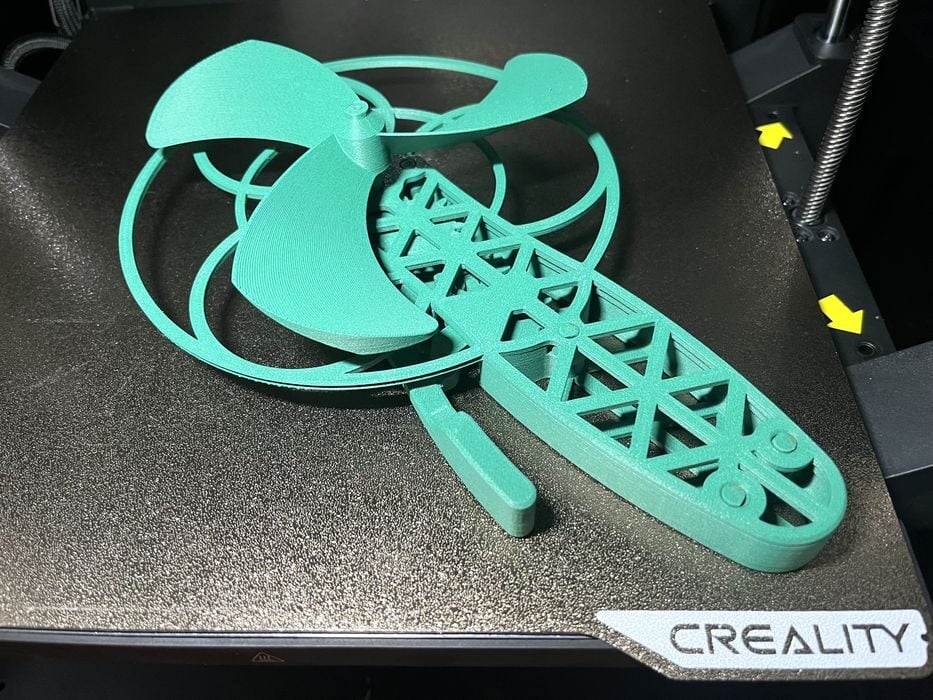
The K2 Pro is capable of additional engineering materials. So we mounted a spool of PETG-CF into the CFS and sliced a Hand-Powered Mechanical Fan model that we hadn’t tried before, getting an estimated print time of 4h using 78g of filament. The print completed in 4h10m with some issues detaching support, poor surface quality, and difficulty assembling the fan, which did not articulate.
Sometimes these issues are just model related, so we loaded and sliced a model we’ve used previously with success, Squeeze Fan Ruggedized.
Unfortunately, the filament failed to load at the start of the print, with nozzle temperature permanently stuck at 300C. We canceled the print and tried loading filament manually via the extrude routine on the LCD, but ran into the same issue.
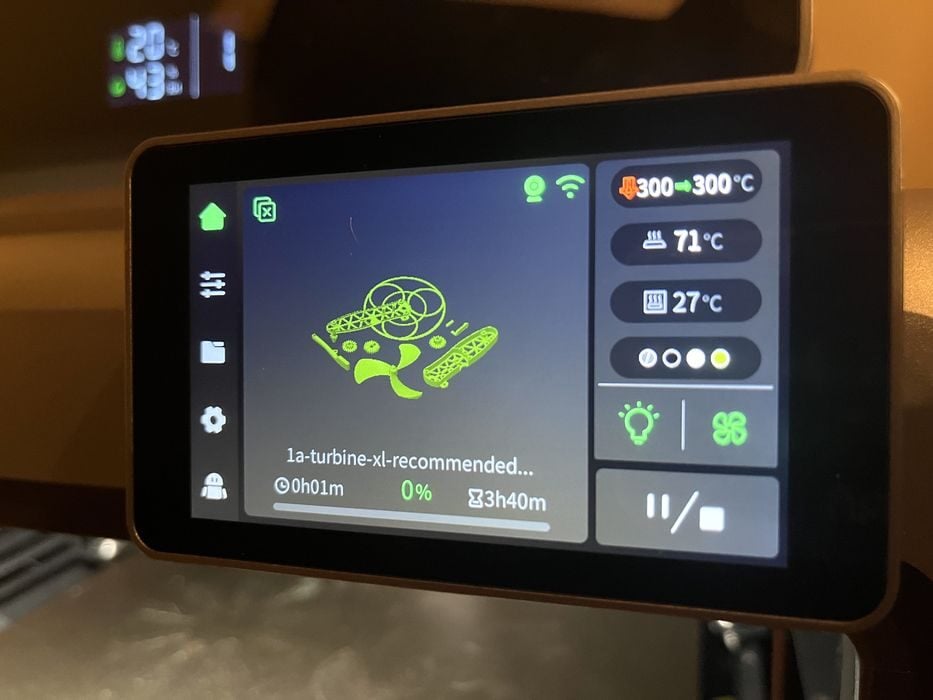 The Creality K2 Pro Combo 3D printer is stuck at 300C! [Source: Fabbaloo]
We discovered that if we used the axis/temp commands and preheated the nozzle, then we could manually extrude with success. So the extruder & hot end were both working. We had stumbled onto some sort of firmware bug.
 Fix for the temperature lock problem on the Creality K2 Pro Combo 3D printer [Source: Fabbaloo]
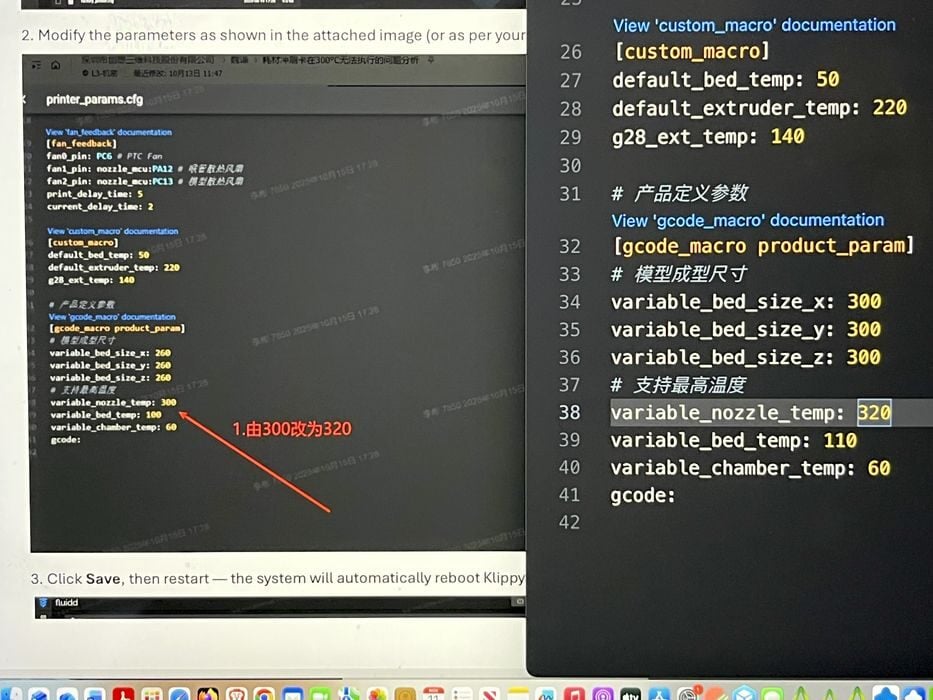
After contacting Creality tech support, they confirmed that it was indeed a firmware glitch and gave us a workaround until they could release a new firmware. This involved accessing the FLUIDD web interface and making a small change to the printer.cfg file and then rebooting the printer.
 Successful PLA-CF print made on the Creality K2 Pro Combo 3D printer [Source: Fabbaloo]
This time when we sent the print job the filament loaded successfully. The print completed in 3h48m, with the quality being excellent. All parts fit together easily, with the finished product articulating as designed.
 Failed PAHT-CF print made on the Creality K2 Pro Combo 3D printer [Source: Fabbaloo]
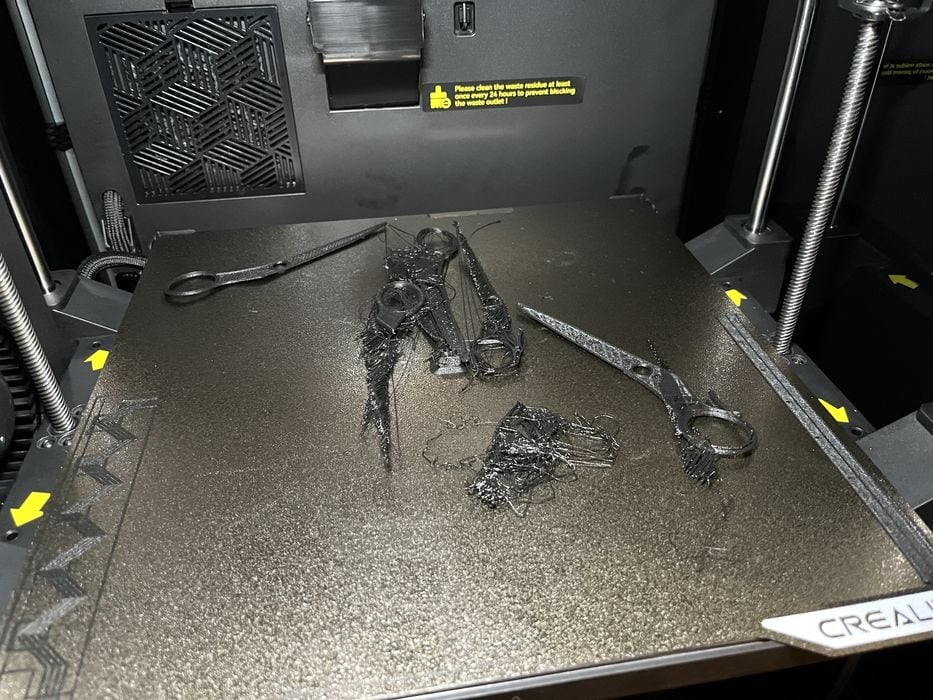
We decided to give PAHT-CF, a challenging material to print, a test and sliced a pair of Scissors. This time we preheated the build chamber to 50C prior to starting print. However the print failed and detached from the build plate, twice, both times failing due to poor bed adhesion.
 Successful PAHT-CF print made on the Creality K2 Pro Combo 3D printer [Source: Fabbaloo]
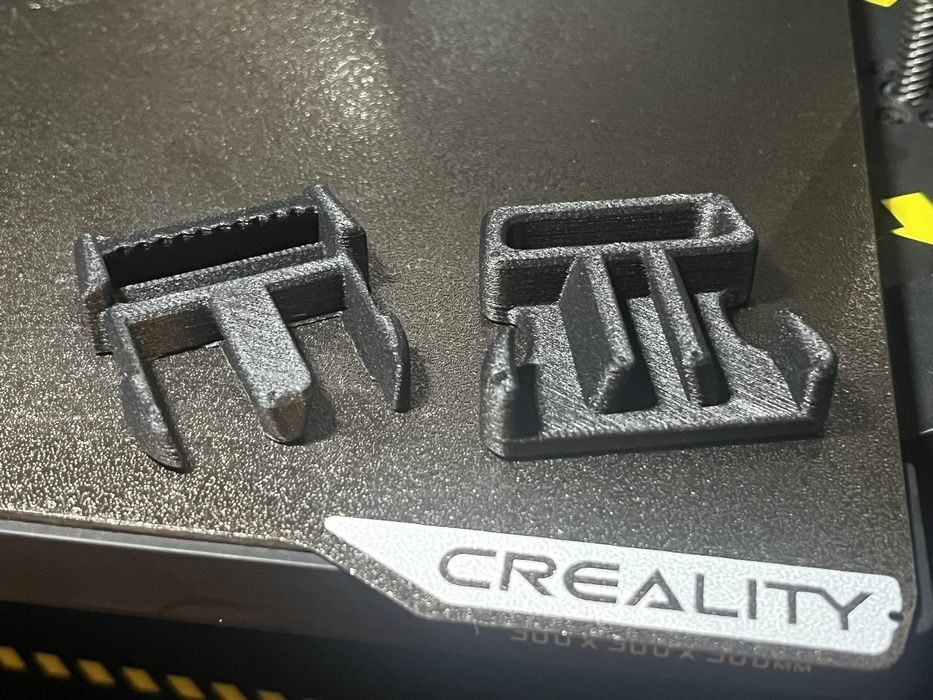
PAHT is a difficult material to print, so we switched to a model with simpler geometry, Strong-Printable-Snap-Buckle, and included a brim for extra adhesion. We also made sure to preheat the build plate and chamber before sending the job. The print completed in 1h43m and was perfect. It seems that the model’s geometry significantly affects the outcome of a PAHt print.
This is part three of a four part series, please read parts one, two and four.
Via Creality