Things used in this project
Story
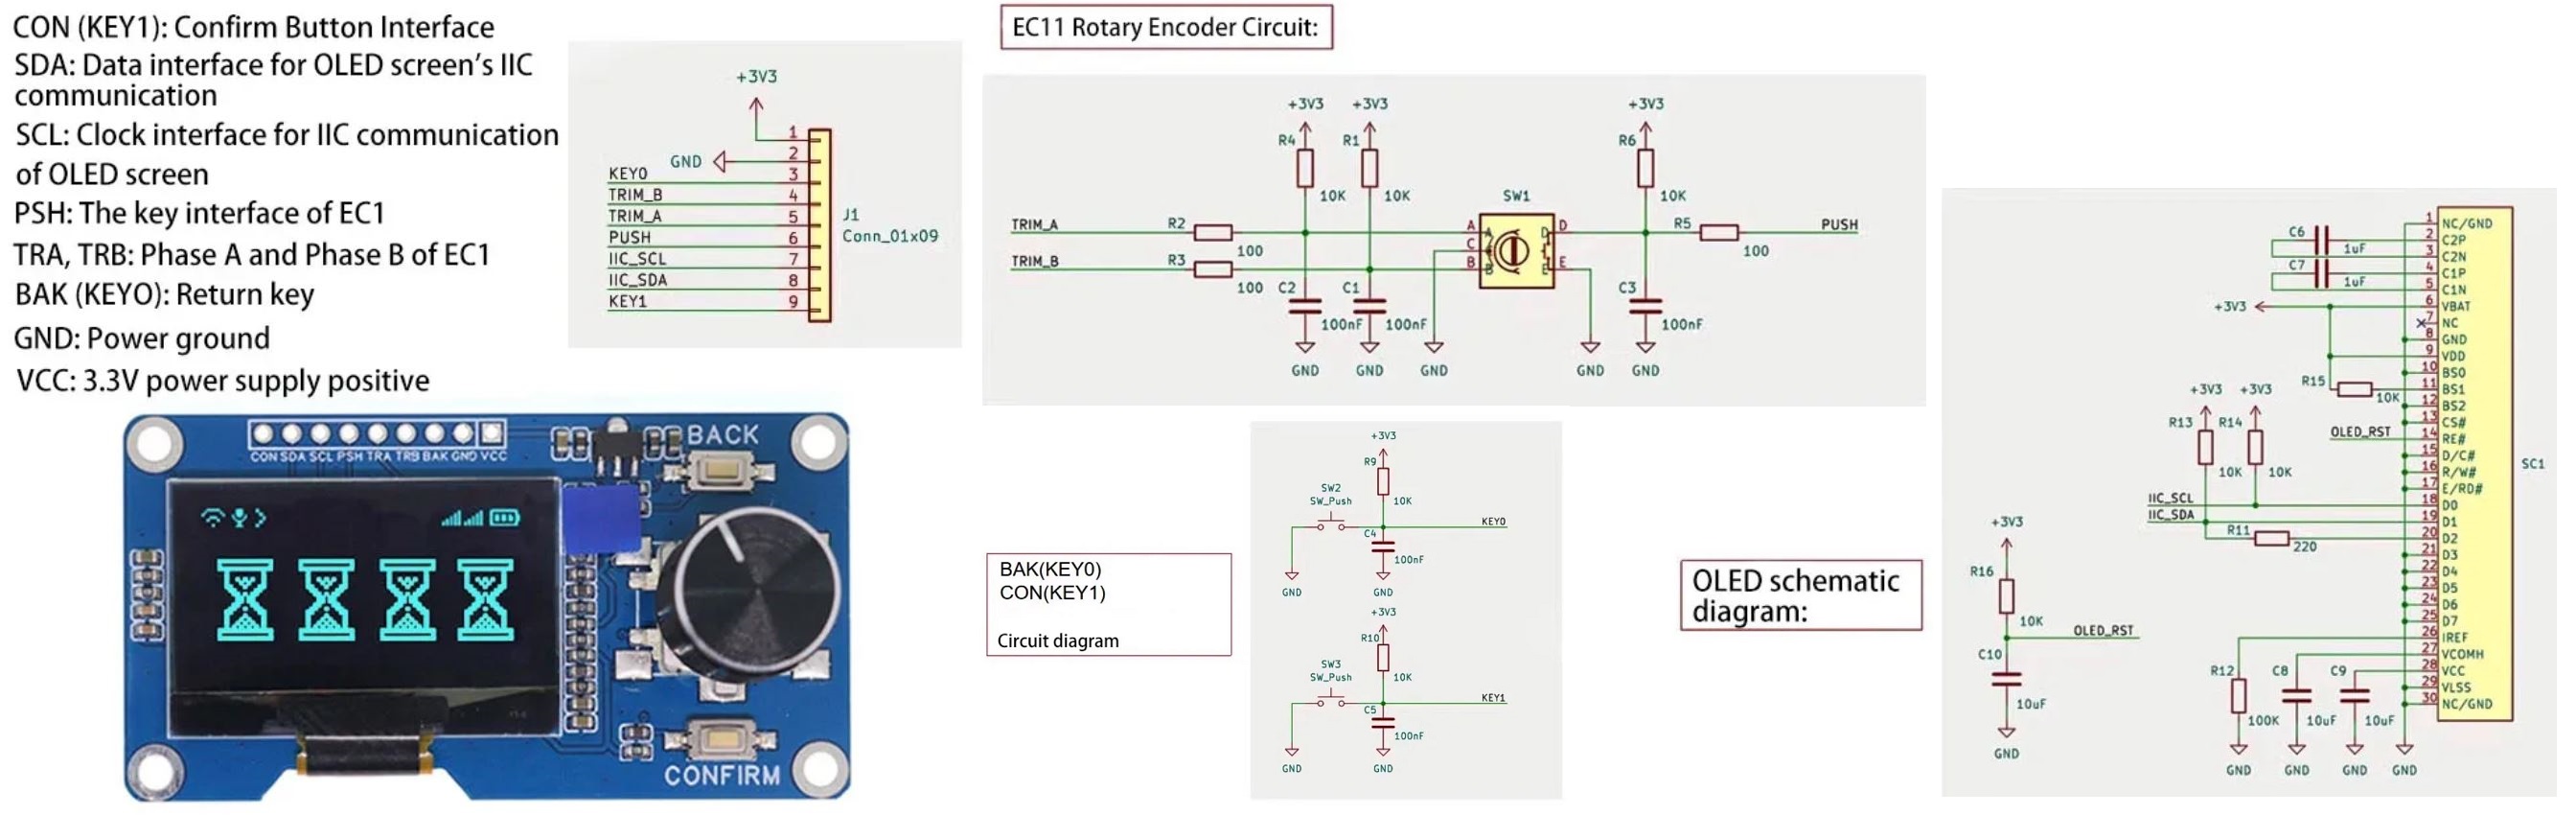
Recently I purchased a Estardyn 1.3" OLED Module from Ali-Express. This module comes with a 1.3" OLED screen, a EC11 rotary encoder and two push buttons. Unfortunately due to the height differences of the OLED screen, rotary encoder and buttons, it is not easy to mount the module into any standard project case.
Estardyn 1.3" OLED Module SH1116 Drive / EC11 Encoder
So this project 3D prints a custom case that not only holds the Estardyn module but also a ESP32-C3 microcontroller.
ESP32-C3 development module
Assembly
3D print the attached STL files using the following slicer settings:
- "Estardyn - Front.stl" - 0.2mm layer height, no supports
- "Estardyn - Back.stl" - 0.2mm layer height, no supports
- "Estardyn - ESP32C3...
Things used in this project
Story
Recently I purchased a Estardyn 1.3" OLED Module from Ali-Express. This module comes with a 1.3" OLED screen, a EC11 rotary encoder and two push buttons. Unfortunately due to the height differences of the OLED screen, rotary encoder and buttons, it is not easy to mount the module into any standard project case.
Estardyn 1.3" OLED Module SH1116 Drive / EC11 Encoder
So this project 3D prints a custom case that not only holds the Estardyn module but also a ESP32-C3 microcontroller.
ESP32-C3 development module
Assembly
3D print the attached STL files using the following slicer settings:
- "Estardyn - Front.stl" - 0.2mm layer height, no supports
- "Estardyn - Back.stl" - 0.2mm layer height, no supports
- "Estardyn - ESP32C3.stl" - 0.2mm layer height, no supports
- "Estardyn - Buttons.stl" - 0.1mm layer height, no supports
- "Estardyn - Knob.stl" - rotate 180 degrees, 0.1mm layer height, no supports
Place the two buttons in the holes on the front panel and screw on the Estardyn module using four 4mm M3 screws. Include the ESP32-C3 holder when screwing in the two screws as shown below.
Screw on PCB to the front panel with the ESP32-C3 holder.
Wiring
Wire the Estardyn module to the ESP32 C3 module as follows
Wiring
ES32-C3 pinout
Programming the ESP32-C3 microprocessor
Install the ESP32 boards in the Arduino IDE
Install the ESP32 boards in the Arduino IDE
Select the ESP32-C3 Dev Module
Select the ESP32-C3 Dev Module
Hold down the BOOT button while pressing the RESET button to put the ESP32-C3 Dev Module in boot mode.
BOOT and RESET button locations
Compile and upload the sample code.
Press the RESET button to test all features of the Estardyn module.
Sketch to test each feature of the Estardyn module
Conclusion
The Estardyn 1.3" OLED Module is great value for the price. However I found the real winner was the ESP32-C3 module. I really like these modules and they are great value. All-in-all it was a interesting project.
**Read more
Custom parts and enclosures
Schematics