When you deploy a website or an API, on Clever Cloud or elsewhere, you sometimes need to add some “intelligence” upstream of your application: transformations on request contents or headers, authentication, security rules, or even simply exposing additional content.
This is where an API Gateway such as Otoroshi can be useful. And you should not limit it to this denomination: its capabilities are numerous and may help in many situations, well beyond topics directly related to APIs.
An open-source solution worth knowing (and supporting)
Otoroshi is an open-source project from MAIF that many customers had already been deploying on Clever Cloud. When we decided to create turnkey managed services such as [Keycloak](http…
When you deploy a website or an API, on Clever Cloud or elsewhere, you sometimes need to add some “intelligence” upstream of your application: transformations on request contents or headers, authentication, security rules, or even simply exposing additional content.
This is where an API Gateway such as Otoroshi can be useful. And you should not limit it to this denomination: its capabilities are numerous and may help in many situations, well beyond topics directly related to APIs.
An open-source solution worth knowing (and supporting)
Otoroshi is an open-source project from MAIF that many customers had already been deploying on Clever Cloud. When we decided to create turnkey managed services such as Keycloak, Matomo or Metabase, Otoroshi quickly appeared as another solution that could make your life easier and to which we could add value through deeper integration within our platform.
We therefore decided to work with Mathieu Ancelin, one of the main Otoroshi developers and co-founder of Cloud APIM, to develop complementary solutions around this highly comprehensive API Gateway.
This has led to solutions such as Biscuit Studio, which enables simplified management and use of the tokens we rely on in our services and that form the foundation of our future IAM, now under the umbrella of the Eclipse Foundation. And also Clever AI, which aims to abstract and simplify the functionalities related to the use of AI models and their integration into enterprise needs.
But Otoroshi goes much further. Beyond its native features, it comes with numerous plugins, sometimes little-known even to experienced users. Let’s take a quick tour of those that may interest you, amuse you, or that have been recently added.
Deploying and managing Otoroshi has never been easier
Let’s start by creating an Otoroshi add-on, which can be done in just a few clicks from our Console. This deploys a Java application and a Redis database, both preconfigured. You do not need to do anything more: the dashboard displays the essential information such as your credentials for the web interface, the API, the link to the OpenAPI.json file, etc.
When a new version is available, you are notified and can update it with a single click. All of this is also possible through our API or Clever Tools, our CLI. These two tools also give you additional possibilities such as integrating your Otoroshi instance into a Network Group (more on this in a future blog post), customising the domain of its interface, or configuring new routes.
clever addon create otoroshi myOtoroshi \
--option access-domain=otoroshi.example.com \
--option routes-domain=otoroshi-routes.example.com
The only thing you will need to ensure is that the DNS of these domains correctly point to the servers of the Clever Cloud zone where Otoroshi is deployed.
Create your first route and… a static site
Once your Otoroshi instance is created, log into its web UI. You can then create a new route either via the “+” button at the top right of the interface or through the shortcut in the left-hand menu. You can define the name of the route, its description, etc., and then create it by clicking “Create Route” at the top right. You will then arrive in the designer.
It visually displays the route as configured, its frontend parameters (the exposed domain through which you access the route), and the backend to which it redirects. You can test the frontend URL (without port 80 and the /*), which by default returns a page showing the headers of the received request.
You can then search for a plugin to use and add it to this default route: “Force HTTPS traffic”. Click “Add to flow” and then “Save”, and it will automatically redirect to a secure version of your pages (automatically handled on Clever Cloud).
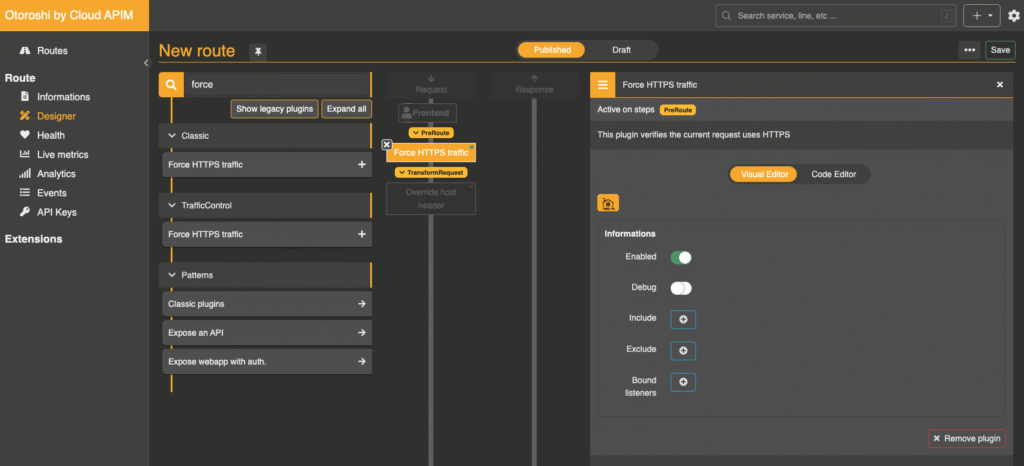 Adding a route takes just a few clicks
You can then adjust a few details. For example, click on “Frontend” in the flow and append /static to the domain, then save the route. You must now use the URL https://your-domain.tld/static to access the backend.
Next, replace the backend with static HTML by adding the Static Response plugin. This plugin lets you always return the same HTML content on a route, which is useful for a “one-page app”. Insert the HTML of your choice into the “body” section of the plugin, for example:
<!DOCTYPE html>
<html lang="fr">
<head>
<meta charset="UTF-8">
<meta name="viewport" content="width=device-width, initial-scale=1.0">
<title>Otoroshi Static Route</title>
</head>
<body>
<h1>Welcome to Clever Cloud</h1>
<p>This page is hosted by an Otoroshi instance</p>
</body>
</html>
Save the route, and the static content will then be served at https://your-domain.tld/static.
What if your site were a Zip file?
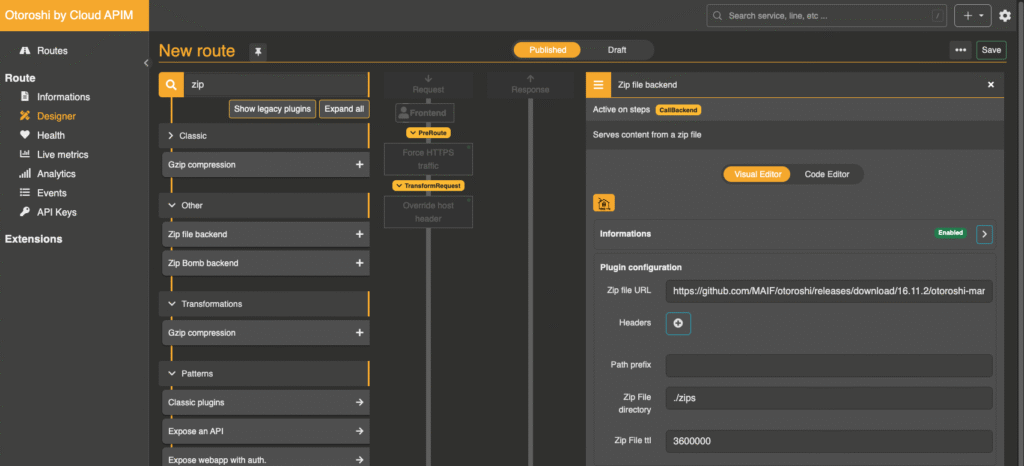
This functionality exists in several forms in Otoroshi. You can serve static content from a folder on the instance, an S3-compatible object storage service such as Cellar, or… a zip archive.
To do this, remove the previous static plugin from the route and add “Zip file backend”. Save the route. By default, this plugin contains the URL of a zip file leading to an older version of the Otoroshi documentation. When a request arrives, the archive is downloaded, decompressed, and then returned. It is cached according to the TTL setting (3,600,000 ms by default, one hour).
You can therefore store static sites in a service such as Cellar and host them on different routes or domains within the same Otoroshi instance effortlessly.
Send emails from your provider through a REST API
Another interesting feature of Otoroshi deployed on Clever Cloud: the “Mailer endpoint” plugin. It allows you to use any SMTP email-sending service—from your ISP to Gmail or Outlook, or a service hosted by Gandi or OVHCloud—and turn it into a REST API for sending emails.
To do this, create a new route ending with /email, for example. Add the plugin and provide the SMTP server parameters: host, username, password, etc. Once configured, save the route. You can then send emails using a simple cURL request:
curl -XPOST https://votre-domaine.tld/mail \
-H 'Content-Type: application/json' \
-d '{
"subject": "Test Email",
"from": "your name",
"to": ["your-email@example.com"],
"text": "This is a test email"
}'
Be careful: as it stands, the route has no authentication. To add some, include the APIkeys module. You can then create an API key in the dedicated menu and assign it to your route via the “Authorized on” selector. Once done, you can send the same request but must include basic auth or the bearer token of your API key for Otoroshi to accept it.
Otoroshi supports many authentication solutions, such as JWT, Biscuit, and more complex ones such as Keycloak.
Otoroshictl, the CLI that makes life easier
What if you could perform all these actions with a single command? That is the promise of the Otoroshictl CLI, which allows you to manage your Otoroshi instances and recently gained a simplified mailer-plugin setup feature:
# You can also download binaries from GitHub
cargo install otoroshictl
otoroshictl toolbox add-mailer
The application will ask you for your SMTP parameters, create the route, the API key, configure everything, and provide a sample cURL request.
To do this, you must first configure your Clever Cloud Otoroshi instance as the one to use. Once again, Clever Tools makes this easy:
# Activez la gestion des opérateurs tels qu'Otoroshi
# Si ce n'est pas déjà fait
clever features enable operators

# Récupérez la configuration de votre Otoroshi
# Passez là à otoroshictl comme configuration courante
clever otoroshi get-config myOtoroshi | otoroshictl config import --stdin --current
This Rust application is open source (Apache 2.0 licence), so feel free to propose ideas or contribute.
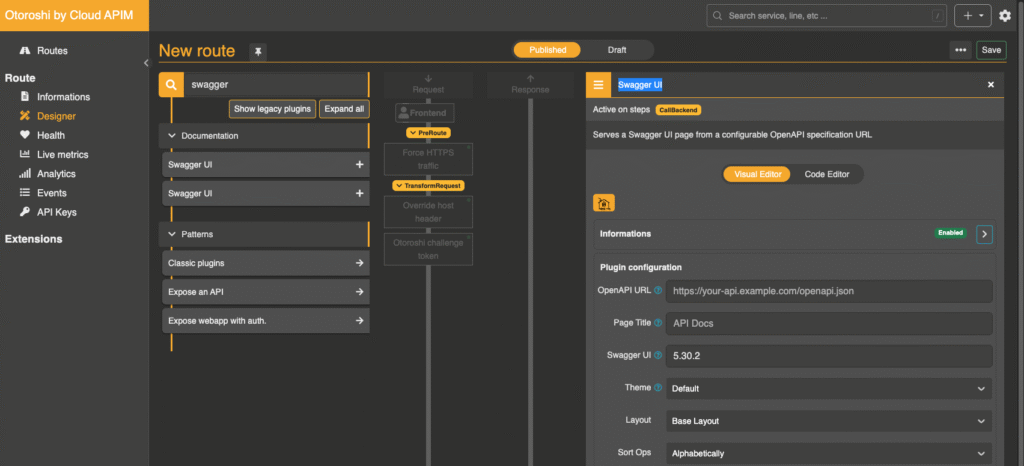
Expose a Swagger UI from a simple openapi.json
Another feature that may interest those providing APIs that follow the OpenAPI standard: simplified hosting of a Swagger interface. Add the “Swagger UI” plugin to one of your routes, specify the path to your OpenAPI.json file, and a Swagger UI page will be generated with your preferred settings for sorting operations, tags, themes, etc.
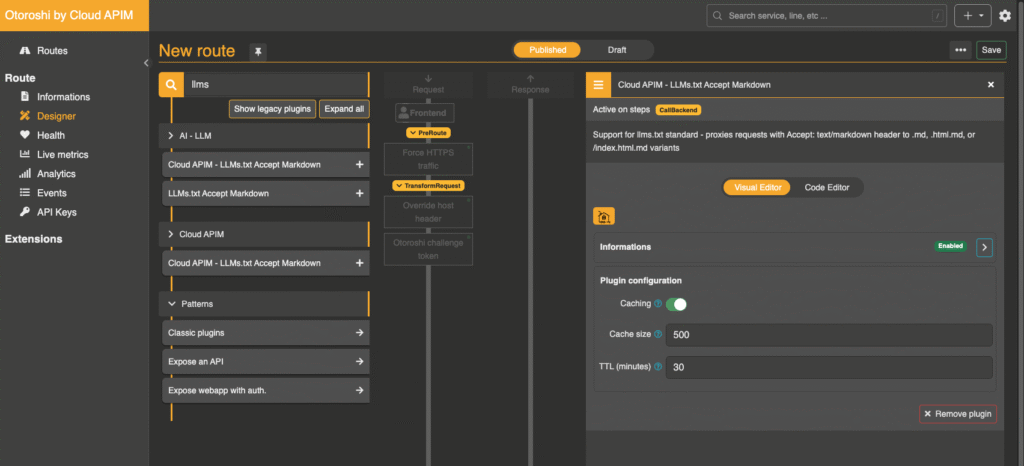
llms.txt support: make life easier for AIs
Do you have online documentation? LLMs prefer to consume it in Markdown format. The llms.txt standard was designed for this, and static site generators such as Hugo are beginning to support such features natively.
But how do you return the Markdown version of a page when it exists? Many services, especially in the AI space, include the header: Accept: text/markdown in their requests to indicate their preference. Your web server must support this for it to work, which requires configuration.
Otoroshi now includes an “LLMs.txt Accept Markdown” plugin to address this need: if the header is present in a request and a Markdown version of the page exists, that version is returned. A caching system is also available to reduce response times. To use it, simply add it to a route, configure the cache duration and size, and save.
Want to know more? Come and see us at FOST (formerly apidays)
As you can imagine, we could talk for hours about Otoroshi and its features. One thing is certain: in its ocean of possibilities, there is surely something useful for you. Our advice: deploy one, test, experiment, and share your suggestions and feedback.
We will be present next week at FOST (formerly apidays) where we will host our Amazing Clever Cloud Enterprise Summit (ACCES) with our clients and partners to discuss what lies ahead for Clever Cloud in 2026. Feel free to come and meet us.
Discover Workflows at 13:00
You can also visit our Twitch and YouTube channels at 13:00. We will present Otoroshi live, along with its latest major features, including one added earlier this year and refined since then: workflows. They let you create full automation scenarios alongside your routes and their plugins, AI models with programmable management, or simply define them through a visual editor. Come and ask your questions live!