We are going to write a game engine in javascript without AI and by AI I mean an LLM. That’s right kiddos, this is going old school if old school meant doing things the way they were done in the long long ago, in the before time of five years from now. A time when the world was pure. A time when the slop was free range and manmade.
If you are looking for some quick aura farming snack for the tiktoks like something about how to get AI to spit out a snek game or a fluid sim, I only have one thing to say.

First, what is a game engine? If you were to ask someone, they’d likely give you a blank look before informing you, "Sir, this is a Wendy’s"
If you were to ask someone on the internet, t…
We are going to write a game engine in javascript without AI and by AI I mean an LLM. That’s right kiddos, this is going old school if old school meant doing things the way they were done in the long long ago, in the before time of five years from now. A time when the world was pure. A time when the slop was free range and manmade.
If you are looking for some quick aura farming snack for the tiktoks like something about how to get AI to spit out a snek game or a fluid sim, I only have one thing to say.
First, what is a game engine? If you were to ask someone, they’d likely give you a blank look before informing you, "Sir, this is a Wendy’s"
If you were to ask someone on the internet, they’d point at Unity or Unreal 5 and say, "That!". If this internet person was sporting a fedora, they’d mention game maker, godot, or love2d. And they’d be right but also wrong in a kinda schrodinger way.
You see, to make a game engine, we need to know what a game engine is. And to truly know what one is, we need to build one with our bare hands. Lucky for you, I am going to show you one simple trick to break the superposition.
Games are a subset of game engines which is to say, in every game there, by definition, exists an engine that powers it.
All that must be done to both understand and build a game engine is to build a game. Specifically, build a game in javascript because it is portable. And I have just the game.
Breakout
"Breakout? That game? What even is breakout? Can’t AI one shot that?" you asks.
Well, my dear reader you are in for a treat.
Breakout is a fantastic simple game similar to pong. You bounce a ball and destroy blocks. Simple enough and a perfect starter game. You’ll see. It is going to be fun.
The real beauty of it is that the base is simple to understand but not so constrictive we couldn’t have some fun with it. Also, it is good that AI can one shot it because once we are done we can feel really good about ourselves for having done something so exceedingly pointless. I mean after all, why would I paint the Mona Lisa when I could print a picture of that babe instead?
Let us begin, first to create a game, you must create the universe.
The Universe
The first task is to model the universe. I will name my universe "Game".
const Game = {};
It is beautiful. Now, let there be space.
const Game = {
width: 100,
height: 100,
};
What is space if nothing exists in it?
const Game = {
width: 100,
height: 100,
ball: {
x: 50,
y: 50,
size: 20,
},
};
You get the picture. Don’t overthink it. This is great.
What performance? Shush you. We have barely begun cooking.
The universe is a little static though.
const Game = {
width: 100,
height: 100,
ball: {
x: 50,
y: 50,
dx: 1,
dy: 1,
size: 20,
},
tick() {
this.ball.x += this.ball.dx;
this.ball.y += this.ball.dy;
},
};
Now we need to blast our eyeballs with some blue light to make the abstract more stract and I know just the thing.
const container = document.getElementById(containerId);
const screenWidth = container.clientWidth;
const screenHeight = container.clientHeight;
const ballDiv = document.createElement("div");
Object.assign(ballDiv.style, {
position: "absolute",
left: "0",
top: "0",
});
container.appendChild(ballDiv);

const Game = {
width: screenWidth,
height: screenHeight,
// the rest
draw() {
const b = this.ball;
ballDiv.style.boxShadow = `${b.x}px ${b.y}px 0 ${
b.size / 2
}px #fff`;
},
};

function universe() {
Game.tick();
Game.draw();
requestAnimationFrame(universe);
}

universe();
Go ahead and take it for a spin below.
We render by having an absolutely positioned div on the top left of the screen. We then draw the ball via a box shadow which will match the div’s 0 size. The 4th param of a box shadow is a spread value which will be 1px when the div has no width and height. A spread of 20px is like a box with a width/height of 20px centered at the given x/y offset of the box shadow.
What? Is that not a good way to draw a ball on the screen? Don’t worry about that friend. Look over here, did you see it move?
You may have missed it but that little white ball moved! Amazing. However, I think the ball is supposed to bounce off the edges in a breakout game.
Time to put on the thinking cap.
thinking cap
We have our universe. Now to implement the rest of breakout. Good to write it down.
- balls bounce
- bricks exist
- balls bounce on bricks
- balls destroy bricks
- paddle exists
- balls bounce on paddle
There are a few more rules around losing the game but I think those cover the core mechanics.
First, the world shouldn’t only have one ball, it should have many balls. That is an easy change, use an array of balls. It would be useful to add a function to our universe which will create a ball.
balls: [],
addBall(x = this.width / 2, y = this.height / 2, speed = 8) {
const angle = Math.random()*2*Math.PI;
this.balls.push({
x,
y,
dx: Math.cos(angle)*speed,
dy: Math.sin(angle)*speed,
size: 20,
});
}
We give the ball a random direction now. There is a formula for finding a point on the unit circle based on an angle. We grab a random angle and then use the formula to find the point noting that the math functions expect radians. We can then apply a speed to this direction by scaling this point by a factor. This works because a unit circle is always normalized to a radius of 1.
Drawing multiple balls is trivially easy, we just draw more box shadows.
draw() {
ballDiv.style.boxShadow = this.balls.map(b => `${b.x}px ${b.y}px 0 ${b.size/2}px #fff`).join();
}
Bouncing is easier. We need to check if the position of a ball is outside bounds. If it is, we want to correct the position and reverse the velocity depending on if it hit the left/right or top/bottom.
No need to think about fancy algorithms. If a ball’s x position + half the size is bigger than the width, we undo the dx and invert it and the same for the y axis too.
tick() {
const {width: w, height: h} = this;
this.balls.forEach((b) => {
b.x += b.dx;
b.y += b.dy;
if (b.x + b.size/2 > w || b.x < b.size/2) {
b.x -= b.dx;
b.dx *= -1;
}
if (b.y + b.size/2 > h || b.y < b.size/2) {
b.y -= b.dy;
b.dy *= -1;
}
});
},
One is the loneliness number but it doesn’t have to be if we give them a 2 and 3 to hang with.
Look at them go. How fun. Let’s make some bricks.
Did you know bricks are kinda like balls? Let’s add a brick in the center and with a ball bouncing around.
const brickDiv = document.createElement('div');
container.appendChild(brickDiv);
const BRICK_SIZE = [60, 15];
Object.assign(brickDiv.style, {
position: 'absolute',
borderRadius: '2px',
left: `-${BRICK_SIZE[0]}px`,
top: `-${BRICK_SIZE[1]}px`,
width: `${BRICK_SIZE[0]}px`,
height: `${BRICK_SIZE[1]}px`,
});

const Game = {
// ...
bricks: [],
addBrick(x = this.width / 2, y = this.height / 2) {
this.bricks.push({
x: x - BRICK_SIZE[0] / 2,
y: y - BRICK_SIZE[1] / 2,
});
},
// ...
draw() {
// ...

const [bW, bH] = BRICK_SIZE;
brickDiv.style.boxShadow = this.bricks.map(b => `${b.x + bW}px ${b.y +bH}px 0 0 #fff`).join();
}
};

Game.addBall(60, Game.height - 60);
Game.addBrick();
Bricks are a little different. Box shadows spread value is uniform in all directions which means you cannot have a different width and height. This is fine. If we position a div off screen with the width/height a brick, we can still use a box shadow to draw with. We do need to make sure that when we draw, we adjust for the offscreen position of the dev so that 0,0 is the top left of the screen.
This is great because right now our game only has 2 divs for all our balls and bricks. Talk about performance!
This is great but it looks wrong and I am sure you know why. No bouncing!
How do we bounce though? Well, if we think about it, we just need to check if some part of the ball overlaps with the brick.
We can assume the x and y positions represent the center of the ball and brick. So if the balls right most edge is > then the brick’s left most edge AND greater than the brick’s right most edge, then the x axis overlaps.
Now if we do the same for the y axis checking if the balls top most edge is between the brick’s top and bottom edges well, then there is overlap.
If we do this with the left, right, top, and bottom positions of the ball compared to a brick. We will know there is a collision.
We can take a note from before and simply undo the dx/dy change and invert the axis with the largest overlap.
Confused? Take your phone, now find something squarish around you. Overlap part of your phone on a corner of the squarelike thing. The intersection of the two squarelikes is a box. That is what we want.
If for whatever reason there are no squarelike things around, this will help.
We can add this to our tick function after checking the screen edges.
const [brickWidth, brickHeight] = BRICK_SIZE;
const ballL = b.x - b.size/2;
const ballR = b.x + b.size/2;
const ballT = b.y - b.size/2;
const ballB = b.y + b.size/2;
for (const brick of this.bricks) {
const brickL = brick.x - brickWidth/2;
const brickR = brick.x + brickWidth/2;
const brickT = brick.y - brickHeight/2;
const brickB = brick.y + brickHeight/2;
if ((ballL > brickR || ballR < brickL)) {
continue;
}
if ((ballT > brickB || ballB < brickT)) {
continue;
}
const xDif = Math.min(ballR - brickL, brickR - ballL);
const yDif = Math.min(ballB - brickT, brickB - ballT);
if (xDif < yDif ) {
b.x -= b.dx;
b.dx *= -1;
} else if (xDif > yDif) {
b.y -= b.dy;
b.dy *= -1;
} else {
b.x -= b.dx;
b.dx *= -1;
b.y -= b.dy;
b.dy *= -1;
}
break;
};
Once we know the overlap, we can figure out what axis it is based on the overlap size. It is worth noting, this is not perfect.
What if the ball travels at light speed? It may jump past a brick completely! There are ways to solve this edge case.
We can solve it by issuing a special edict, no ball shall travel at light speed. There done, problem solved without a line of code.
Actually, another issue can happen. Sometimes, at tiny edge hits, moving the balls back by their dx/dy isn’t enough to prevent another collision next frame, they then can get stuck in a block. A simple way to solve this is to push the ball’s back a little further than the last time step.
b.x -= b.dx*1.02;
// ...
b.y -= b.dy*1.02;
Let’s see what this looks like now.
Nice. What is that? You wanted a physics engine? This IS a physics engine. Is it accurate? Not really, but how accurate can one be with floating point numbers anyways? Look guy, relax, don’t worry about it. This is about making a game engine not a physics engine silly.
Our game’s physics engine is almost complete. It would be trivial to remove the block when a hit happens and update a score counter or something.
addBrick(x = this.width / 2, y = this.height / 2) {
this.bricks.push({
x,
y,
isAlive: true,
});
},

this.balls.forEach((b) => {
// ...
for (const brick of this.bricks) {
if (!brick.isAlive) {
continue;
}
// ...
brick.isAlive = false;
// maybe update score or something
break;
};
});

this.bricks = this.bricks.filter(b => b.isAlive);
You could clean up mid loop too. It doesn’t matter until it does matter and right now it doesn’t.
Time to add a paddle to the world. A paddle is like a brick but it doesn’t die, and you can control it.
Speaking of control, how should that be done? Arrow keys? wasd? mouse? touch? Oh my!
We will pick touch/mouse input. While I am sure keyboard and controller support would be nice additions to our input engine, this input should suffice. It will cover both desktop and mobile platforms. Heck, even smart TVs should work.
First, the paddle needs to exist.
Behold, a paddling paddle made by paddling a brick into a paddle.
const paddleDiv = document.createElement('div');
container.appendChild(paddleDiv);
const PADDLE_SIZE = [100, 10];
Object.assign(paddleDiv.style, {
position: 'absolute',
left: `-${PADDLE_SIZE[0]}px`,
top: `-${PADDLE_SIZE[1]}px`,
width: `${PADDLE_SIZE[0]}px`,
height: `${PADDLE_SIZE[1]}px`,
});

const Game = {
// ...
paddles: [],

addPaddle(x = this.width /2, y = this.height - PADDLE_SIZE[1]*2) {
this.paddles.push({
x,
y,
width: PADDLE_SIZE[0],
height: PADDLE_SIZE[1],
});
}

draw() {
// ...

const [pW, pH] = PADDLE_SIZE;
paddleDiv.style.boxShadow = this.paddles.map(p => `${p.x + pW/2}px ${p.y + pH/2}px 0 0 #fff`).join();
}
}
A good question may be, do we really need more than one paddle? I don’t know but it is a side effect of copying the brick code.
You would think we could copy the collision code to right? And you would be! However, that breaks the rules.
You see, I will let you in on a little secret about break out which the majority of online tutorials never mention.
What makes breakout not mind-numbingly boring after 3.50 seconds is the ability to aim the ball with the paddle. This doesn’t use any kind of complex angular moment or whatever. It is simpler.
The idea is that you can control the ball direction based on the position of the x axis it hits the paddle. If it hits the paddle perfectly center, the ball goes up at a perfect 90 degree. The closer to the left the balls hits, the closer to 180 degrees the ball goes. The closer to the right it hits, the closer to 0 degrees it goes.
We then handle those rare edge hits by inverting both the x and y directions. This almost guarantees a safe ball. Why? Because we want the player to feel good when they make that "perfect" save.
These rules allow for a more active game where you try and perfectly angle your shots to get at those pesky corner bricks.
To help us out I made a little drawing.
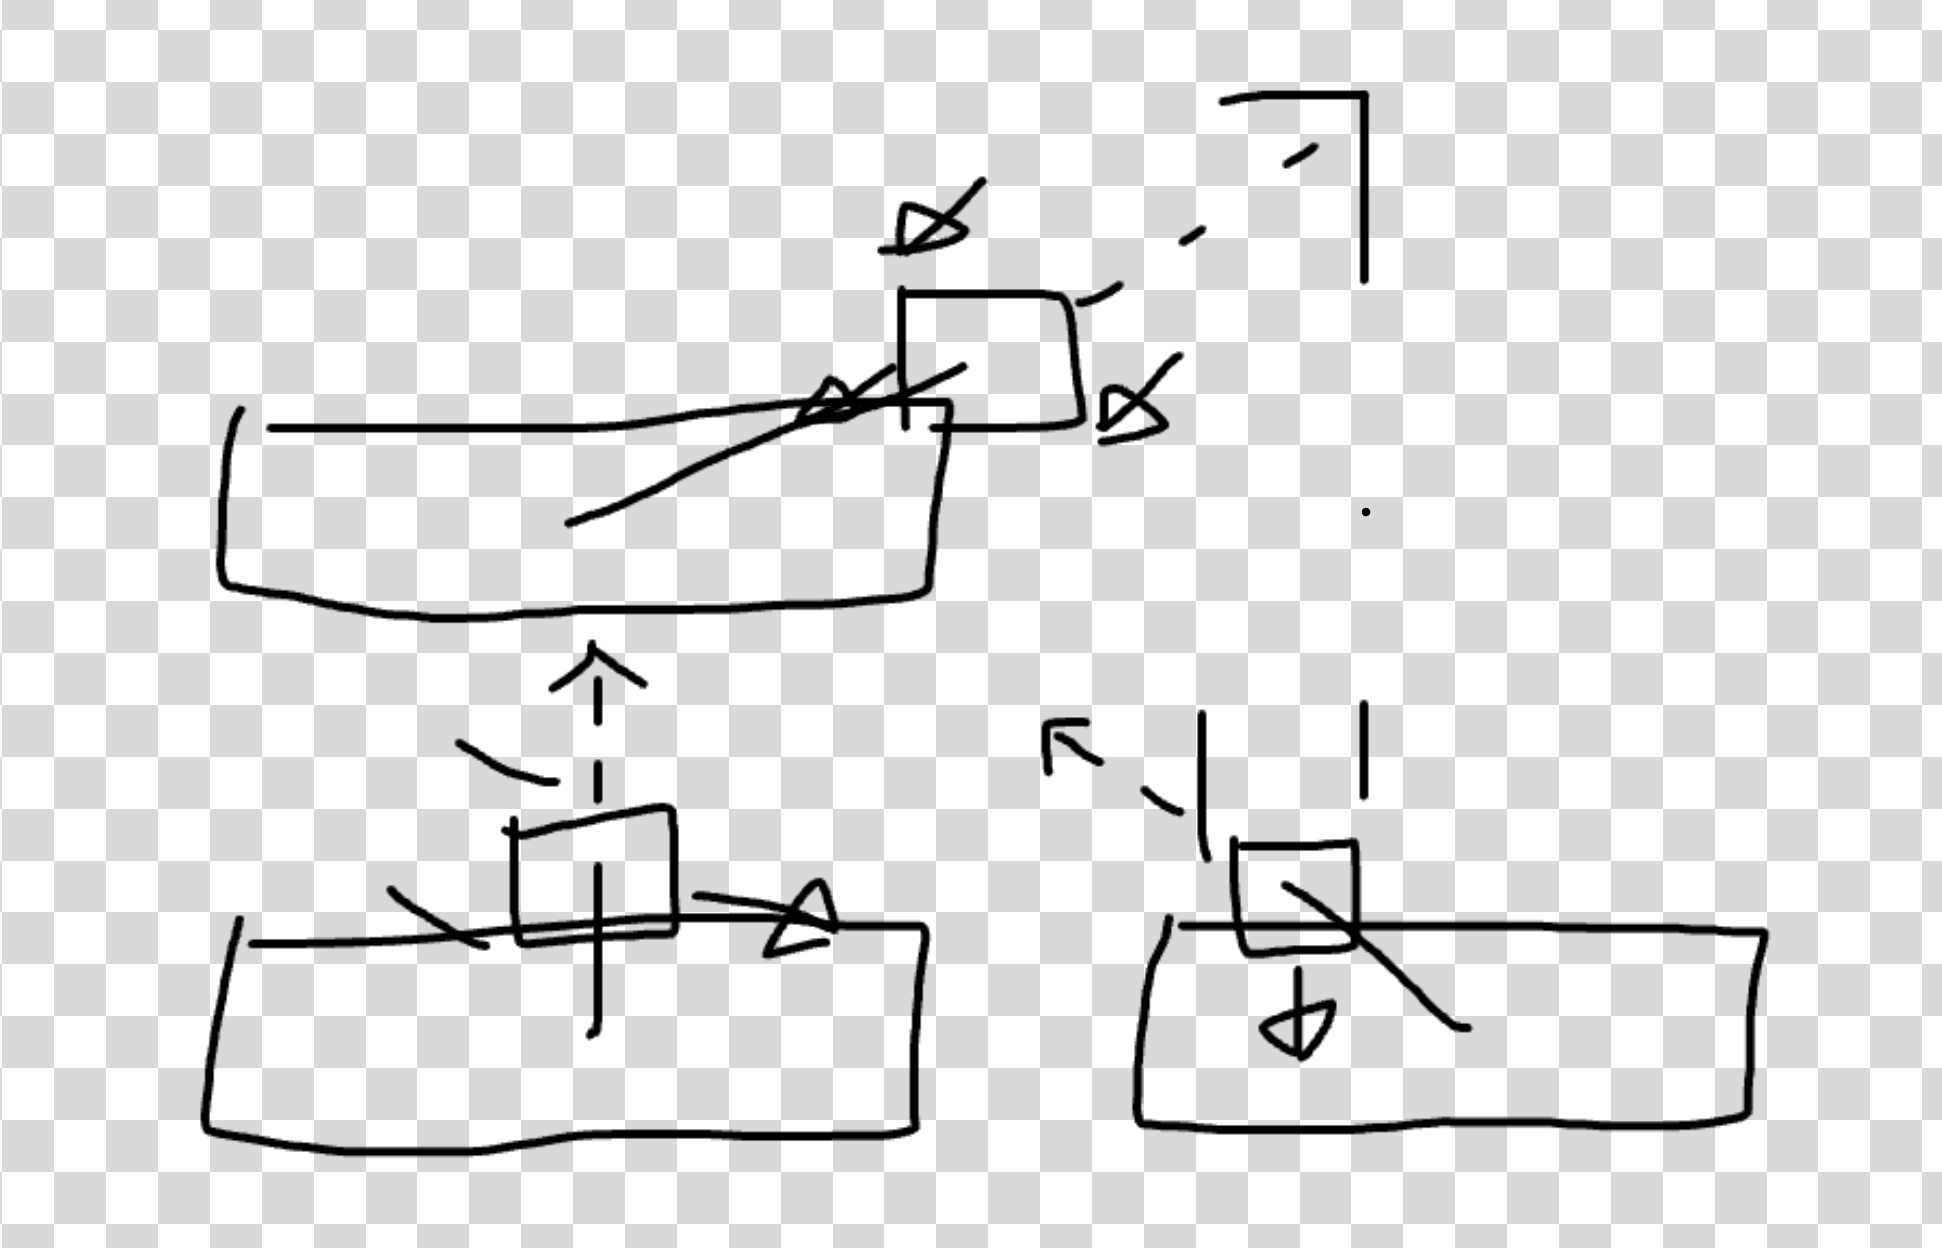
If you notice, the angle between the center of the paddle and ball is just about the exact direction we want the ball to go in. If it is in the center, it is 90 degrees up. As it gets towards the left or right of the paddle, the ball angle deflects more aggressively.
It isn’t perfect but I think it works. The logic is then simple, find the angle between the center of the ball and paddle, and set the ball in that direction.
What vectors? I am not sure what those are. I do know if we take the arch tangent of the difference of the two points we get the angle back in radians. We can then use the same code to finding a random point on a unit circle to find the dx/dy positions for this angle.
It looks like this.
const angle = Math.atan2(b.y - p.y, b.x - p.x);
// get the speed by finding the length of direction by treating it as a triangle
const speed = Math.sqrt(b.dx*b.dx + b.dy*b.dy);
// get the point on unit circle of angle and then scale by speed
b.dx = Math.cos(angle)*speed;
b.dy = Math.sin(angle)*speed;
Putting that together in the ball loop.
// check paddles
for (const p of this.paddles) {
// just like bricks
const pL = p.x - p.width/2;
const pR = p.x + p.width/2;
const pT = p.y - p.height/2;
const pB = p.y + p.height/2;
if ((ballL > pR || ballR < pL)) {
continue;
}
if ((ballT > pB || ballB < pT)) {
continue;
}
// but no need for overlap
b.x -= b.dx;
b.y -= b.dy;
const angle = Math.atan2(b.y - p.y, b.x - p.x);
const speed = Math.sqrt(b.dx*b.dx + b.dy*b.dy);
b.dx = Math.cos(angle)*speed;
b.dy = Math.sin(angle)*speed;
break;
};
For Input we grab the x position of the mouse/touch and set all the paddles x values to the same. No need to overcomplicated the input system of our engine.
const Game = {
handleMouseOrTouchInput(event) {
event.preventDefault();
const x = (event?.touches?.[0]?.clientX) ?? event.offsetX;
const y = (event?.touches?.[0]?.clientY) ?? event.offsetY;
this.paddles.forEach(p => p.x = x);
},
}

// ...

container.addEventListener("pointermove", (e) => Game.handleMouseOrTouchInput(e));
container.addEventListener("touchmove", (e) => Game.handleMouseOrTouchInput(e));
And with that we have just about all the mechanics.
Amazing! Add more bricks, score, and that’s a game.
Now hold up there cowboy, we arn’t done yet.
This has major issues, there is some jank and the game both looks and feels pretty bland. If we are honest here, it is a bit of a turd.
But that is ok, because if you polish a turn enough, it will shine bright like diamond, at least that is what my mother told me.
polishing a turd
Ok, first up we should do a little polish pass on the code, clean up numbers, tighten up edge cases etc. Most of polishing here is adding a few more conditionals to handle the edge cases.
For example, the ball can be knocked out of bounds pretty easily by the paddle. It can also get stuck in the paddle.
Another issue is that right now the game will run as fast as the requestAnimationFrame runs. This means if your device refreshes frames 120 or 144 times a second the game will be 2 times faster than it should be!
Fixing this isn’t too hard as the requestAnimationFrame will give us how long it has been since the last time it was called. We can use this to smooth out how fast the game runs.
If the last update took 1ms, then we scale everything by a tiny fraction, but if it took 500ms, then we scale by 500x 1ms. This effectively unlocks the frame rate.
It isn’t complicated, only about 5 lines.
const Game = {
tick(dt) {
// scale the updates by time
b.x += b.dx * dt;
b.y += b.dy * dt;
// etc
}
}

let lastTime = 0;
function universe(delta) {
if (lastTime === 0) {
lastTime = delta;
}

// normalize from ms to seconds.
const dt = (timestamp - lastTime) / 1000;
Game.tick(dt);
Game.draw();

lastTime = delta;
requestAnimationFrame(universe);
}

universe(lastTime);
Before the ball speed was 6 which meant 6 pixels per `requestAnimationFrame`` or 660 pixels/s. The issue is if the device running the game were 120, it is 6120 pixel/s Wow that is fast.
With the delta time smoothing it is 6 pixels a second. To get the same speed as before, we can set the speed to 360. Other game engines my use a unit like meters. I like pixels so we will stick to that.
Next the ball can get stuck in the paddle or brick, and jump out of bounds. Both of these issues are because we do not find the "perfect" correction when a collision is detected. We only undo that last move and hope that the ball didn’t just "undo" into another collision.
It isn’t hard to fix this with the paddle and bounds by moving the ball back by the amount overlap amount. However, for bricks at extreme corner hits the simple overlap fix fails. This is because at certain time steps the overlap will look like a y axis when it is actually an x axis hit.
It doesn’t always happen but when it does it is a sad day in heaven and feels ever so wrong.
One way to fix it is to solve each axis consecutively making sure to only update the ball’s position one axis at a time.
const bHalfSize = b.size/2;
const [brickWidth, brickHeight] = BRICK_SIZE;
// x axis
b.x += ballDx;
// recalc ball edges
for (const brick of this.bricks) {
if (!brick.isAlive || brick.health <= 0) {
continue;
}
// recalc brick edges
if ((ballT > brickB || ballB < brickT) || (ballL > brickR || ballR < brickL)) {
continue;
}

b.x = ballDx > 0 ? brickL - bHalfSize - 1 : brickR + bHalfSize + 1;
b.dx *= -1;
didBounce = true;
break;
};

// y axis
b.y += ballDy;
// recalc ball edges
for (const brick of this.bricks) {
if (!brick.isAlive || brick.health <= 0) {
continue;
}

// recalc brick edges
if ((ballT > brickB || ballB < brickT) || (ballL > brickR || ballR < brickL)) {
continue;
}

b.y = ballDy > 0 ? b.y = brickT - bHalfSize - 1 : brickB + bHalfSize + 1;
b.dy *= -1;
didBounce = true;
break;
};
Nice, but one more thing.
I am also going to pretend the paddles center point is a bit further down on the y axis. The reason is to make it so the angle the ball reflects off the paddle is more gradual. Right now it is too easy to get the ball to move aggressively on the x axis. Sharp x axis movement is very very slow on the y axis making the whole game "feel" slower. While it can be useful to get the ball into tight corners it shouldn’t feel like the default gameplay is watch a ball bounce 100 times on the sides slowly moving up before coming back down.
What would feel more natural is if the paddle were a box with equal sides. This takes the possible angles from 120 degrees or so down to a perfect 90. This is fantastic as edge its on the side will still get agro side to side movement which sometimes is desirable when aiming. It is easy to tweak this by making the center point maybe 50% of the length if you pref a wider angle. We like the options.
What? That isn’t real physics? Look guy, be a frwend. We are talking game feel here. It isn’t about the real but the feel.
const xDif = Math.min(ballR - pL, pR - ballL);
const yDif = Math.min(ballB - pT, pB - ballT);
if (xDif < yDif) {
b.x += b.x > p.x ? xDif : -xDif;
} else {
b.y += b.y > p.y ? yDif : -yDif;
}
// find the top of the paddle then move down the width
const angle = Math.atan2(b.y - (p.y - p.height/2 + p.width/2) , b.x - p.x);
const speed = Math.sqrt(b.dx*b.dx + b.dy*b.dy);
b.dx = Math.cos(angle)*speed;
b.dy = Math.sin(angle)*speed;
And look at that, an easy change for a better experience.
How does it feel now?
Speaking of game feel. Part of polishing a turd is to make it juicy. Let us moisten this up with a spritzing of morning dew.
making it juicy
The juice factor is all about feeding that goozy little goblin in all our brains. The one that loves dopamine. I could use many a word to describe what the juice factor is but it is simpler to just play a few slot machines or Balatro. THAT is the juice factor.
We want each event to "feel" good. Let’s go back to the ball and the brick. When the ball bounces off something, we can add a scale and color impact.
The idea is to give pay off to the anticipation of the event that the gooey goblin expects. You see the ball move towards the brick, waiting waiting, almost there, HIT!
That HIT! needs to "feel" like a hit.
This is all pretty trivial to add by using a legendary technique passed down generation to generation of game dev, "tweening". The simplest way to tween is to linearly interpolate between values across time. Don’t worry, we actually have already done this with th delta time from above.
It’d be good to have a sugary api to make adding tweens easy. Let’s make the ball "bounce" in size when hit.
tween(b, 'size', b.size, b.size*.8, 0.1);
// delay the second tween by the duration of the first
tween(b, 'size', b.size*.8, b.size, 0.1, 0.1);
Implementing could look like this.
// linear interpolation
const lerp = (from, to, time) => from + (to-from) * time;

const Game = {
tweens: new Set(),

tween(target, prop, from, to, duration, delay = 0) {
this.tweens.add({target, prop, from, to, duration, delay, t: 0});
}

tick(dt) {
for(const tween of this.tweens) {
const {target, prop, from, to, duration } = tween;
tween.delay -= dt;
if (tween.delay > 0) continue;
target[prop] = lerp(from, to, Math.min(1, tween.t/duration));
if(tween.t > duration) this.tweens.delete(tween);
tween.t += dt;
}
}
}
While this would work one thing to be careful of when stacking tweens is to think about the case of multiple tweens on one value. Say tween A is mid way done, the size is at 15 moving towards 20. If another tween starts using the above logic, it would take the current size 15 scale it down 20% and then tween to 15. This is wrong though, the starting size is 20!
Whatever can we do? More code? Surely not.
I simple trick here is to animate a different value which only changes how things visually look. This will also fix any physics issues with tweening simulated size values.
We add a scale, offset and maybe color to any object we may want to tween. Usually, you want to animate size/position/rotation/skew/color kind of props. Visual stuff, not logic based things like speed or health.
Another thing that’d be nice to think about is stacking effects. We can use the delay idea but what if we want to setup like 5 values to tween like a screen shake?
A delay would work by carefully tracking all the right delays times or maybe we can think of a nicer api to use.
// tween b.scale from 1->.8->1 over .2s with .1s delay
tween(b, 'scale', [1, 0.8, 1], 0.2, .1);
Nice, we can provide an array of "keyframes" values to the tween function. It will animate across them based on the overall duration. We still can have a delay if we want.
// linear interpolation
const lerp = (from, to, time) => from + (to-from) * time;

const Game = {
tweens: new Set(),

tween(target, prop, keyframes, dMs, delayMs = 0) {
this.tweens.add({target, prop, keyframes, duration: dMs / 1000, delay: delayMs / 1000, t: 0});
}

tick(dt) {
// other code

for (const tween of this.tweens) {
const { target, prop, keyframes, duration } = tween;

tween.delay -= dt;
if (tween.delay > 0) continue;
tween.t += dt;
const frames = keyframes.length - 1;
const progress = Math.min(1, tween.t / duration);
const kIdx = Math.min(frames - 1, Math.floor(frames * progress));
const localProgress = (progress - kIdx / frames) / (1 / frames);
target[prop] = lerp(keyframes[kIdx], keyframes[kIdx + 1], localProgress);

if (tween.t < duration) {
continue;
}

target[prop] = keyframes[keyframes.length - 1];
this.tweens.delete(tween);
}
},
}
Look at that, about 15 lines of code for janky keyframe animations. The gist is that we find the local range between 2 keyframes and then map the tween progress to a local progress value between frames. We always assume there are at least 2 frames eg, 1 key frame with a from/to. An array of 3 would be 2 key frames [1,0,1] from 1 to 0 then 0 to 1.
The other thing is to have the tween function take in duration and delay as time in milliseconds rather than seconds. You can use seconds if you like but I find ms to be easier to tune.
Whole numbers make my brain happy.
Ok, now we can add some juice. Let’s add a shake effect when something is hit along with a color flash. For a screen shake we need to have a "camera" which we can wiggle around. We also want to give all objects that can tween some uniform values. For now it is offsetX, offsetY, color, and scale.
const Game = {
camera: {
scale: 1,
offsetX: 0,
offsetY: 0,
},

addBall(x = this.width / 2, y = this.height / 2, speed = 360) {
this.balls.push({
//...
scale: 1,
offsetX: 0,
offsetY: 0,
color: [255,255,255],
});
},
// other objects too.

draw() {
ballDiv.style.boxShadow = this.balls.map(b => `${b.x + b.offsetX}px ${b.y + b.offsetY}px 0 ${(b.size/2)*b.scale}px rgb(${b.color.join()})`).join();

// other objects

container.style.transform = `translate(${this.camera.offsetX}px,${this.camera.offsetY}px)`;
},
}
Then we can have some helper tweens.
shakeIt(obj, dist = 4, dir = undefined) {
let ox = -dist/2 + Math.random()*dist;
let oy = -dist/2 + Math.random()*dist;
if (dir) {
ox = dir[0] * dist;
oy = dir[1] * dist;
}
this.tween(obj, 'offsetX', [0, ox, -ox, ox/2, 0], 260);
this.tween(obj, 'offsetY', [0, oy, -oy, oy/2, 0], 260);
},
flashIt(obj) {
this.tween(obj.color, '0', [100, 100+Math.random()*155, 255], 180);
this.tween(obj.color, '1', [100, 100+Math.random()*155, 255], 180);
this.tween(obj.color, '2', [100, 100+Math.random()*155, 255], 180);
}
Now when the ball hits the edge of the screen we can
this.shakeIt(this.camera, 3);
And when it hits the paddle we can shake it directly down as that is the anticipated direction.
this.shakeIt(p, 3, [0,1]);
this.flashIt(p);
The brick won’t die just yet, we will let him shake and flash too.
Feels fun ya? The screen shake is a little much with how small the game space is but this already "feels" better. But I don’t think this is wet enough.
Great, one last thing we could tack on here is a way to fire an event or similar when a tween completes. This is useful for playing an animation for when a brick is removed.
tween(target, prop, keyframes, duration, delay = 0, onComplete = undefined) {
this.tweens.add({
target, prop, keyframes, t: 0,
duration: duration/1000,
delay: delay/1000,
onComplete
});
},
// later
for (const tween of this.tweens) {
// other code

target[prop] = keyframes[keyframes.length - 1];
this.tweens.delete(tween);
if (tween.onComplete) {
tween.onComplete();
}
}

// in the bricks
this.flashIt(brick);
this.shakeIt(brick, 5)
this.tween(brick, 'scale', [1, 0], 300, 0, () => brick.isAlive = false);
While the game is juicy it still is a bit of a turd. It still doesn’t shine.
did I say to stop polishing?
Ok, our game has come a long way and it is time to add more content. This is so much fun.
- Score
- Levels
- Power Ups
- Lives
- Death and Winning
Score
Score is easy. Draw some text at the top of the game. Every time you break a brick you get 100 points. Why 100 and not just 1? Because people like big numbers.
const scoreContainer = document.createElement('div');
container.appendChild(scoreContainer);
// set styles

const Game = {
score: 0,
lives: 3,
level: 1,
}

draw() {
// other draw
scoreContainer.innerText = `${this.score.toLocaleString()}`;
}
Nice. We can make it juicy with a tween when we update the score.
Levels
For levels, we could store them in a config file but for now a few little scripts that place bricks based on the screen size is good enough.
spawnLevel_1() {
let [w, h] = BRICK_SIZE;
w += 1; // little padding around bricks
h += 1;
const countW = Math.floor(this.width / w);
const countH = Math.floor(this.height / h);
const rW = this.width % w;
const rH = this.height % h;
const sx = rW /2 + w / 2;
const sy = rH /2 + h / 2;
const xPad = 1; // brick count padding.
const yPad = 4; // only does the starting
for (let i = xPad; i < countW - xPad; i++) {
const x = sx + i*w;
for (let j = yPad; j < countH; j++) {
const y = sy + j*h;
if (y < 40) continue;
if (y > 180) break; // space for play area.
this.addBrick(x, y);
}
}
}
Nice. It will fill the screen full of bricks with reasonable spacing. This works but could be better if we want lotsa levels.
It sure would be awfully nice to have a spawnLevel(config) function that takes an optional configuration. Let’s make one!
Having an optional predicate for special logic brick placement logic would be worthwhile too.
spawnLevel(config) {
const {
blockWidth, blockHeight, screenWidth, screenHeight,
brickGutterPx, xBrickPad, yBrickPad,
playAreaPxBot, playAreaPxTop,
playAreaPxLeft, playAreaPxRight,
predicate,
} = {...defaults, ...config};
const brickAreaW = screenWidth - playAreaPxRight - playAreaPxLeft;
const brickAreaH = screenHeight - playAreaPxBot - playAreaPxTop;
const bW = blockWidth + brickGutterPx;
const bH = blockHeight + brickGutterPx;
const xBrickCount = Math.floor(brickAreaW / bW);
const yBrickCount = Math.floor(brickAreaH / bH);
const rW = brickAreaW % bW;
const rH = brickAreaH % bH;
const sx = playAreaPxLeft + rW / 2 + bW / 2;
const sy = playAreaPxTop + rH / 2 + bH / 2;
for (let i = xBrickPad; i < xBrickCount - xBrickPad; i++) {
const x = sx + i * bW;
for (let j = yBrickPad; j < yBrickCount; j++) {
const y = sy + j * bH;
predicate({ x, y, i, j, xBrickCount, yBrickCount });
}
}
}
And then we add a level like so.
goToNextLevel() {
this.level++;
if (this.level === 1) {
this.spawnLevel({
predicate: ({x, y, i, j, countW}) => {
return j % 3 === 0 ? undefined : this.addBrick(x, y);
}
});
}
// etc.
}
Nice. Slap a bit of unsafe external javascript loading and we have level mods! What about power ups?
I have the power!
Power ups will have a chance to drop when a brick croaks. There will also be "special" bricks which always drop specific power ups or even get fancy and blow up nearby bricks. The world is our oyster.
What power ups should we have?
- Multi-ball - Splits all balls in twine
- Big ball - Spawns a Big’ol ball
- Power Ball - Spawns a power ball which powers through all bricks
- Paddle Size - Bigger paddle stacking
- Gutter Guard - A wall to guard the gutter from a single bounce stacking
- Laser Paddle - Shoots lasers when hit by a ball
- Extra Life - Gives another life
- Bonus Points - Give bonus score
- Power Up Omega Device - Powers up the omega device
- Speed up - Speeds the balls Up
- Slow Down - Slows balls down
Amazing. A power up will be a simple colored circle which falls downwards. When it hits the paddle using an overlap check, we kill it and give the player the power. If it moves outside the game area, we remove it and it counts as missed.
You know the drill right? Copy our balls div, name it powerUpDiv, add it to the draw function, make a addPowerUp function that has a type, copy the balls code removing everything but the paddle collision logic, and add a bunch of ifs in there for the different kinds of power ups.
Delicious. Oh, make sure to remove the power up after it hits the paddle.
const powerUpDiv = document.createElement("div");
container.appendChild(powerUpDiv);
const POWER_UP_SIZE = 16;
Object.assign(powerUpDiv.style, {
position: "absolute",
left: `-${POWER_UP_SIZE}px`,
top: `-${POWER_UP_SIZE}px`,
width: `${POWER_UP_SIZE}px`,
height: `${POWER_UP_SIZE}px`,
borderRadius: '9000px',
});

const Game = {
//...
powerUps: [],
addPowerUp(x = this.width / 2, y = this.height / 2, type = 0, speed = 160) {
this.powerUps.push({
x,
y,
dx: 0,
dy: speed,
type,
isAlive: true,
size: 16,
scale: 1,
offsetX: 0,
offsetY: 0,
// different power colors
color: [...this.powerColors[type]],
});
},
//...

tick() {
// power ups
for (const power of this.powerUps) {
// update and check collision

if (power.y > this.height) {
power.isAlive = false;
// whoop you missed it
continue;
}

if (power.isAlive) {
continue;
}

if (power.type === 0) {
// THE POWER!
}
}

this.powerUps = this.powerUps.filter((pow) => pow.isAlive);
}
}
Adding a power up when a block bites the dust isn’t hard. Let’s be generous and have a 10% chance.
damageBrick(brick) {
// check if we are dead
// if so, check for power up
if (Math.random() > .9) {
this.addPowerUp(brick.x, brick.y);
}
},
Call this when the brick is hit and we have power ups. But they don’t do much. Let’s change that.
First, ball splitting.
const PowerUpTypes = {
MultiBall: 0,
BigBall: 1,
PowerBall: 2,
// etc
}

// in power up loop
if (power.type === PowerUpTypes.MultiBall) {
this.balls.map(b => [b.x, b.y]).forEach(([x,y]) => this.addBall(x,y));
}
This works but having so many ifs can be a bit ugi. Wouldn’t it be nice if it were one line?
const BallTypes = {
Normal: 0,
PowerBall: 1,
}

const PowerUpEffects = {
[PowerUpTypes.MultiBall]: (game, powerUp) => {
game.balls.map(b => [b.x, b.y]).forEach(([x,y]) => game.addBall(x,y));
},
[PowerUpTypes.BigBall]: (game, powerUp) => {
game.balls.forEach(b => b.size *= 2);
},
[PowerUpTypes.PowerBall]: (game, powerUp) => {
game.addBall(powerUp.x, powerUp.y, BallTypes.PowerBall);
},
[PowerUpTypes.ExtraLife]: (game, powerUp) => {
game.lives += 1;
},
[PowerUpTypes.SpeedUp]: (game, powerUp) => {
game.balls.forEach(b => {
b.dx *= 1.25;
b.dy *= 1.25;
});
},
[PowerUpTypes.SpeedDown]: (game, powerUp) => {
game.balls.forEach(b => {
b.dx *= .9;
b.dy *= .9;
});
},
};

// in loop it is one line.
PowerUpEffects[power.type]?.(game, power);

// spawn by picking a random power up.
if (Math.random() > 0.9) {
const types = Object.values(PowerUpTypes);
this.addPowerUp(brick.x, brick.y, types[Math.floor(Math.random()*types.length)]);
}
We knocked out the easiest ones already!
What was that? Is this the best way of doing power ups? Best practices?
Don’t think about that, look over there at the game. See how much more fun it is!
We did do a little off offscreen work: making the power ball red, making power ups wiggly, setting up more types, nothing major.
The new code is getting pretty repetitive so we will rapid fire the last power ups. Oh, did you want to see the code? All our previews have that little "code" button you can tap on. Don’t worry the rest of the power up are pretty uninteresting.
- Paddle Size - Refactor paddles to have variable sizes and increment all paddles widths like the ball size power up does.
- Gutter Guard - Add a brick with type "GutterMaster" at the bottom or something. Increment its health by 3. Stack it.
- Laser Paddle - Turn paddle color teal and each time a ball hits it fire lasers up starting at the center of the paddle. Lasers are balls with type "laser" which die when they hit a brick or go out of bounds.
- Bonus Points - Easy, make the power up bigger the more points it is worth using a formula like
points = power up size * 10. Also, flash the paddle yellow. - Omega Device - The omega device is a special stein power you can charge up. When it activates it damages all the bricks! Mega screen shake.
Puh puh puh powwah!
Life, death, and more levels
What is victory without defeat?
To top off the polishing pass we will round it all out. The game should start paused to give the player time to prepare. Similarly, when all the balls are dead, the game should pause before using one of the players "lives" or spare balls. We need logic to destroy a ball if it goes out of bounds but only for the bottom of the screen.
Most of this is pretty easy to implement. First, our universe needs to have an off button or well pause button. It doesn’t "fully" pause the sim but most of it.
const Game = {
isPaused: true,


tick(dt) {
if (isPaused) {
return;
}
}
}
That isn’t right. We still want our tweens to run because our menu isn’t gonna just "pop" into existence.
tick(dt) {
if (!isPaused) {
// update game
}

updateTween(dt);
}
Now we can add a few more div’s to our game to hold some UI. One for the pause title, one for the lives, one for the "play" button, and another just in case.
const menuPaused = document.createElement('div');
const titleDiv = document.createElement('div');
menuPaused.appendChild(titleDiv);
// etc
const msgDiv = document.createElement('div');
const startButton = document.createElement('button');
const scoreContainer = document.createElement('div');
We have a parent for the menu so we can add a transparent background with a blur filter to give the game a "pause" feel. Less is more with styling so the title and button remain simple.
The title shows the level you are on and the button says play or similar. Lives will be a number with a little green styling to convey it is your "health."
While we could extend the input system to listen to taps and check if they fall within a list of buttons bounds, it is easier to toss a div in and add a few event listeners to it. What will help here is if we add a few helper functions on the game to make it easier to control both the game state and UI along with it.
This is the idea.
if (b.y > this.height) {
// we are outside the screen
b.isAlive = false;
}

// after updating balls
this.balls = this.balls.filter(b => b.isAlive);

if (this.balls.length === 0) {
this.doTheDeathThing();
}
if (this.blocks.length === 0) {
this.doTheWinThing();
}
When you die, mega screen shake, boof the lives display, reset paddle, reset ball, and pause the game. Knocking out all the state is tedious but doable.
onLifeLost() {
this.showMenu();
this.onResetLevel();
this.megaShake(this.camera, 30);
// delayed boof
this.tween(livesContainer.style, 'scale',
[1, 0.7, 2, .8, 1.5, .9, 1.2, .95, 1], 680, 540,
// late update as we want it obvs a live was lost
() => livesContainer.innerText = `${this.lives}`
);
},
onDeath() {},
onWinLevel() {
this.onResetLevel();
this.spawnNextLevel();
this.showMenu();
},
onResetLevel() {
// clean up.
this.powerUps = [];
this.paddles = [];
this.addBall(this.width/2, Game.height - 60);
this.addPaddle();
},
onStartGame() {
// start
},
onResetGame() {
// reset all props
},
Using on as a little hint that these happen based on an event. What? An event bus? Subscriptions? That sounds complicated. Don’t worry about that. Let’s animate the menu.
Animation sounds hard but actually it isn’t as we can reuse our tweens. A show/hide menu.
hideMenu() {
this.tween(menuPaused.style, 'scale', [1,1.1,0.5], 380);
this.tween(menuPaused.style, 'opacity', [1,0], 300, 80, () => {
menuPaused.style.opacity = 1;
menuPaused.style.scale = 1;
menuPaused.style.display = 'none';
this.isPaused = false;
});
},
showMenu() {
this.isPaused = true;
menuPaused.style.display = 'flex';
titleDiv.innerText = `Level ${this.level}`;
this.tween(menuPaused.style, 'scale', [0.5, 0.4, 1.1, 1], 380);
this.tween(menuPaused.style, 'opacity', [0,1], 300);
}
flex/none are css options. Flex is just a row/column layout. Our menu container is a flex column. We make sure to pause first when showing but unpause after the animation is done when hiding.
Basic but serviceable.
This will let us win and lose now. Losing only resets score and level back to 0. Instead of a final level, the game will start over from level one but the starting speed of the ball will increase and the bricks will be stronger. Maybe power ups drop more often too.
But for that to work, we should update the goToNextLevel bit.
spawnNextLevel() {
this.level++;
const levels = {
0: () => this.spawnLevel(),
1: () => this.spawnLevel({
predicate: ({x, y, i, j, xBrickCount}) => {
if ((i % (xBrickCount >> 1)) === 0) {
return;
}
let color = [255, 255, 255];
if (j % 5 === 0) color = [255,200,200];
if (j % 3 === 0) color = [200,255,200];
this.addBrick(x, y, 0, color);
}
}),
};
const nLevels = Object.keys(levels).length;
levels?.[((this.level - 1) % nLevels)]?.();
},
If we don’t have at least 2 levels, it won’t wrap around correctly, a side effect of modulo’ing with a 1. We also updated the total brick counts for the x and y axis in the predicate.
At this point, we can add more levels with different colored bricks, stronger bricks, etc. I think 10 levels is a good number.
STOP. I know what you are thinking. Can’t AI just "magic" us up some cool level layouts?
Come on now, don’t be like that. Relax. Be creative. Think of this like, practice for "leet" code interviews. We want a few little algos that place bricks in interesting ways.
Let’s use that big beautiful
Remember, it is more about letting the player have fun. We want to dose out dopamine for the little gabo in our brains. Anticipation, build up, build up, release, and reset. The levels should chase this but still remain interesting as they progress.
- 1 - Simple full screen white bricks
- 2 - Screen full of bricks. Two rows missing and 2 columns missing. Bottom and top row bricks take two hits. Color every third brick blue. and every fourth red.
- 3 - 2 center columns missing with edge columns colored purple bricks on the border of screen taking 5 hits to pop. All other bricks blue.
- 4 - Alternating 2 full rows one empty row. Bottom row of full rows brick have 5 hits top have 2. Each row alternating shades of grey.
- 5 - Back to the basics, full screen bricks rainbow rows, bricks take random 1-3 hits.
- 6 - Pillars, alternating full and empty columns. Ever other row brick takes 3 hits.
- 7 - Triple trouble. middle and center missing 2 rows/cols making 4 block areas. Then, add 2 bricks for each spot. First white, second blue, and third red. (If you are not American, use your countries flag instead)
- 8 - Hard bottom. Bottom brick has infinite health with
unbreakabletype. May need to add more code.
Woh, this is so fun. It makes us want to add more bricks right? Like bomb bricks, or respawn bricks which will respawn the bricks around them. Oh, what about warp bricks which will warp to another location after getting hit!
Later later, finish the 10 first.
- 9 - Almost empty. Only the edge is there with strong bricks but a small little middle exists with multiple stacked bricks. Rim is 2 layers deep with blue and teal then center is orange.
- 10 - Boss level. Full screen, all bricks have 5 health.
The boss level is boring. We will come back to it later when we add the boss. Oh, the boss is going to be extra spicy.
The levels are a bit long so we can omit the specifics. Here are a few tips though.
({x, y, i, j, yBrickCount, xBrickCount}) => {
// store the mid points
const midX = Math.floor(xBrickCount / 2);
const midY = Math.floor(yBrickCount / 2);
if (j === yBrickCount-1 || j === 0 || i === 0 || i === xBrickCount -1) {
// edges
}
if (j === yBrickCount-2 || j === 1 || i === 1 || i === xBrickCount -2) {
// second layer edge
}
if (i >= midX - 1 && i <= midX+1 && j >= midY - 1 && j <= midY+1) {
// mid point expanding out
}
if (i === 0) // left
if (i === xBrickCount-1) // right
if (i % 3 === 0) // column skip
if (j % 3 === 0) // row skip
}
With a little template like that it isn’t too hard whip and tweak in the future.
While we are at it, we can add a bit more shine to the game too.
-
When a power up hits the paddle flash the paddle the same color as the power up.
-
Make the menu animation more fancy.
-
Make power ball bounce against unbreakable bricks and be less powerful.
-
We track what bricks a ball has hit since the non-brick hit skipping bricks we already hit. This will make it so the power ball doesn’t completely wreck everything as we want to leave some room for power creep.
Do you feel it now Mr. Crabs?!?!?
This is not right. Something is still off. It just doesn’t feel right.
What? Did you say something? You know what is missing? Spit it out already.
I can’t hear you!
Is it really a game without sound? I don’t think so.
That is correct, if you play games with sound turned off, you are wrong. Heck, if we had a way to stimulate the olfactory sense as easily as the auditory, you bet your ass we’d make players smell all kinds of nasty fantastic stuff. The power ball would be smokey and lasers like burnt ozone.
Until then, sound it is. The soundscape of a game tightens up the vibe. Something is better than nothing but the juice factor takes stage here too.
For example, when the ball hits a brick should it play a blishf sound? What happens if it hits the edge? What about when it hits 3 bricks in a row and then the edge and then a brick? Maybe the blishf should go up a note to a blaushf and then again and again for each consecutive brick resetting when it hits the edge.
Is there one short song on repeat? Or can each level have a theme? What about boss music?
There is no reason to over think this. Our sound engine api is a simple one.
this.playSound(name, pitch, volume, loop);
this.stopSound(name);
this.muteAudio(true|false);
We don’t need any panning, doppler, or convolution based reverbs to have some rocking ear-candy. It is always possible to mute sound because for whatever reason there may be those crazy players who don’t like that one song or that one sound effect and want it off. A polished experience always has this option and while our game may be a turd it is a glossy one.
Don’t overthink this. Use whatever built in sound capability available. With javascript we are in decent hands.
Audio files are the first game "asset" we need to think about. Assets are resources that must be loaded. We could wait for all the sounds to load before starting the game which is a capital idea. Wait a little and then you can play, no loading screens.
What was that? What about memory limits? Ram? Relax friend. Don’t worry about it. We haven’t even loaded a single sound yet. That is a tomorrow’s us kind of problem.
Let’s get tunes going.
We are going to use javascript’s standard sound api. On the surface it may seem complex but for us it will be dead simple. We create an AudioContext and attach a Gain node to it. This root node will allow for global muting of all sounds. Then, we will keep track of the audio files we have loaded along with what sources are actively playing for each file.
An audio file is the decode sound data and a source is what reads the sound data and plays it. Audio sources have an output we can connect them to like our Gain node from earlier.
If we want to control the volume of a single source, then we will need to give it it’s own Gain node. Source -> Local Gain node -> Master Gain -> AudioContext.
There are other nodes javascript provides but this is all we need. The code is way simple.
First we preload.
audioCtx: new AudioContext(),
masterGainNode: null,
audioFiles: new Map(),
audioSources: new Map(),
isAudioMuted: false,
async preload() {
const sounds = [
// sound files
];
this.masterGainNode = this.audioCtx.createGain();
this.masterGainNode.connect(this.audioCtx.destination);

return Promise.all(sounds.map(sound =>
fetch(`/sounds/bronc/${sound}.ogg`)
.then(res => res.arrayBuffer())
.then(ab => this.audioCtx.decodeAudioData(ab))
.then(buff => {
this.audioSources.set(sound, new Set());
this.audioFiles.set(sound, buff);
});
));
},
After we have the data for the sound, we decode it, and add it to our loaded sounds. It is good to hold off on starting the game until after we have loaded the sound. We will use .ogg format as it is a lossless but decently com