How to set the Baseline Grid in InDesign:
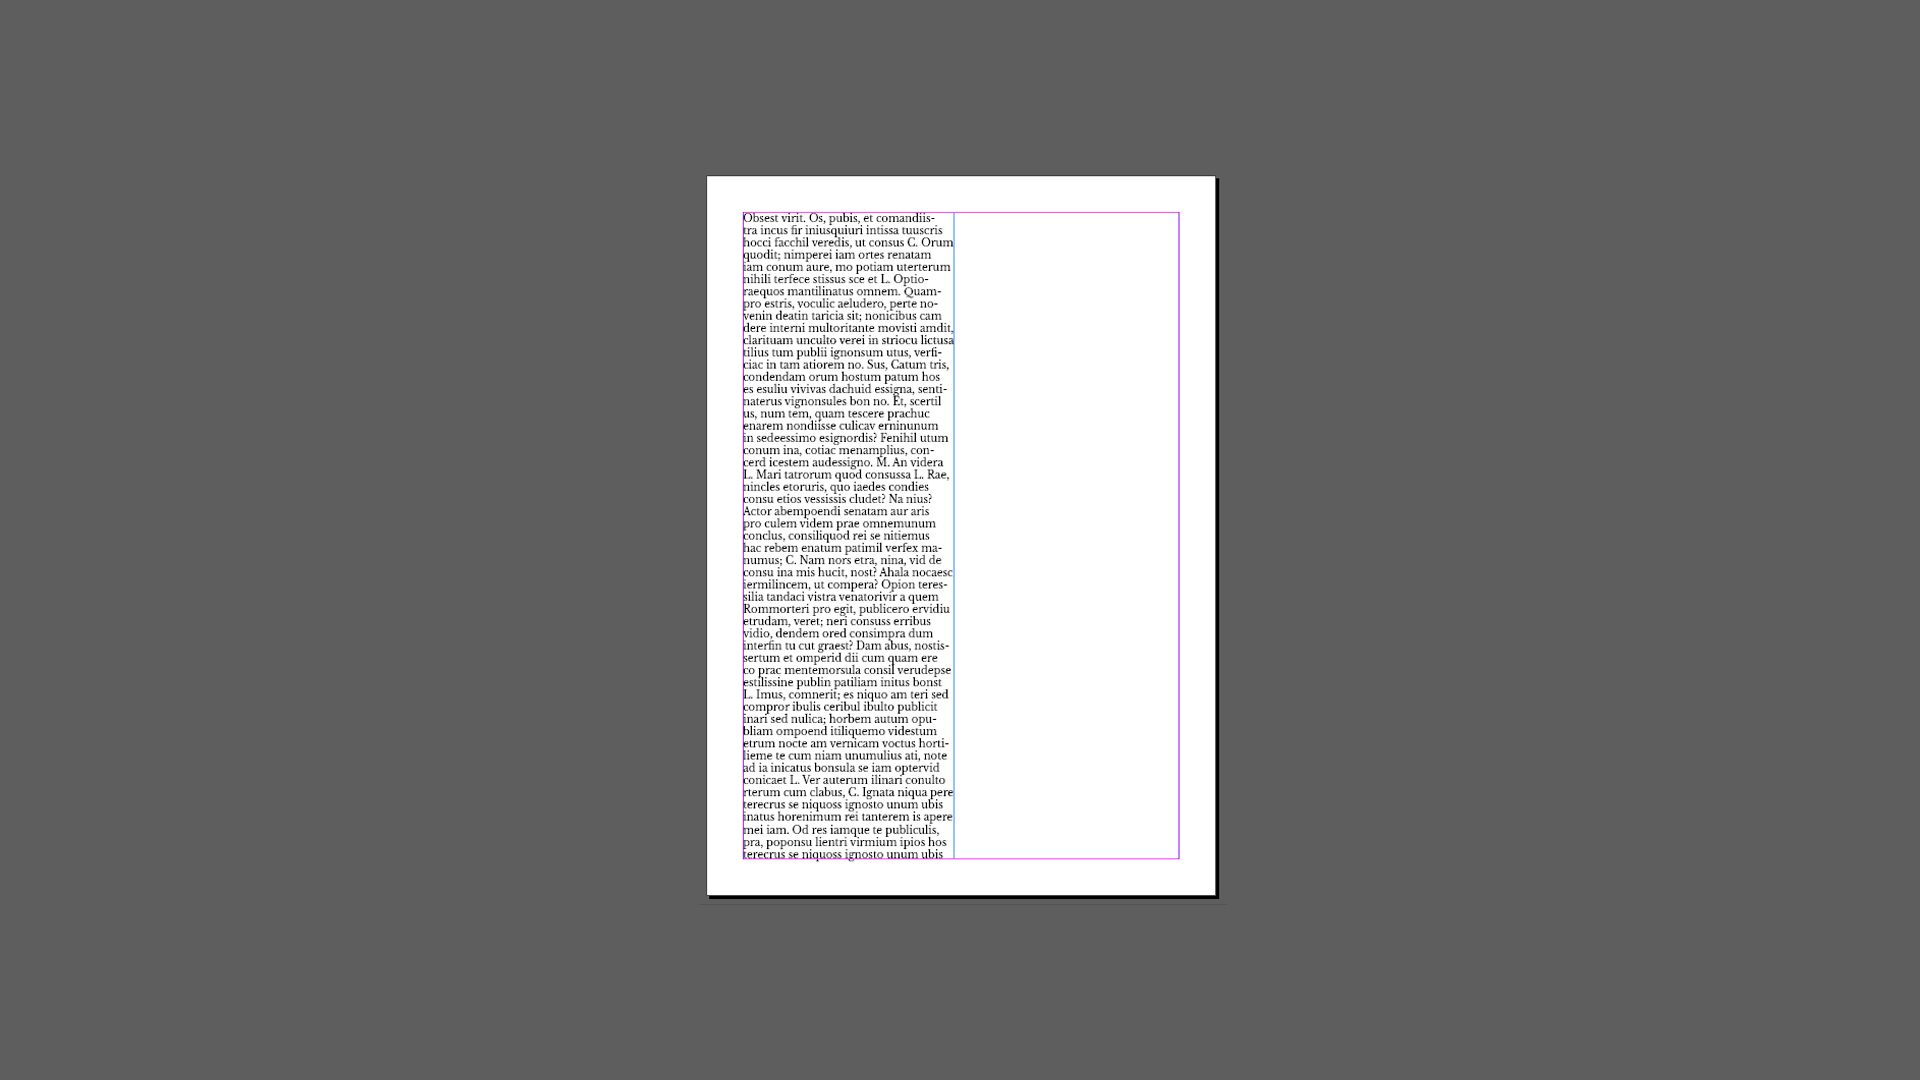
1. Choose the size of your document and determine your margins. For this example, let’s work with an A4 document with 15 milimeters margins.

2. Create a text column that covers the page from the top to the margin to the bottom, and fill it with fake text using the font and size of your preference.
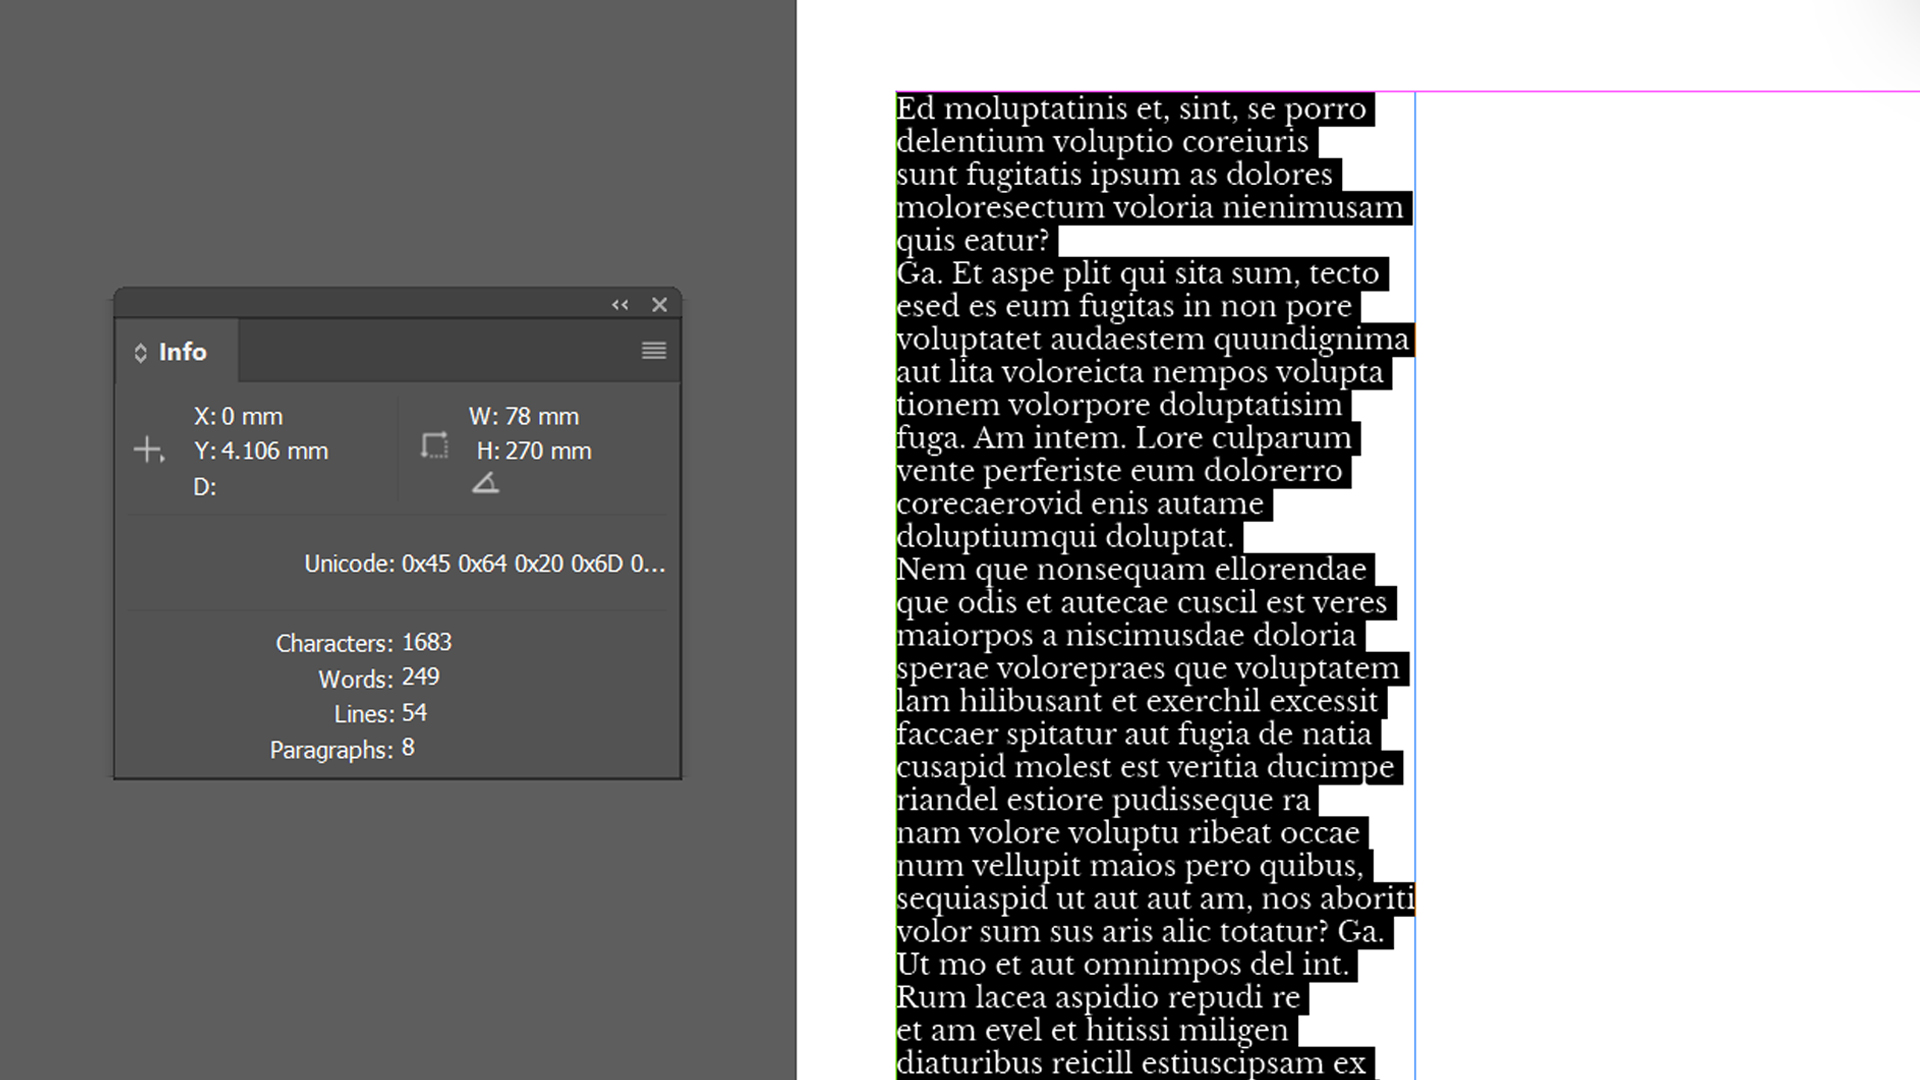
3. Open the information pannel in Window > Information. Then, with the text tool, select the entire text you just created. The pannel will show the ammo…
How to set the Baseline Grid in InDesign:
1. Choose the size of your document and determine your margins. For this example, let’s work with an A4 document with 15 milimeters margins.
2. Create a text column that covers the page from the top to the margin to the bottom, and fill it with fake text using the font and size of your preference.
3. Open the information pannel in Window > Information. Then, with the text tool, select the entire text you just created. The pannel will show the ammount of lines that your paragraph has. In our case, it has 54 lines.
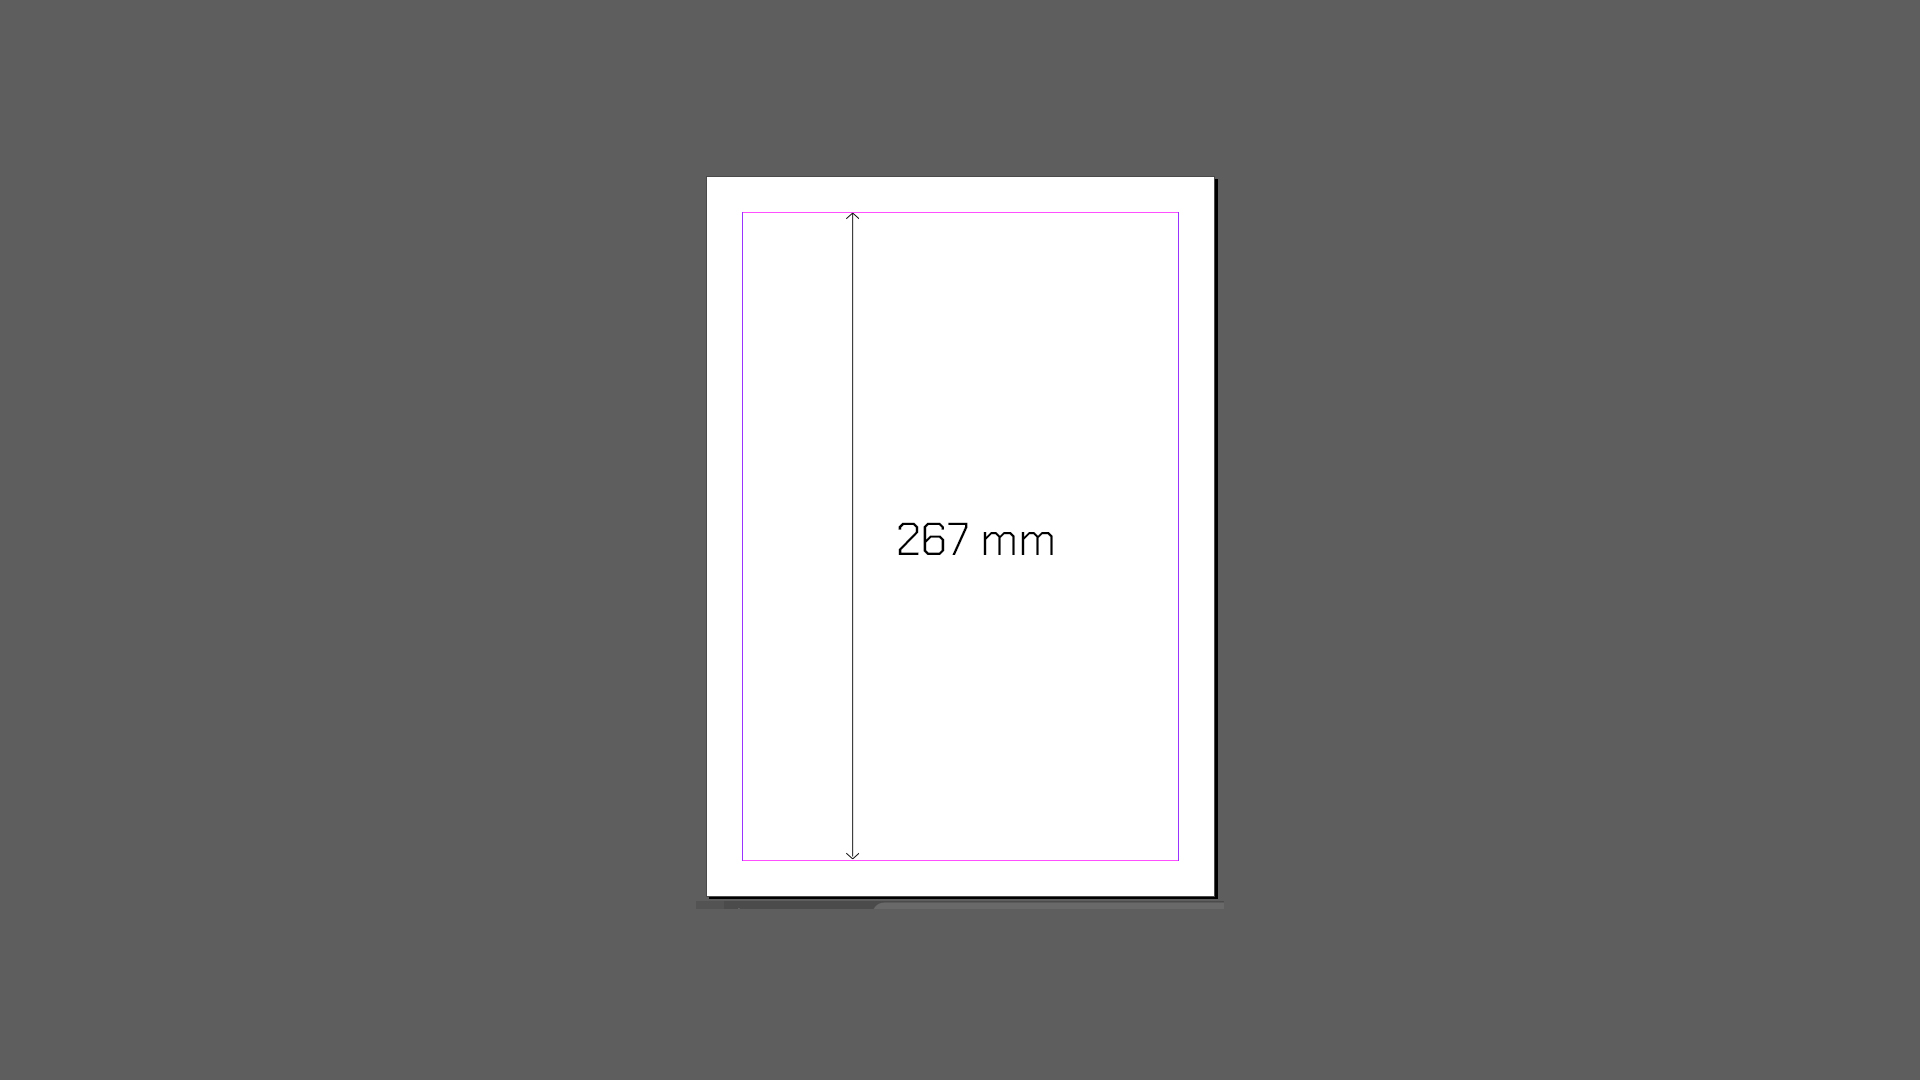
4. Measure the height of the area inside your margins. Then, divide this number between the number of lines you got from the information pannel. This number will be your leading value.

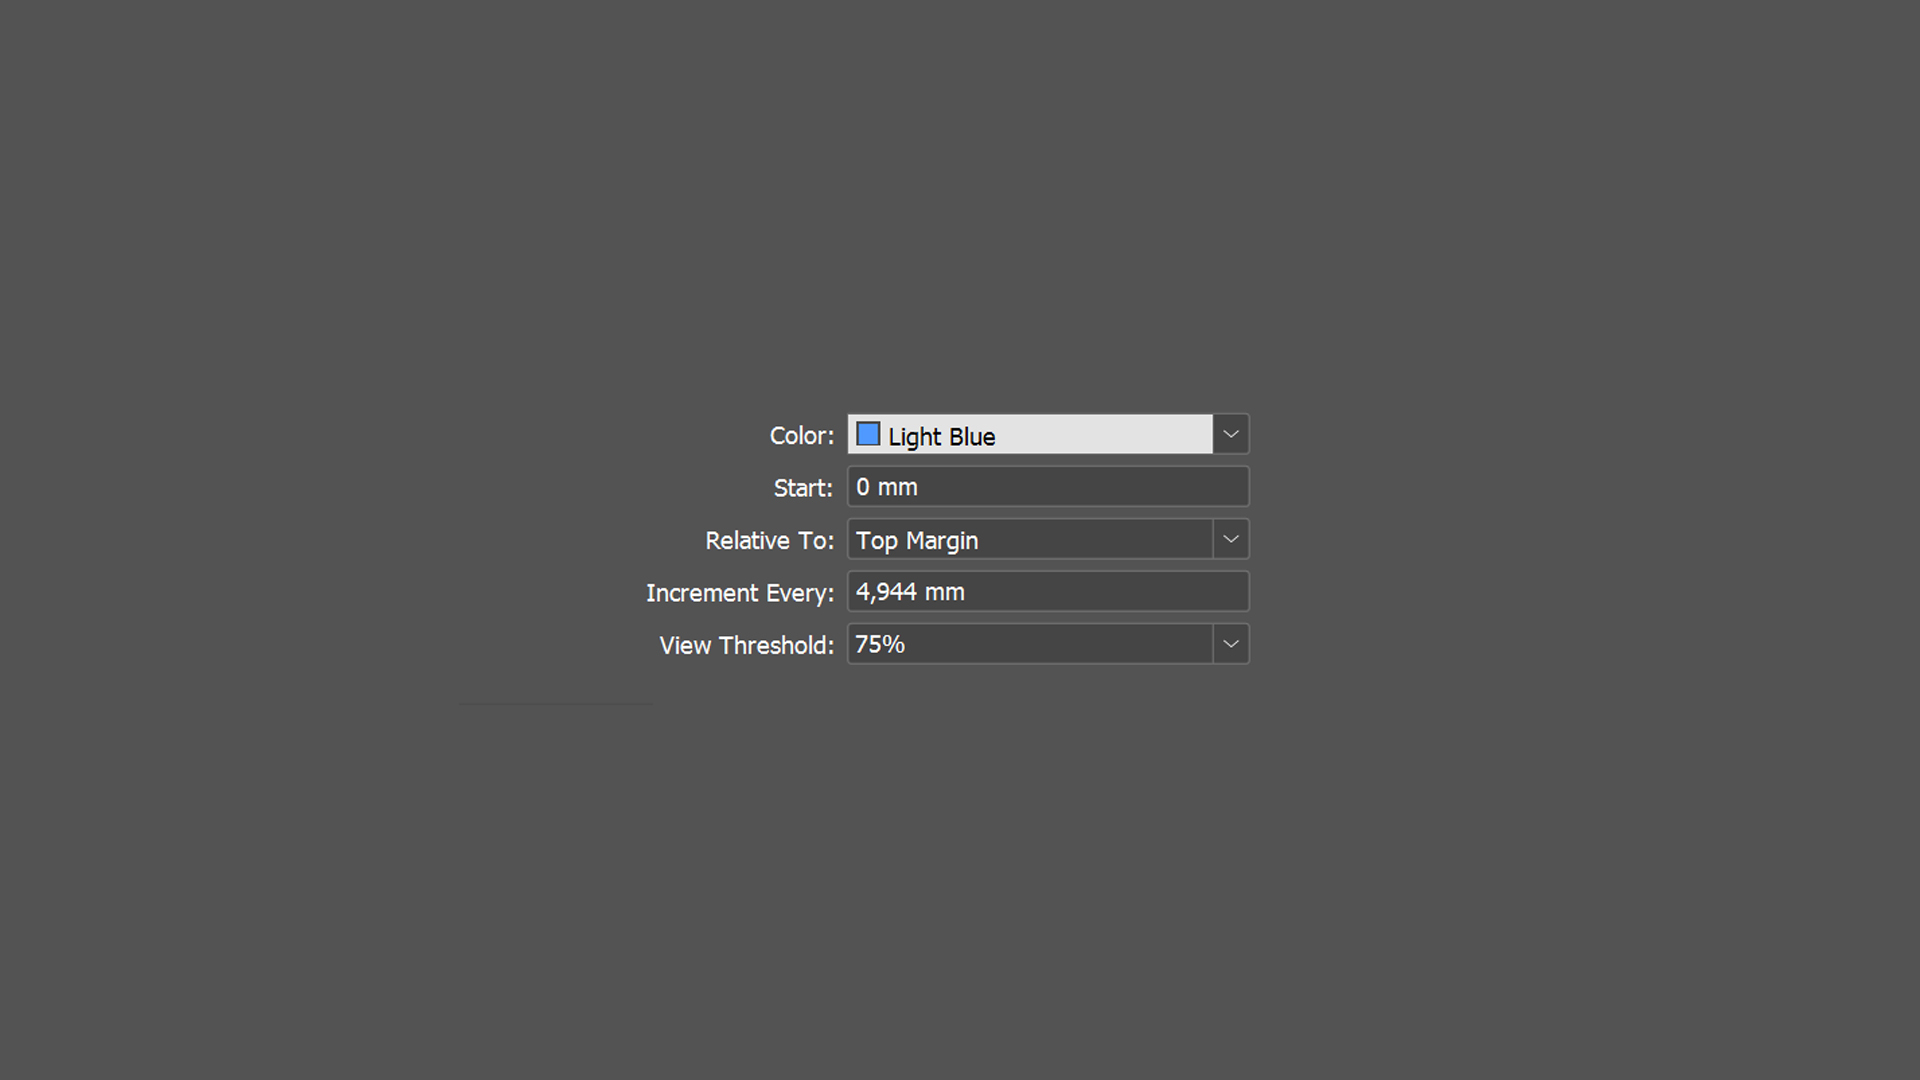
5. Configure the grid: Navigate to Preferences > Grids in InDesign, set Increment Every to your leading value, and adjust the Start value to align with page margins.
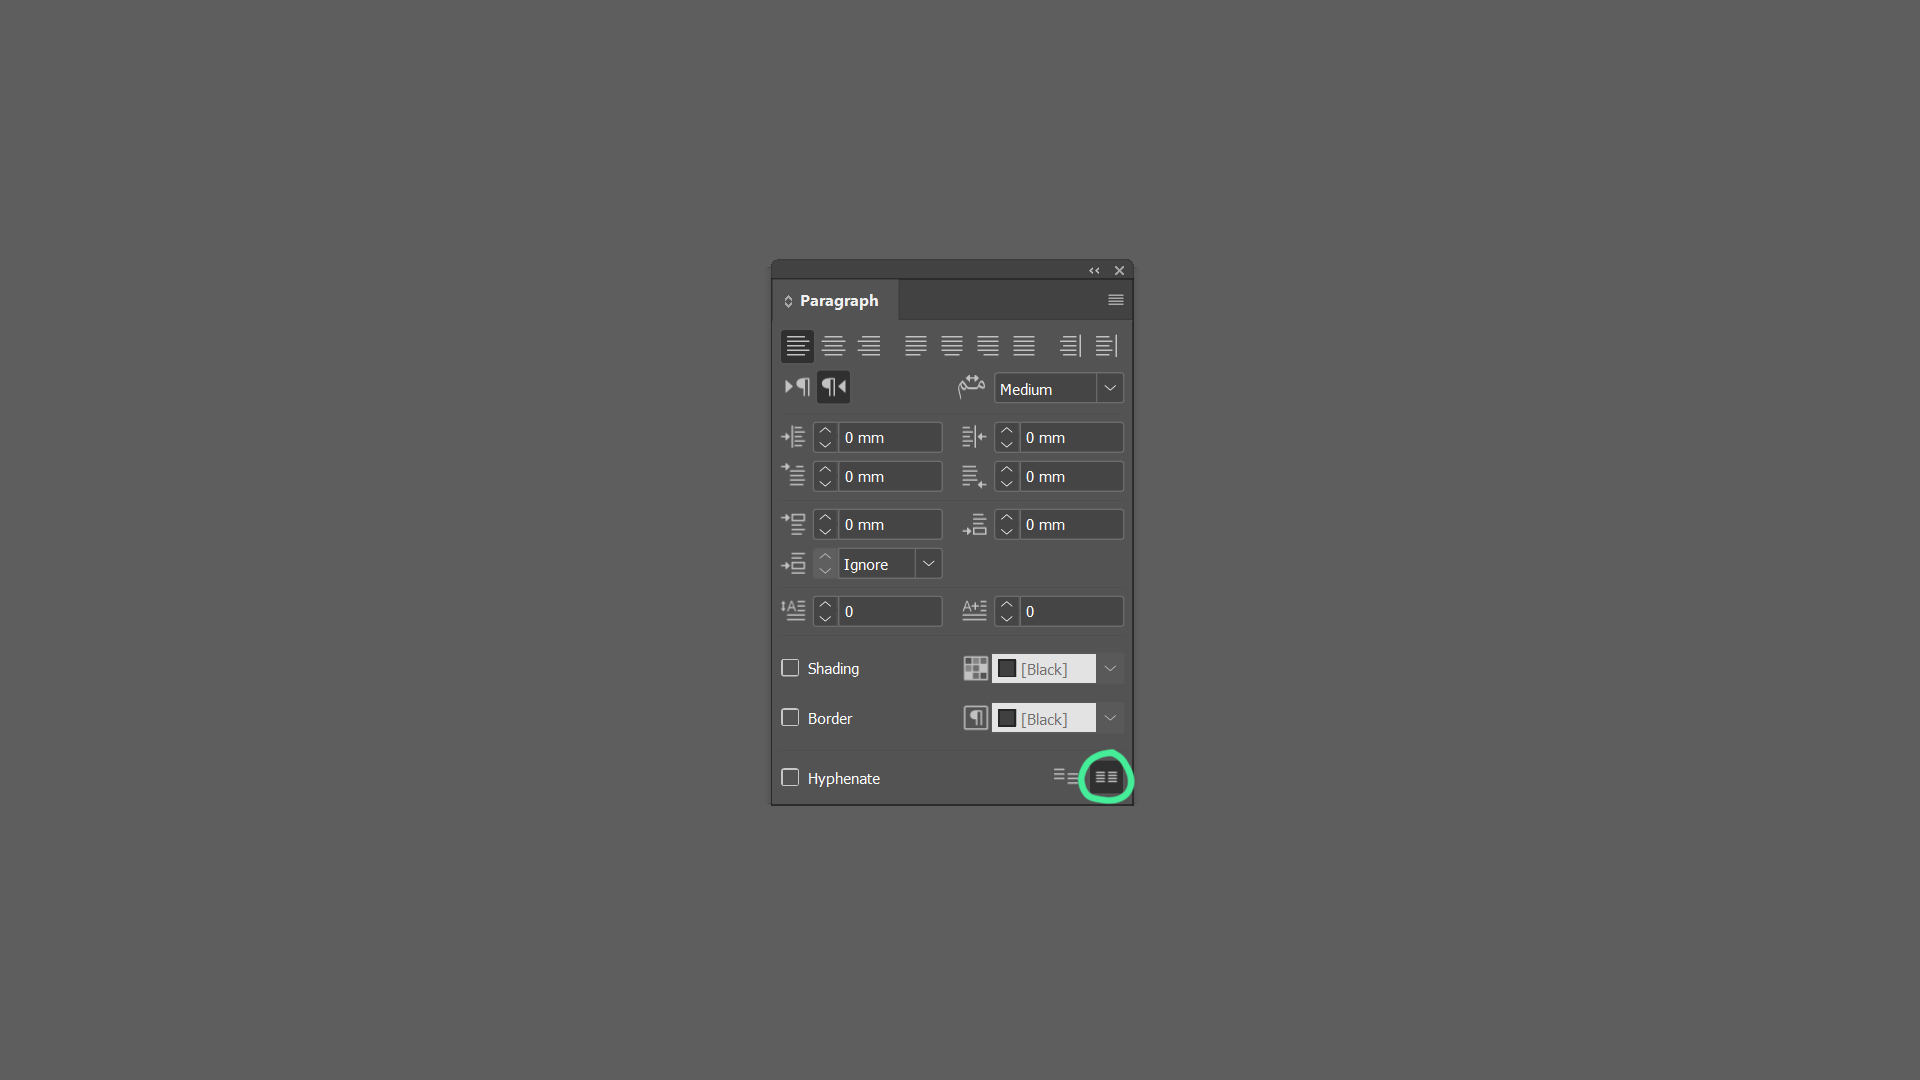
6. Align text: In the Paragraph panel, click the “Align to Baseline Grid” icon.
Tip: if you’re unable to see the baseline grid, go to View > Grids & Lines > Show Baseline Grid