Ever since the first Raspberry Pi came out I wanted to create some kind of cluster with them. The first generations of Pis had very limited RAM so they didn’t make good application or Docker servers. That didn’t stop me from making various helpful, crazy or experimental projects with them. But one thing I never wanted to use them for in my homelab is Docker of the mentioned weaknesses.
When the pandemic hit, electricity prices exploded but also Raspberry Pi’s prices went up, so I turned to smarter and faster alternative…
Ever since the first Raspberry Pi came out I wanted to create some kind of cluster with them. The first generations of Pis had very limited RAM so they didn’t make good application or Docker servers. That didn’t stop me from making various helpful, crazy or experimental projects with them. But one thing I never wanted to use them for in my homelab is Docker of the mentioned weaknesses.
When the pandemic hit, electricity prices exploded but also Raspberry Pi’s prices went up, so I turned to smarter and faster alternatives and moved my homelab from an old HP Server to multiple smaller Lenovo tinies.
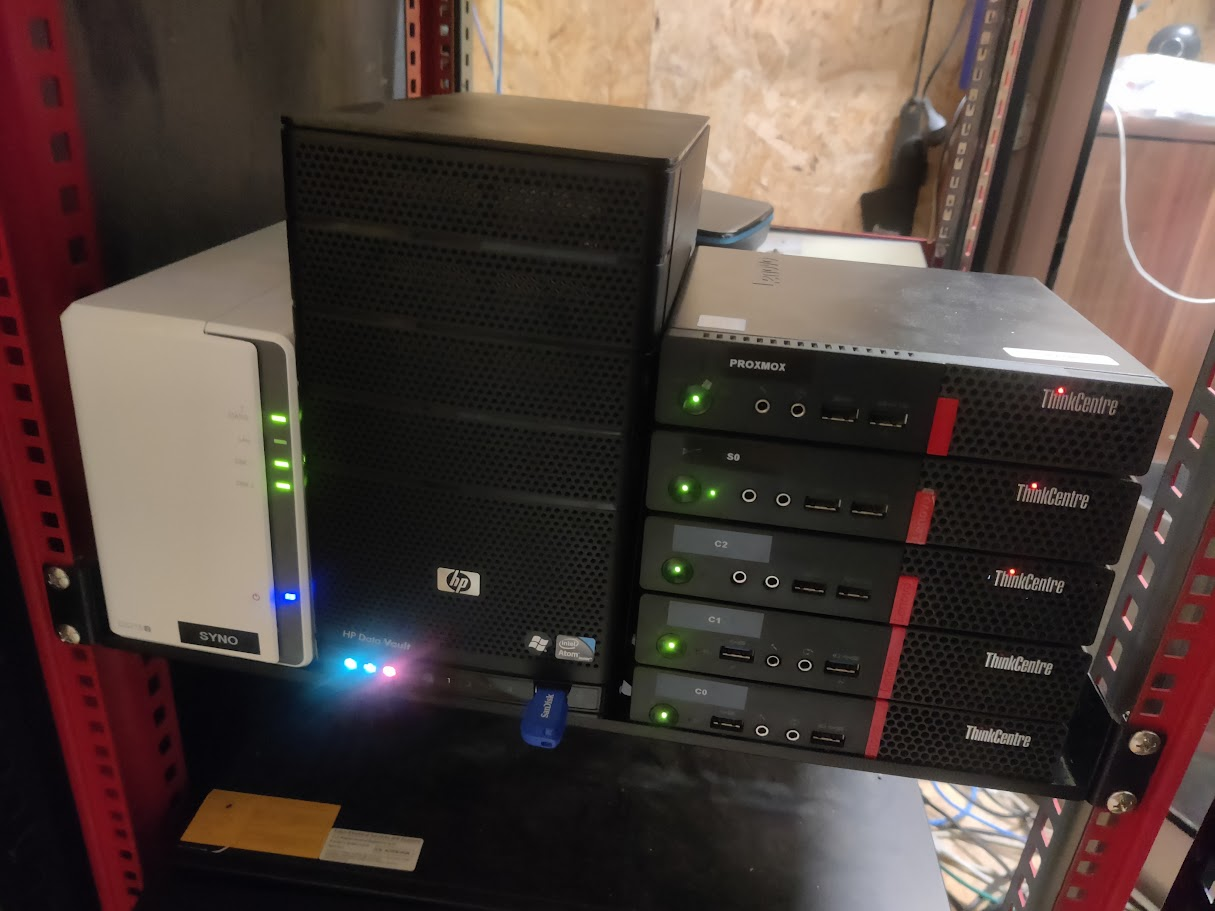 My Lenovo Tiny boxes with a Synology NAS and the old DataVault from the perfect file server article for backups
I never expected to go back to Pis because the lower power consumption was not worth the price to performance ratio.
That all changed when a few months ago I saw Jeff Geerlings video about the NanoCluster, a very high density board that can hold up to 7 Pi Compute modules in about the size of a coffee mug. That means that in a full configuration you’ll have 28 cores and up to 112 gigs of RAM in this little thing.
 Nano Cluster from Jeff Geerlings video
So I ordered a NanoCluster and also got a mixed bunch of Raspberry Pi Compute modules to put into the cluster.
| Model | Role | RAM | Disk |
|---|---|---|---|
| CM4 | Controller | 2G | 256G NVMe SSD |
| CM4 | Compute | 8G | 64G SD-Card |
| CM4 | Compute | 8G | 64G SD-Card |
| CM5 | Compute | 8G | 64G SD-Card |
| CM5 | Compute | 8G | 64G SD-Card |
I chose SD-Cards for the Compute nodes so I won’t have to use network bandwidth for the docker image and configuration. So I had to prep all SD-Cards with one big EXT4 partition. You could also store the Docker info and image cache on an ISCSI or NFS share but I decided against it because the whole board shares a 1 GbE connection so I wanted to preserve bandwidth.
The Controller node has an 256G NVMe SSD attached to the connector board which shipped with my NanoCluster.
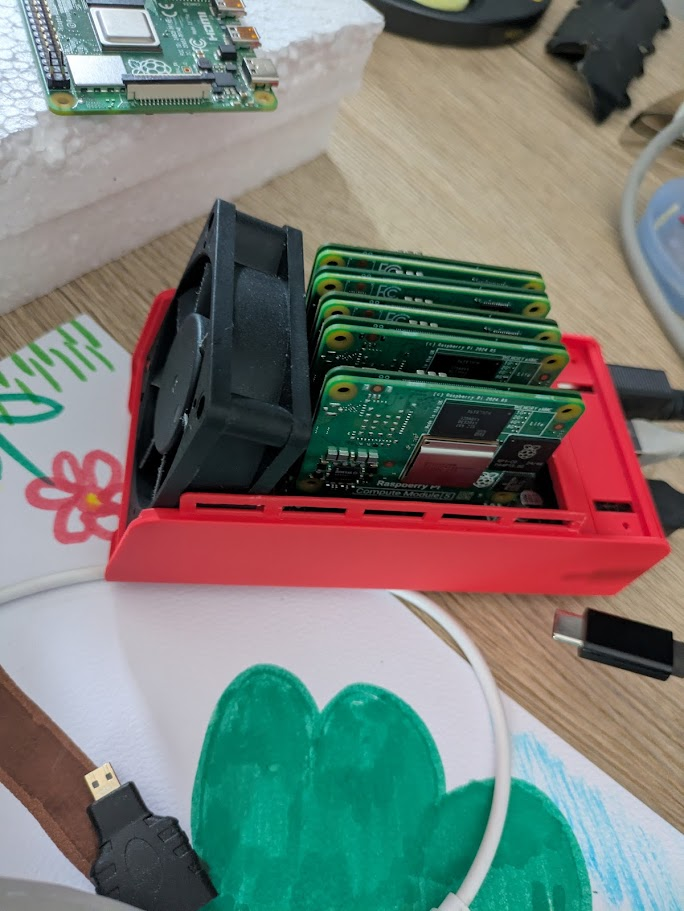 The NanoCluster by Sipeed
  5 Raspberry Pi Compute modules
Laziness wins
Setting up a cluster is kinda easy, but managing and keeping it updated over years is hard. I knew from previous homelab experiments I wanted to go with Docker Swarm, because it’s the easiest way to set up multiple Docker servers (don’t even get me started about k8s or k3s) but in the past I have used docker Swarm Stacks with Portainer which can be a pain to manage and handle new yml files so I wondered what could be the laziest way to handle a cluster which will consist of many nodes (and maybe in the future multiple NanoClusters?). I had the opportunity to learn from past painpoints and go with the route of least resistance.
The answer for me was:

WTF is gitops?
So instead of using just directory structures with docker-compose.yml files or god forbid using tools like portainer to manage all my stacks I wanted to have a clean git repo that contains all my stacks and configurations.
To be even lazier I wanted to set up in a way that will automatically update a stack when I change something in the git repo or stop a stack when I remove the corresponding yml from the repo. Also I want the container images to auto update if they are configured for the :latest tag.
https://github.com/geek-at/gitops-cluster
And all that is going to be done fully with only Alpine Linux on the controller and nodes btw.
But what about provisioning new cluster nodes?
So in the past when I was playing with clusters and nodes I had to:
- Setup a base system
- Create a specific configuration for Disks and applications (lazy method via ansible)
- Push all of that to the VM or bare metal
- Make the node join the cluster
Which works great, but it’s not the laziest way I could think of so for this project I might want to add more nodes on the fly and don’t want to do all these manual steps for every node so the lazy alternative I was thinking of was of course:
PXE booting new nodes to automatically join the Cluster
This is the heart of the whole project. I want to just PXE boot newly bought Pis and by the end of the boot sequence they should be joined to the swarm and handling workloads all without manual intervention.
For this to work we need three things on our controller node:
- TFTP Server (for serving the kernel and boot files)
- NFS Server (for the shared storage on all nodes)
- Web Server (for serving the boot script and the apk overlay file)
So let’s set them up!
We’re going to assume the controller has the IP: 10.0.0.1 and is running Alpine Linux (installed normally in “sys” mode-,System%20disk,-mode%20installation%20may) on an SSD)
┌──────────────────────┐   ┌──────────────────────┐    ┌──────────────────────┐
│Controller            │   │Compute node 1        │    │Compute node N        │
│10.0.0.1              │   │10.0.0.2              │ ┌┐ │10.0.0.x              │
│                      │   │                      │ └┘ │                      │
│Web server            │   │                      │ ┌┐ │                      │
│NFS server            │   │                      │ └┘ │                      │
│TFTP server           │   │                      │    │                      │
└──────────────────────┘   └──────────────────────┘    └──────────────────────┘
Step 0: PXE booting requisites
You basically have two options to PXE boot a Raspberry Pi:
- Easy if your firewall supports it: Set DHCP option 66 to
10.0.0.1(IP of our Controller node) and 67 tostart4.elf. On unifi firewalls also set the “TFTP Server” option to10.0.0.1 - Or manually configure the Pi to always ask a TFTP server: Update the Raspbetty Pi bootloader with the following configuration:
BOOT_ORDER=0xf142
TFTP_PREFIX=1
TFTP_IP=10.0.0.1
Step 0.5: Create a gitops repo
I have created an example github repo that I’ll be using in this blog post a lot:
https://github.com/geek-at/gitops-cluster
In the real world you’d be forking it and not using mine though because you’ll adapt it to your needs.
On the controller, let’s clone it to a sane location
git clone https://github.com/geek-at/gitops-cluster /srv/cluster
So from now on the repo will live in /srv/cluster
Step 0.75: Prep the controller node
99% of the configuration we’ll have to do for a PXE bootable Pi cluster lives on the controller node. For example the whole point of this project is to have docker stacks autodeploy when they changed in the git repo.
Since the controller is (the most important) part of the docker swarm cluster we’ll have to create a swarm with it:
apk add docker && rc-update add docker && rc-service docker start

docker swarm init
 Docker swarm init command
This will initialize the swarm and show you the swarm token (which you will need later to put in the cluster_setup.sh script - I’ll remind you when it comes to it)
Also since we’ll want the controller to automatically handle new stack files in the git repo, we’ll need to add a cron
# edit crontab
crontab -e

# add this line:
*/5       *       *       *       *       /srv/cluster/autodeploy.sh
This will check every 5 minutes for updates in the git repo and will auto-deploy or remove or update the stacks if your files had changed. The beauty of this solution is that it works behind firewalls, doesn’t need any port forwardings or webhooks, it just does a git fetch on the repo. Works even better with locally hosted git instances, then I’d also change the cron to run every minute.
Step 1: The TFTP Server
Let’s prepare the TFTP part:
In the repo you’ll find a folder called tftp and in it a script called [download.sh](https://github.com/geek-at/gitops-cluster/blob/main/tftp/download.sh which will download all required files that we’ll need for PXE booting ) to pre-populate your TFTP server. Make sure to edit the download.sh script before running it, replacing the IP to the one of your controller and the alpine version to something recent.
Then install and enable the TFTP server service and run the script
# Install packages
apk add tftp-hpa tftp-hpa-openrc && rc-update add in.tftpd

# Basic config
cat <<EOF > /etc/conf.d/in.tftpd
INTFTPD_PATH="/srv/cluster/tftp/"
INTFTPD_OPTS="-R 4096:32767 -s /srv/cluster/tftp/"
EOF

# Start the tftp server
rc-service in.tftpd start

cd /srv/cluster/tftp
./download.sh
Now you should already be able to boot a fresh Pi over the network! But it’s going to be pretty bland because we’re missing one amazing part of Alpine Linux: the apkovl file. If youre eagle-eyed you might have spotted it in the cmdline.txt: apkovl=http://10.0.0.1/alpine.apkovl.tar.gz.
Step 2: The NFS Server
Since the Pis will boot into RAM disk mode we’ll need to have a shared space between all the cluster nodes. We’ll do this via NFS. We’ll be using NFS4 to circumvent some of NFS’s problems with lockfiles (especially when using WAL with sqlite3). The actual mounting of the NFS shares will happen on boot in the cluster_setup.sh script.
# Install packages and make the service start on boot
apk add nfs-utils nfs-utils-openrc && rc-update add nfs && rc-service nfs start

# Configure the shares to work for the nodes
cat <<EOF > /etc/exports
/srv/cluster/nfs 10.0.0.0/24(rw,fsid=0,no_subtree_check)
/srv/cluster/nfs/swarm 10.0.0.0/24(rw,sync,no_subtree_check,all_squash,anonuid=1000,anongid=1000)
EOF

# save changes
exportfs -ra
This configuration will allow all devices on the 10.0.0.0 - 10.0.0.255 Subnet to access the shares. This could also be a security concern if you use your primary network for it, as it basically acts as a “free for all” share. To make it more secure you could pin it on individual Pi IPs or use ACLs.
Step 3: The Web server
The web server on the controller will be used to serve both the apkovl file as well as the script that is fetched and run by every Pi booting from the network (Step 4).
On the Controller we’ll just install caddy and use a very simple Caddyfile to serve the web directory
# Install and autostart Caddy on boot, as well as start it now
apk add caddy && rc-update add caddy && rc-service caddy start

# Create default configuration for Caddy
cat <<EOF > /etc/caddy/Caddyfile
:80 {
root * /srv/cluster/web

file_server

log {
output file /srv/cluster/logs/caddy.log {
roll_size 10mb
roll_keep 5
roll_keep_for 720h
}
format console
}
}
EOF

# Apply new Caddyfile
rc-service caddy reload
!! ADD YOUR DOCKER SWARM TOKEN TO THE SCRIPT NOW !!
Remember the Docker swarm join token from the beginning? You’ll need to add it now to the cluster_setup.sh script, so the swarm nodes will be able to join.
Now you should be able to access the controller via the webserver: curl 10.0.0.1/cluster_setup.sh
Step 4: The apkovl - A few customizations for the boot image
Alpine linux on Raspberries always boots from a RAM disk so you have a full Alpine system, can install packages and run programs but when you reboot it’s all gone. Thankfully the amazing Alpine Linux devs have included lbu which is a built-in tool that allows you to backup all config changes, added packages and configured services and put it in a APK Overlay file by default it’s called alpine.apkovl.tar.gz.
We’ll use this to set up the “default setup” that all Pis will boot so for configuring the first pi you’ll need a display and a keyboard.
Okay so now you should boot your first Pi over the network and we’ll do the customizations from here. If your netboot isn’t working yet you can still do these steps with a freshly booted Alpine Linux on any Raspberry Pi - just flash the extracted img file from the official installer to an SD card and boot from that.
You should see something like this:
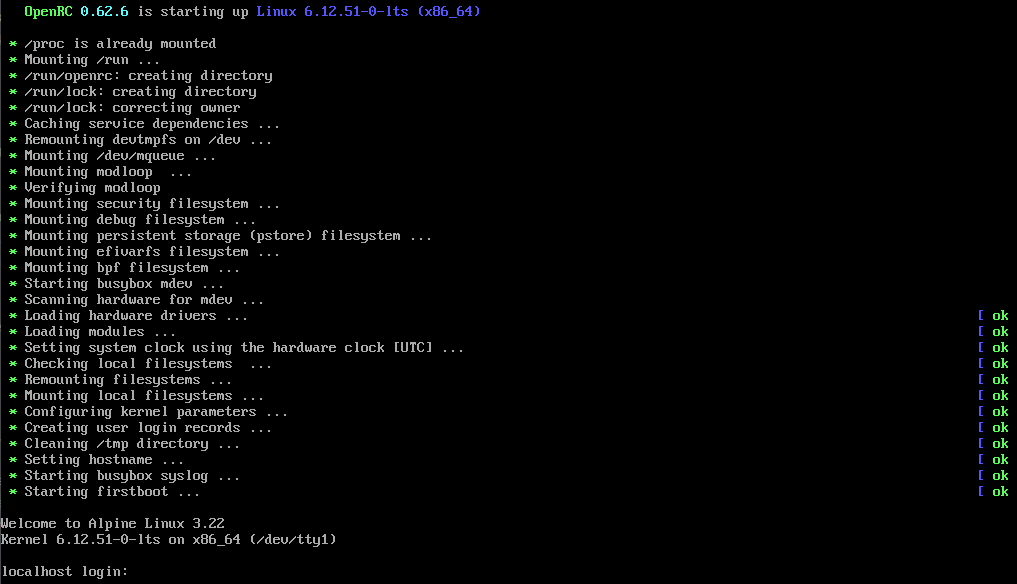 Freshly booted Alpine Linux
alpine-setup
So the first thing we’ll do is to run alpine-setup which guides you through the basic things your alpine box will need. The defaults will be okay, just make sure for eth0 you’ll select “dhcp” (as all pis will use this config you can’t set it to a specific IP) and when it comes to disk setup use “none”. Do everything else to your liking eg setting up a user or ssh keys.
After you set up your keys and SSH you can (and should) ssh into your blank pi to do the following configurations. After configuring everything, we’ll use lbu to create an apkovl file that we’ll grab via scp and put in the controllers web directory for all clients to grab on boot.
Runtime script
To make sure we’ll later be easily be able to change the settings of all Pis, we’re not going to hard-code the cluster setup script in the image but rather we’ll just grab a script from the controller’s webserver and run it on boot. Alpine Linux uses a service called “local” which runs all scripts in /etc/local.d/ on boot if they have a .start extension.
cat <<EOF > /etc/local.d/setup.start
#!/bin/ash
curl http://10.0.0.1/cluster_setup.sh | ash
EOF

# configure the "local" service to run on boot
rc-update add local
You can check out the default cluster_setup.sh script from the example repo, which will mount the NFS share, an SD card (if available), install and configure docker to join the controller’s docker swarm (you’ll need to update the SWARM_TOKEN variable with the real one).
You can go wild with this script even use local or ISCSI disks. This script will be run on every boot so you can experiment with it very easily.
Wrap it up
While still connected to the freshly booted Pi you’ll next want to package all your changes up in the apkovl file.
## on the setup pi

# we'll save it in the root so we can easily grab it via the controller later
lbu pkg /root/alpine.apkovl.tar.gz
Now all changes we have made like starting services on boot, creating the setup script, etc will be preserved in the alpine.apkovl.tar.gz file.
If you didn’t add the SSH keys during the alpine-setup run, now would be the time to add your SSH keys so you can connect passwordless to the future compute nodes.
Make sure your keys are present in the ~/.ssh/authorized_keys file. If not, add them. And also add the SSH key of the controller so you can grab the apkovl file.
Ship it to the controller
From the controller you want to grab that new alpine.apkovl.tar.gz off the Pi you were working on.
## on the controller

# grab the file from the setup pi and store it in the web folder
scp 10.0.0.2:/root/alpine.apkovl.tar.gz /srv/cluster/web/.
That was it! Now you can boot as many Pis as you want and they will all share the compute load.
In the future if you want to make changes to the default boot image you can just ssh into one of the compute nodes, make your changes and run the lbu pkg /root/alpine.apkovl.tar.gz again and put it in the web folder of the controller.
Oh BTW did I mention this blog is now hosted on my NanoCluster?
What about zero downtime deployments?
Oh right I forgot to talk about the best part of this system. You can create your application stack files in a way so you’ll have zero downtime while updating the app.
If you deploy your app with two or more replications and configure paralleism right, you can push updates to your hosted apps without them dropping a single connection.
Take for example this docker stack yml that I’m using for hosting this blog:
services:
web:
image: mylocalregistry/blog:latest

ports:
- target: 80
published: 8084
protocol: tcp
mode: ingress        # Swarm VIP load-balancing across replicas
healthcheck:
test: ["CMD-SHELL", "curl -fsS http://localhost || exit 1"]
interval: 10s
timeout: 3s
retries: 6
start_period: 20s
deploy:
replicas: 2            # >=2 for real zero-downtime
update_config:
parallelism: 1       # update one task at a time
order: start-first   # add new ready task before removing an old one
delay: 0s
monitor: 30s
max_failure_ratio: 0.0
failure_action: rollback
restart_policy:
condition: on-failure
placement:
constraints:
- node.role == worker
Serveral things of note here:
- Placing them only on “workers” so I make sure to keep the controller clean.
- Having 2 replicas with parallism set to 1 and “start-first” order. This ensures the updated container is up and handling connections before the old version is removed.
- The healthcheck makes sure the server is already serving the content and not still in a booting phase.

Comment using SSH! Info
ssh dockerswarmcluster@ssh.blog.haschek.at
Comments
Get new posts by email
(~ one email every couple of months & no spam)