#rust #rustlang #postgresql #database #realtimeapp
📄 Introduction
Behind every smart app is a smarter database — one that doesn’t just store data, but keeps it structured, scalable, and r…
#rust #rustlang #postgresql #database #realtimeapp
📄 Introduction
Behind every smart app is a smarter database — one that doesn’t just store data, but keeps it structured, scalable, and ready to evolve.
This guide is part of my Teacher Assistant App series, where we move from CSV-based storage to a full PostgreSQL backend built with Rust.
In Level 1 and Level 2, focuses on designing intuitive interfaces and managing student data through Rust and CSV files. But as the app grew, so did its needs — multiple teachers, real-time updates, and complex relationships required a true database engine.
Enter PostgreSQL — a powerful, open-source system known for stability and relational depth. In this part of Level 3, we’ll set up PostgreSQL, create a secure user role, and design the core tables that define the Teacher Assistant App — teachers, logins, classes, and students.
By the end of this guide, you’ll have a fully structured academic database that’s clean, connected, and ready for automation. In the next part, we’ll make this structure think for itself by adding triggers that automatically calculate attendance, grades, and reports.
Let’s begin by installing PostgreSQL and setting up our environment — the foundation that powers everything we’ll build next.
💡 Setup and Verifying PostgreSQL
Before we can design our database or connect it to Rust, we first need to set up PostgreSQL locally. Let’s get our system ready.
🛠️ PostgreSQL Installation
The images below walk through each stage — from installation to successful connection.
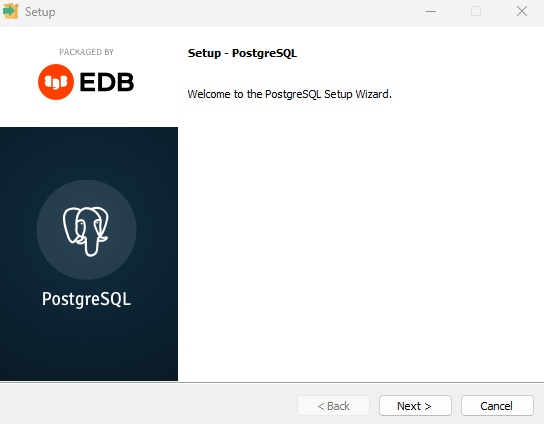
Click the arrows to navigate through installation steps.
Note:
- The images above show only the key steps: setting your PostgreSQL password, confirming the default port (5432) and successful installation of PostgreSQL.
- In Password dialogbox, PostgreSQL asks for a password. This is the admin (superuser) password you’ll use whenever you log in to psql or connect from your app.
Once PostgreSQL is installed, the next step is to verify that it’s running correctly — so we know our setup is stable before creating databases and tables.
✔️ Verifying PostgreSQL
-
Launch SQL Shell(psql) prompt from the Start Menu (on Windows).
-
To accept the default values, just press Enter when prompted for:
-
Server
localhost -
Database
postgres -
Port
5432 -
Username
postgres -
When prompted, type the Password - created during the installation process (note: it is invisible).
-
Once the PostgreSQL version and the prompt
postgres=#appear, your setup is complete — the database is now running locally and ready to create your first tables.
Let’s quickly review a few PostgreSQL shell commands you’ll use often to navigate and verify your database.
💡 PostgreSQL Quick Commands
| Command | Description |
|---|---|
\l | List all available databases |
\c <database_name> | Connect to a specific database |
\dt | List all tables in the current database |
\d <table_name> | Describe table structure |
\d+ <table_name> | Describe table structure with extra details |
q | Exit long output view |
\q | Quit PostgreSQL shell |
\s | Show command history |
\conninfo | Display current connection information |
Tip: Use \dt and \d table_name often to verify that your tables were created correctly.
Screenshot: Image that displays psql version and its prompt.
Click the image to view full size
With PostgreSQL successfully verified, our setup is now complete for local use. If you’d like to access your database from other devices on your network — say, another computer or a future frontend — you can enable LAN access as an optional step.
🌐 Optional: Enable LAN Access
-
If you’d like PostgreSQL to be accessible from other devices on your network:
-
Ensure postgresql.conf file contains
listen_addresses = '*'. -
In pg_hba.conf file, add
host all all 0.0.0.0/0 md5.
⚠️ Use this only on trusted networks, as it exposes your database to LAN connections.
Screenshot: Both configuration files with the added lines highlighted
Click the image to view full size
Click the image to view full size
With PostgreSQL installed and running seamlessly, it’s time to bring our Level 3 — Teacher Assistant database to life. Let’s move from setup to structure, and start designing the schema — the blueprint that shapes how every piece of data in our app connects and interacts.
🧩 Database Schema
A well-structured database is the backbone of every intelligent application — it keeps data consistent, scalable, and instantly accessible.
In this part of Level 3, we’ll design the PostgreSQL schema that powers the Teacher Assistant App, transforming it into a dynamic, multi-teacher system capable of managing students, subjects, attendance, grades, and performance reports.
Each table in our schema represents a real-world entity — from teachers and classes to attendance and grades — all interlinked through relationships that ensure data integrity. This foundation prepares our database for the next stage, where we’ll add automation through triggers and integrate it with the Rust + egui frontend for a complete, classroom management experience.
🔖 Database Overview
Here’s a quick overview of the complete database schema for the Teacher Assistant App before we start creating each table.
| Table Name | Purpose / Description |
|---|---|
| teachers | Stores teacher details such as staff ID, name, qualification, contact info, and assigned subjects. |
| login | Handles authentication for multiple teachers using teacher_id and password hash. |
| classes | Defines each class and section, and maps them to their assigned teacher. |
| students | Maintains student information including roll number, name, class, section, and cumulative percentages. |
| subjects | Lists subjects offered (up to five), with references to the teacher and class. |
| attendance | Tracks daily attendance records for each student and updates overall attendance automatically via triggers. |
| grades | Stores marks for each subject and updates the student’s overall grade percentage through triggers. |
| reports | Generates and updates a summarized report containing overall attendance and grade percentages per student. |
Note:
- This post covers the creation of the Teachers, Login, Classes, and Students tables — the core foundation of our database.
- The remaining tables — Subjects, Attendance, Grades, and Reports — will be explored in the next part of Level 3, where we’ll add triggers and automation to bring the database to life.
🧱 Creating Database and Role
Before defining our tables, we need a dedicated database and a user role that will interact with it. This ensures proper access control and keeps our setup clean as we scale toward multi-teacher logins.
Continue after verifying installation, create a database and connect to it
CREATE DATABASE teacher_assistant;        -- Create a new database
\c teacher_assistant                      -- Connect to the newly created database

CREATE ROLE teacher_user WITH ENCRYPTED PASSWORD 'password123';   -- Create a new PostgreSQL role (user)
GRANT ALL PRIVILEGES ON DATABASE teacher_assistant TO teacher_user; -- Grant privileges to the new user
Explanation:
CREATE DATABASEinitializes a new workspace for your app.\c teacher_assistantconnects you to it.CREATE ROLEcreates a separate user (for teachers/app access).GRANTensures the new role has permissions to read/write inside this database.
Screenshot: Creating and connecting to the database
Click the image to view full size
With our database created and user role configured, it’s time to start building the structure that will store and organize all our data. We’ll begin with the Teachers Table, which forms the foundation for every other relationship in the system.
🧑🏫 Teachers Table
Connect to the teacher_assistant database (if not already connected), and create the table using:
1️⃣ Create the Teachers Table
CREATE TABLE teachers (
teacher_id SERIAL PRIMARY KEY,              -- Auto-generated unique ID
staff_id VARCHAR(10) UNIQUE NOT NULL,       -- Unique staff identifier (e.g., T1001)
staff_name VARCHAR(50) NOT NULL,            -- Teacher's full name
qualification VARCHAR(100),                 -- Academic qualification
subjects VARCHAR(100),                      -- Subject handled
contact VARCHAR(15),                        -- Contact number
email VARCHAR(100) UNIQUE                   -- Email address
);
💡 Note:
teacher_idacts as the primary key and is auto-generated by PostgreSQL.
staff_idis a manually assigned staff/employee code — we’ll use this field to link each teacher with their login credentials in the next table.The subjects column will help identify which subjects each teacher handles (useful when assigning classes later).
2️⃣ Inserting values
After creating the table, insert a few sample teachers:
INSERT INTO teachers (staff_id, staff_name, qualification, subjects, contact, email)
VALUES
('T1001', 'Anita', 'MSc Physics', 'Physics', '9876543210', 'anita@school.com'),
('T1002', 'Ravi', 'MSc Maths', 'Mathematics', '9876501234', 'ravi@school.com'),
('T1003', 'Priya', 'MA English', 'English', '9876512345', 'priya@school.com');
3️⃣ Verifying the data
Verify the inserted records:
SELECT * FROM teachers;
Screenshot: Creating teacher table, inserting and viewing the values.
Click the image to view full size
With the Teachers table complete, we now have the core identities defined. The next step is to let these teachers access the system — by creating a Login Table that securely manages their credentials and connects them to their records.
🔐 Login Table
The Login table manages authentication for all teachers. It stores their login credentials and links each login directly to the teacher’s record in the teachers table through teacher_id. This setup allows multiple teachers to sign in independently while maintaining a consistent link to their classes and subjects.
1️⃣ Create the Login Table
CREATE TABLE login (
login_id SERIAL PRIMARY KEY,                      -- Auto-generated unique login ID
teacher_id INT REFERENCES teachers(teacher_id) ON DELETE CASCADE,  -- Link to teachers table
username VARCHAR(50) UNIQUE NOT NULL,             -- Unique username for each teacher
password_hash VARCHAR(255) NOT NULL               -- Hashed password for secure login
);
💡 Note:
teacher_idis a foreign key referencing the teachers table. If a teacher is deleted, their login entry is automatically removed (ON DELETE CASCADE).
password_hashwill later store encrypted passwords when integrated with the Rust frontend.Using
teacher_idensures stronger relational consistency across tables (teachers → login → classes).
2️⃣ Inserting values
After creating the table, insert login credentials for each teacher:
For now, we’ll use simple placeholder passwords (pass123) for all teachers, just to test the relationship between the tables.
INSERT INTO login (teacher_id, username, password_hash)
VALUES
(1, 'anita_t', 'pass123'),
(2, 'ravi_m', 'pass123'),
(3, 'priya_e', 'pass123');
Note:
- The
password_hashvalues here are plain text ('pass123') only for demonstration purposes. - In a real-world application, passwords should be encrypted using a hashing algorithm such as
bcryptorargon2before storing them in the database. - We’ll implement proper hashing when integrating PostgreSQL with the Rust frontend in the upcoming part of this series.
3️⃣ Verifying the data
Verify that the data is linked correctly to the teachers:
SELECT * FROM login;
Screenshot: Creating login table, inserting and viewing the values.
Click the image to view full size
Now that each teacher can log in with unique credentials, it’s time to assign them their responsibilities within the app. Let’s create the Classes Table, which maps teachers to specific classes and sections.
🏫 Classes Table
The Classes table defines each class and section in the school and maps them to their assigned teacher. This helps the app organize which teacher handles which class — making it easier to manage students, attendance, and grades in later tables.
1️⃣ Create the Classes Table
CREATE TABLE classes (
class_id SERIAL PRIMARY KEY,                      -- Auto-generated unique ID for each class
class_name VARCHAR(10) NOT NULL,                  -- Class name (e.g., 10, 12, etc.)
section VARCHAR(5) NOT NULL,                      -- Section identifier (e.g., A, B, C)
teacher_id INT REFERENCES teachers(teacher_id) ON DELETE SET NULL -- Assigns class to a teacher
);
💡 Note:
teacher_idis a foreign key referencing the teachers table.If a teacher is removed, the teacher_id here becomes NULL instead of deleting the class (ON DELETE SET NULL). This ensures that class records remain intact even if a teacher leaves.
class_nameand section together will uniquely identify a specific class-section combo.
2️⃣ Inserting values
Insert some sample classes and assign them to teachers:
INSERT INTO classes (class_name, section, teacher_id)
VALUES
('10', 'A', 1),     -- Anita teaches 10 A
('10', 'B', 2),     -- Ravi teaches 10 B
Note:
- For demonstration purposes, this setup includes 3 teachers and 2 classes (10 A and 10 B).
- In the next section, we’ll add 8 students — 4 each for Class 10 A and Class 10 B — to illustrate how student data connects with teachers and classes.
3️⃣ Verifying the data
Verify the data with:
SELECT * FROM classes;
Screenshot: Creating classes table, inserting and viewing the values.
Click the image to view full size
With classes and sections in place, our database now knows who teaches what. The next step is to add the Students Table, where we’ll store details for every student enrolled in each class — the core of our academic data.
👩🎓 Students Table
The Students table stores each student’s information — their roll number, name, class, and section. It also includes columns for attendance and grade percentages, which will be automatically updated later through triggers. Each student is linked to a specific class using a foreign key reference (class_id).
1️⃣ Create the Students Table
CREATE TABLE students (
student_id SERIAL PRIMARY KEY,                          -- Auto-generated unique ID
roll_no INT NOT NULL,                                   -- Student's roll number within class
student_name VARCHAR(50) NOT NULL,                      -- Student's name
class_id INT REFERENCES classes(class_id) ON DELETE CASCADE, -- Link to class table
attendance_percentage NUMERIC(5,2) DEFAULT 0.00,        -- Auto-updated via trigger later
overall_grade_percentage NUMERIC(5,2) DEFAULT 0.00      -- Auto-updated via trigger later
);
💡 Note:
class_idconnects each student to their class.
attendance_percentageandoverall_grade_percentagewill be updated automatically when attendance and grades are recorded (in later sections).
2️⃣ Inserting values
Now, insert 8 students total (4 in 10 A and 4 in 10 B):
INSERT INTO students (roll_no, student_name, class_id)
VALUES
-- Class 10 A (class_id = 1)
(10A01, 'Rahul', 1),(10A02, 'Sneha', 1),(10A03, 'Arjun', 1),(10A04, 'Meera', 1),

-- Class 10 B (class_id = 2)
(10B01, 'Karthik', 2),(10B02, 'Divya', 2),(10B03, 'Ajay', 2),(10B04, 'Lakshmi', 2);
3️⃣ Verifying the data
Check if all entries were added correctly:
SELECT * FROM students;
Screenshot: Creating students table, inserting and viewing the values.
Click the image to view full size
With the Students Table ready, we’ve now connected classes and students together — completing the backbone of our academic structure.
🎓 Wrapping Up — The Foundation is Set
We’ve now built the backbone of the Teacher Assistant App’s database — complete with teachers, logins, classes, and students, all neatly connected inside PostgreSQL.
-
Each table now forms a vital link:
-
Teachers define who instructs,
-
Classes organize how learning is structured, and
-
Students bring our data model to life.
This structured base ensures our next steps can focus entirely on automation — letting the database update attendance, grades, and reports automatically through PostgreSQL triggers.
🔜 Next in Level 3 — Making the Database Think
In the upcoming part of Level 3, we’ll:
- Add Subjects, Attendance, Grades, and Reports tables
- Create smart triggers that auto-update student performance
- Build a Report View that gives teachers live insights into every class
By the end, you’ll have a self-updating academic database that runs intelligently in real time — ready to connect with our Rust + egui frontend.
Stay tuned on Techn0tz — next, we’ll make this database come alive with real-time updates and intelligent automation.
**Enjoyed this post? Rate it! ** ★ ★ ★ ★ ★