Setting up Azure Virtual Desktop usually means dealing with domain controllers, complex hybrid identity setups, and a lot of moving parts that can break. But what if you could skip all that complexity and build a modern AVD environment that runs entirely in the cloud?
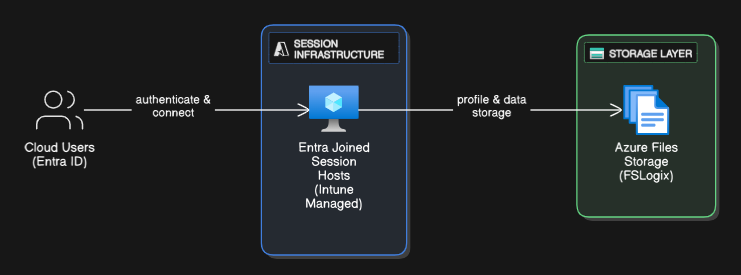
Microsoft now supports Entra ID-joined session hosts managed through Intune, with FSLogix profiles that work seamlessly with cloud-only users. No domain controllers required, no hybrid sync headaches, just clean cloud architecture that actually works.
This approach is perfect if you’re building greenfield environments, migrating from on-premises VDI solutions, or simply want to embrace a cloud-first strategy without compromising on functionality. Your users get the same seamless experience they expect, while knowing the…
Setting up Azure Virtual Desktop usually means dealing with domain controllers, complex hybrid identity setups, and a lot of moving parts that can break. But what if you could skip all that complexity and build a modern AVD environment that runs entirely in the cloud?
Microsoft now supports Entra ID-joined session hosts managed through Intune, with FSLogix profiles that work seamlessly with cloud-only users. No domain controllers required, no hybrid sync headaches, just clean cloud architecture that actually works.
This approach is perfect if you’re building greenfield environments, migrating from on-premises VDI solutions, or simply want to embrace a cloud-first strategy without compromising on functionality. Your users get the same seamless experience they expect, while knowing there are fewer moving parts to break
What You’ll Learn in This Guide:
- Deploy AVD without any on-premises dependencies
- Configure Intune for automated session host management
- Set up FSLogix with cloud-only user authentication
- Implement single sign-on for seamless user experience
Traditional AVD deployments require:
- On-premises Active Directory or Azure AD Domain Services
- Hybrid identity synchronization
- Additional infrastructure to maintain
- Complex networking and domain join processes
The cloud-native approach eliminates these dependencies with:
- Pure Entra ID joined session hosts
- Intune handles all device management
- FSLogix works with Azure Files using Kerberos authentication
- Single sign-on experience for users
Architecture Overview:
Here are some of the key benefits of doing this:
- Reduced infrastructure complexity
- Faster deployment and scaling
- Simplified user management
- Lower operational overhead
Prerequisites and Setup Information
Before we dive into the technical implementation, let’s make sure you have everything needed for a successful deployment
Licensing Requirements
You’ll need these for a complete setup:
- For Azure Virtual Desktop access, you’ll need one of the following license: Microsoft 365 E3/E5/F3, Windows E3/E5, M365 Business Premium or you can enroll for Per-User access pricing.
- Microsoft Intune Enrollment Enabled and Domain Connected for the MDM functionality
- Active Azure subscription (with VM quota)
Optional but recommended:
- Entra ID P1 (for dynamic groups and conditional access)
Creating the AVD Network Infrastructure
The foundation of your AVD environment starts with proper network configuration. This provides the secure connectivity framework for your session hosts.
Step 1: Create Virtual Network
At this point, you have your foundational network component ready to host the virtual machines for AVD.
Using Azure CLI for Create the Resource Group and the Virtual Network (Optional)
If you prefer to use Azure CLI instead for faster deployment and repetitive setup for testing, you can follow the instructions below and run the commands in your terminal while ensuring that you are logged into your desired Azure account with right subscription context.
If you are new to Azure CLI, considering reading this article to understand how to install and setup your workstation for Azure CLI use for automated deployment.
- Create the resource group using the following Azure CLI command:
az group create --name rg-avd-prod-001 --location canadacentral
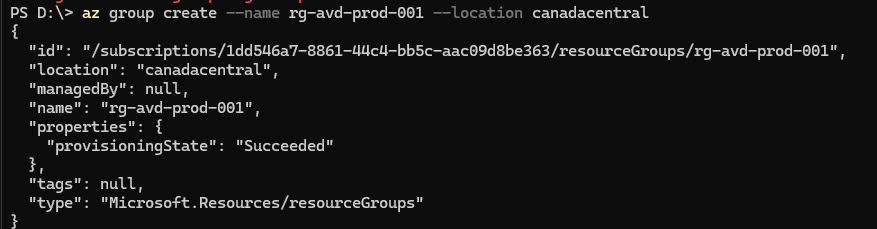
If you are using an existing resource group, you can skip over this command and continue with the following instructions.
- Use the following Azure CLI command to setup your virtual network with desired values for the resource group and location:
az network vnet create --resource-group rg-avd-prod-001 --location canadacentral --name vnet-avd-prod-001 --address-prefix 10.0.0.0/16 --subnet-name snet-avd-sessionhosts --subnet-prefix 10.0.1.0/24
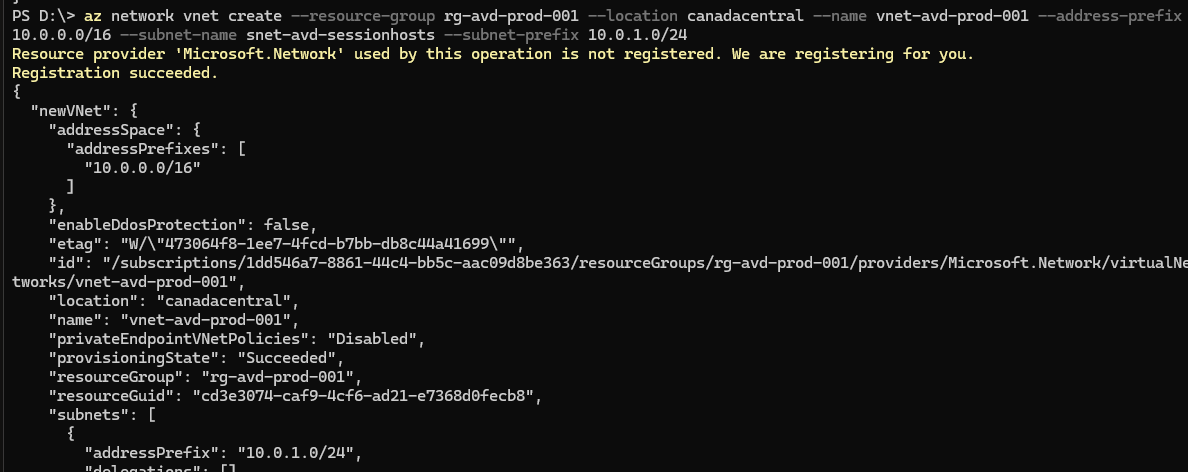
It is important to note that you may need to update/adjust the values for resource group and region if you choose to setup the environment matching your desired configuration.
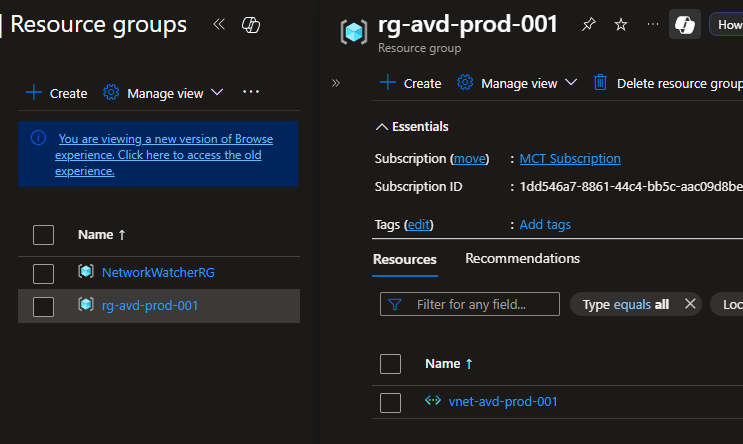
- After running these command, you will see the virtual network inside the newly created resource group at this point now.
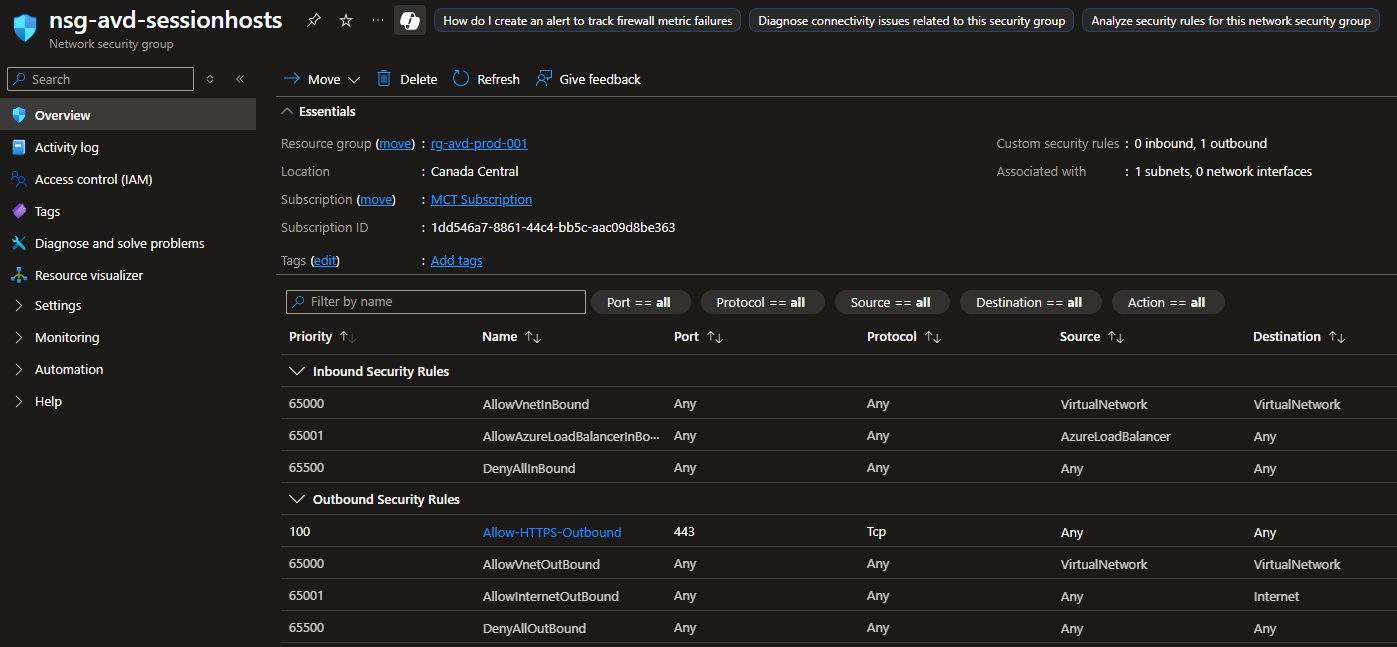
Step 2: Configure Network Security Group
The Network Security Group (NSG) provides an additional layer of security to your environment by defining the traffic controls and rules to ensure you don’t leave your AVD environment open for anyone to access. It is recommended to have an NSG level control over your subnet instead of individual VMs, however for this demo you can skip the NSG setup if you wish to do so.
To setup the NSG, follow the instructions below and create the essential outbound rules to secure your network and the resources.
Using Azure CLI to Create NSG (Optional)
If you are more comfortable using Azure CLI to set this up, use the following commands to create the necessary settings and the resource itself.
az network nsg create --resource-group rg-avd-prod-001 --name nsg-avd-sessionhosts

az network nsg rule create --resource-group rg-avd-prod-001 --nsg-name nsg-avd-sessionhosts --name Allow-HTTPS-Outbound --direction Outbound --priority 100 --destination-port-ranges 443 --protocol Tcp
az network nsg rule create --resource-group rg-avd-prod-001 --nsg-name nsg-avd-sessionhosts --name Allow-HTTP-Outbound --direction Outbound --priority 100 --destination-port-ranges 80 --protocol Tcp
az network nsg rule create --resource-group rg-avd-prod-001 --nsg-name nsg-avd-sessionhosts --name Allow-SMB-Outbound --direction Outbound --priority 100 --destination-port-ranges 445 --protocol Tcp

az network vnet subnet update --resource-group rg-avd-prod-001 --vnet-name vnet-avd-prod-001 --name snet-avd-sessionhosts --network-security-group nsg-avd-sessionhosts
Configuring Azure Premium Files Share for FSLogix
Now we are going to setup the user profile settings to enable FSLogix remote profile for the AVD environment. It is important to do this now so that the users can start to use this on the first login. However, you can optionally configure this anytime later as well.
Step 3: Create Premium Storage Account
Follow the steps below to create a premium file share enabled storage account where the user profiles will hosted.
Step 4: Create File Share and Enable Kerberos
Let’s create the file share and enable the Entra ID authentication for the storage file share to use with AVD Session hosts.
Important: The Kerberos authentication must be enabled at the file share level, not just the storage account level. This allows Entra ID users to authenticate directly without any hybrid infrastructure!
Deploying AVD Host Pool with Intune Integration
This is where the cloud-native magic happens. You will be creating session hosts with Entra ID login and enroll the machines to Intune directly without any additional setup.
Step 5: Create Host Pool using Azure Portal
-
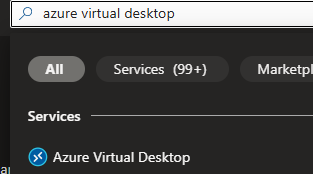
Navigate to Azure Virtual Desktop by searching it in Azure portal search bar:
-
Click on Create a host pool:
-
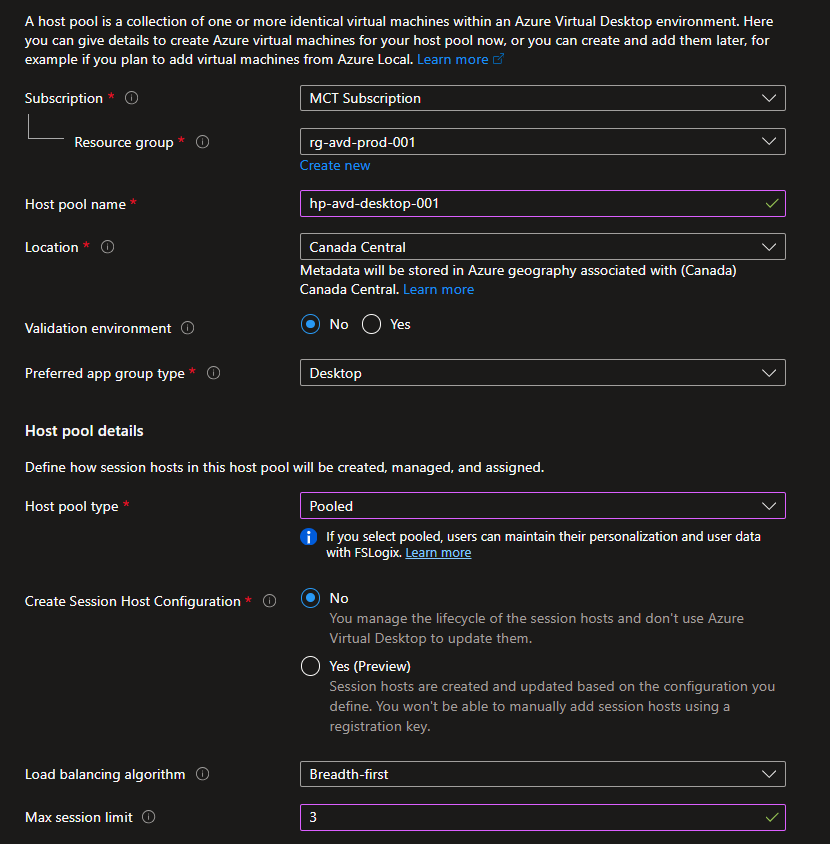
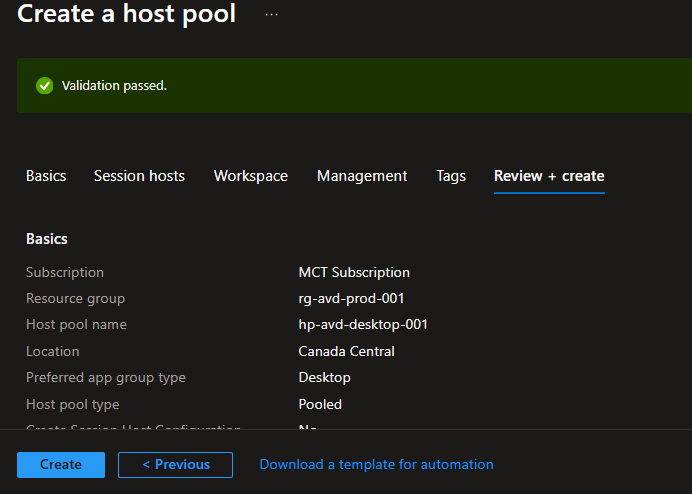
Fill out the following on the Basics tab of Create a host pool and click Next: Session host:
-
Resource group:
rg-avd-prod-001 -
Host pool name:
hp-avd-desktop-001 -
Location: Select Canada Central
-
Host pool type: Select Pooled
-
Max session limit: 10
-
Load balancing algorithm: Breadth-first
-
Max Session limit: Enter 3
-
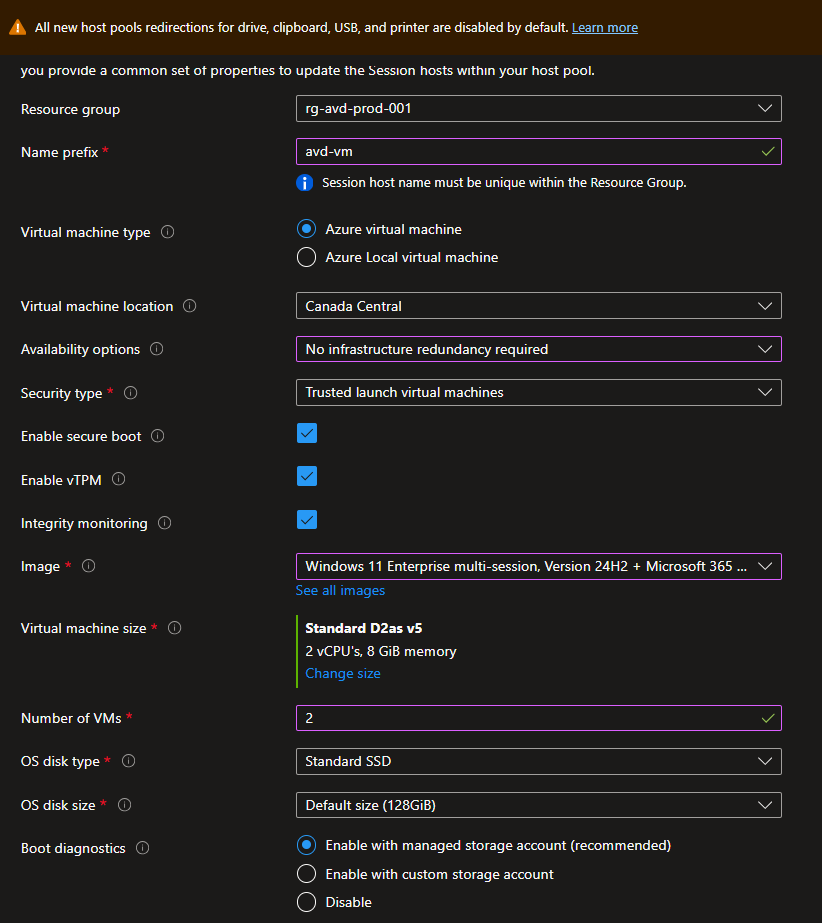
Select the Yes to add virtual machines on the Session hosts tab and fill out the following details for the first section:
-
Add Azure virtual machines: Yes
-
Resource group:
rg-avd-prod-001 -
Name prefix:
avd-vm -
Availability options: Choose No infrastructure redundancy required for this demo
-
Image: Windows 11 Enterprise multi-session + Microsoft 365 Apps (feel free to pick any version)
-
Virtual machine size: Select Standard D2as v5 to keep the cost to minimum
-
Number of VMs: 2
-
OS disk type: Premium SSD
-
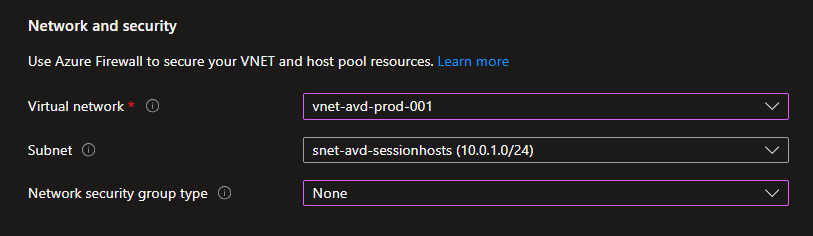
Scroll down to Network and Security and fill out the following information**:**
-
Virtual network:
vnet-avd-prod-001 -
Subnet:
snet-avd-sessionhosts -
Network security group: Select None
-
Scroll down to Domain to Join section and select the following:
-
Select which directory you would like to join: Microsoft Entra ID
-
Enroll VM with Intune: Yes

-
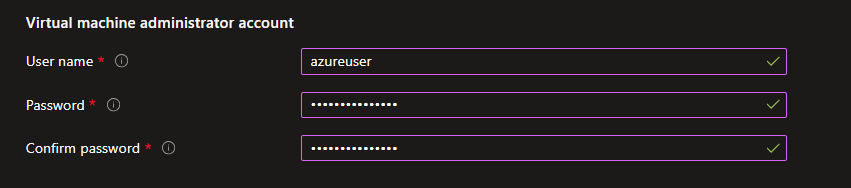
Finally, enter an admin Username and Password of your choice for the sessions hosts and click Next: Workspaces:
-
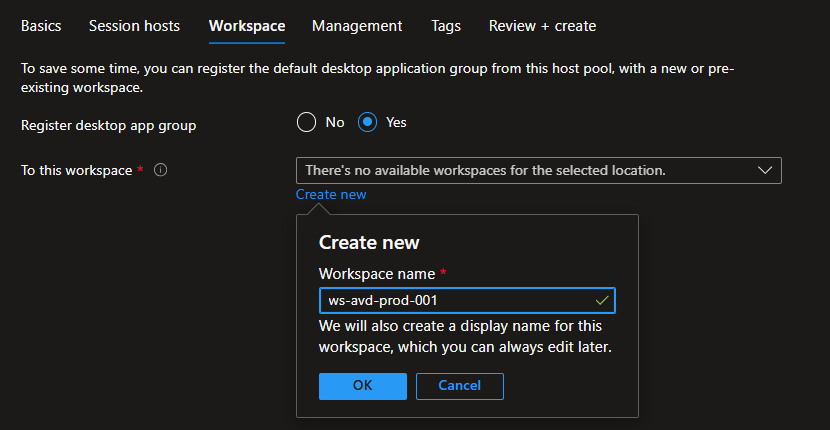
On the Workspace tab, select Yes for Register desktop app group and click Create new followed by entering the name for workspace and click OK:
-
Register desktop app group: Yes
-
Workspace name:
ws-avd-prod-001
- Skip through rest of the tabs and click Create on the Review + Create tab:
Step 6: Configure RDP Single Sign-On
This critical step enables seamless authentication for Entra ID users:
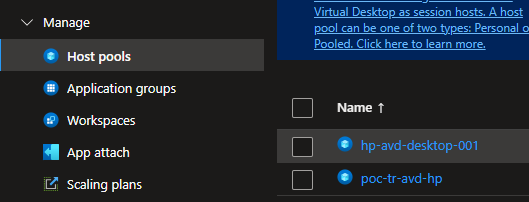
- Once the resources are deployed, go to your host pool and select the host pool from the list:
- Click RDP Properties and Advanced tab:

- Add custom property and click Save:
enablerdsaadauth:i:1
Note: Without this configuration, users cannot access the virtual desktop pool.
Issues with Joining Domain with Azure AD
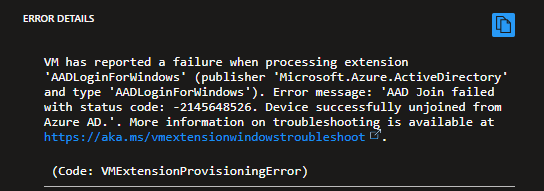
If you encounter the following error during the host pool creating, follow the steps below to fix the error and return back to host pool view to add the host pools again. If not, you can skip over this step.
{"code":"DeploymentFailed","message":"At least one resource deployment operation failed. Please list deployment operations for details. Please see <https://aka.ms/arm-deployment-operations> for usage details.","details":[{"code":"VMExtensionProvisioningError","message":"VM has reported a failure when processing extension 'AADLoginForWindows' (publisher 'Microsoft.Azure.ActiveDirectory' and type 'AADLoginForWindows'). Error message: 'AAD Join failed with status code: -2145648526. Device successfully unjoined from Azure AD.'. More information on troubleshooting is available at <https://aka.ms/vmextensionwindowstroubleshoot>. "},{"code":"VMExtensionProvisioningError","message":"VM has reported a failure when processing extension 'AADLoginForWindows' (publisher 'Microsoft.Azure.ActiveDirectory' and type 'AADLoginForWindows'). Error message: 'AAD Join failed with status code: -2145648526. Device successfully unjoined from Azure AD.'. More information on troubleshooting is available at <https://aka.ms/vmextensionwindowstroubleshoot>. "}]}
Access Control and User Management
Azure Virtual Desktop with Microsoft Entra joined session hosts requires a dual-layer access control model. Unlike traditional domain-joined environments where users authenticate once to Active Directory, cloud-native AVD requires two separate permission sets:
- Virtual Machine Login Roles: These Azure RBAC roles control whether users can authenticate and sign into the session hosts themselves
- Application Group Access: This determines which AVD resources (desktops/apps) users can see and launch from their workspace
Without both permission layers configured correctly, users will either be unable to sign into session hosts or won’t see any published resources in their AVD workspace.
Step 7: Create User Groups for AVD Users
You’ll need some way to filter and scope the users to enable access to AVD which in this case will be using a Entra Groups.
-
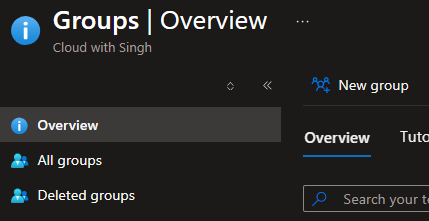
Navigate to Microsoft Entra ID → Groups → New group:
-
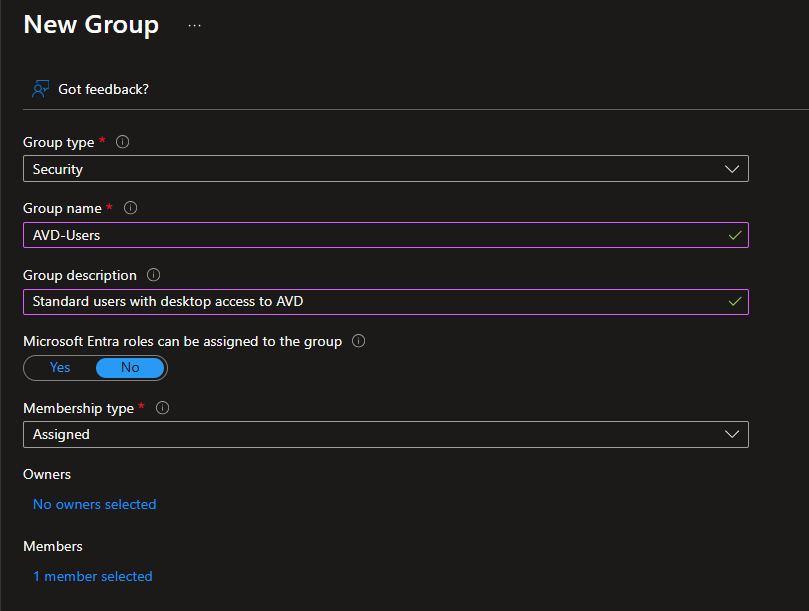
Create standard user group using the following settings:
-
Group type: Security
-
Group name:
AVD-Users -
Group description:
Standard users with desktop access to AVD -
Membership type: Assigned
-
Members: Add your regular AVD users
Step 8: Create Dynamic Device Group for Session Hosts
Dynamic device groups automatically capture AVD session hosts as they’re deployed, ensuring all Intune policies (FSLogix, security settings, etc.) apply consistently without manual group management.
Note: Microsoft Entra ID P1 license is required for this step. If unavailable, use an assigned group instead.
-
Navigate to Microsoft Entra ID → Groups → + New group
-
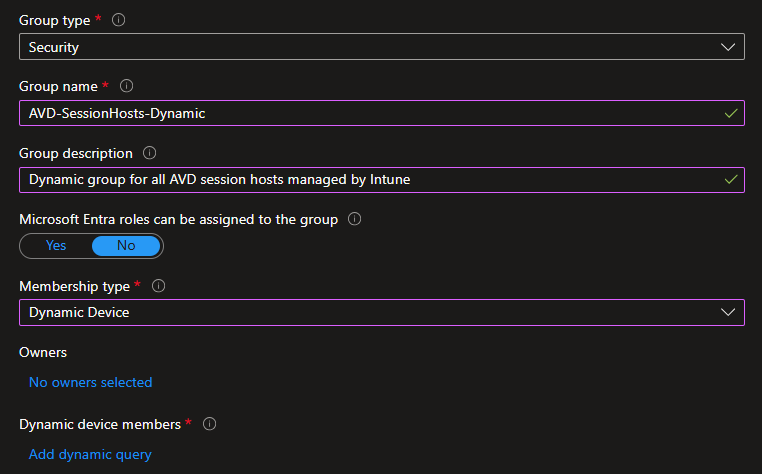
Configure a dynamic group using the following settings:
-
Group type: Security
-
Group name:
AVD-SessionHosts-Dynamic -
Group description:
Dynamic group for all AVD session hosts managed by Intune -
Membership type: Dynamic Device
-
On Dynamic device members, click Add dynamic query and set the following rule and save when done:
-
Property: Select displayName
-
Operator: Select Starts With
-
Value: Type avd-vm (Matches your session host naming pattern)
-
You can optionally validate the rule by doing the following:
-
Click Validate Rules tab
-
Test with existing session host names to confirm matching
Note: The dynamic device group created above will be used in Intune Configuration to scope all FSLogix and security policies to session hosts only.
If you don’t have the P1 license on your tenant, consider creating an assigned security group and add the hosts as they are deployed manually to the group membership.
Step 9: Assign RBAC Permissions for AVD User Login
These Azure RBAC roles are mandatory for Microsoft Entra joined VMs. They control the fundamental ability to authenticate and sign into the session hosts.
Step 10: Configure Application Group Access for AVD Users
VM login roles only allow signing into session hosts but the users also need explicit permission to access AVD published resources (desktops or applications) through application group assignments. You’ll setup the access to the AVD application group now:
Critical Note: Users need both VM login roles and application group access to successfully access AVD. Missing either will result in authentication failures or empty workspaces.
Configuring Intune for FSLogix Management
Now you need to get FSLogix working properly across your session hosts. Since you’re running without traditional Active Directory, there’s no Group Policy to handle this – that’s where Intune comes in.
You’ll configure FSLogix settings through Intune’s Settings Catalog, which pushes the necessary registry configurations to all your session hosts automatically. We’ll also need to set up some custom registry settings that aren’t available in the standard catalog, specifically for handling Azure AD credentials with your cloud-only users. Think of this as giving your session hosts the instructions they need to properly store and retrieve user profiles from Azure Files.
Step 11: Creating FSLogix Configuration Profile
Navigate to your Microsoft Intune admin center and follow the steps below to setup the Intune policy for FSLogix redirect:
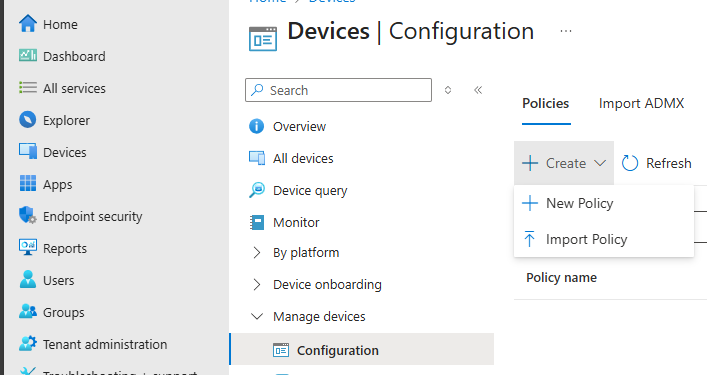
- Navigate to the Devices → Configuration under Manage devices→ + Create → + New Policy:
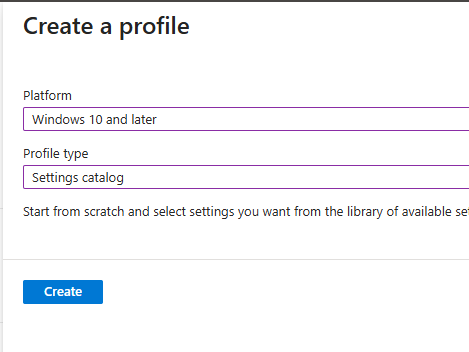
- Select the following on the Create a profile window and click **Create:
**
- Enter the name for the profile:
AVD-FSLogix-Configurationand click Next: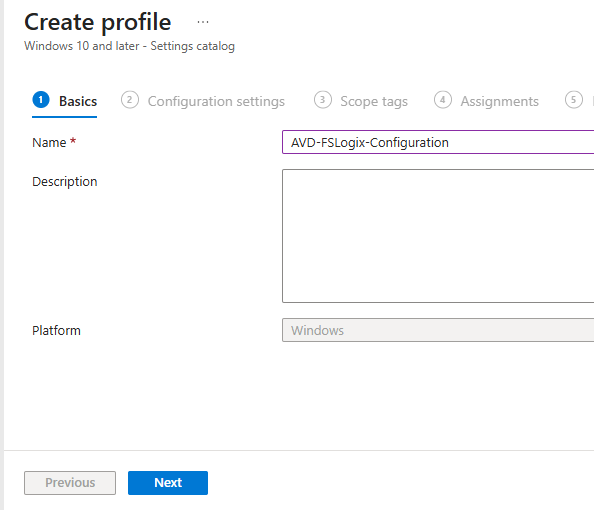
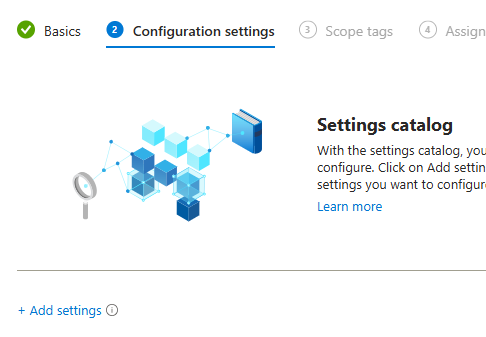
- On the Configuration settings, click Add settings:
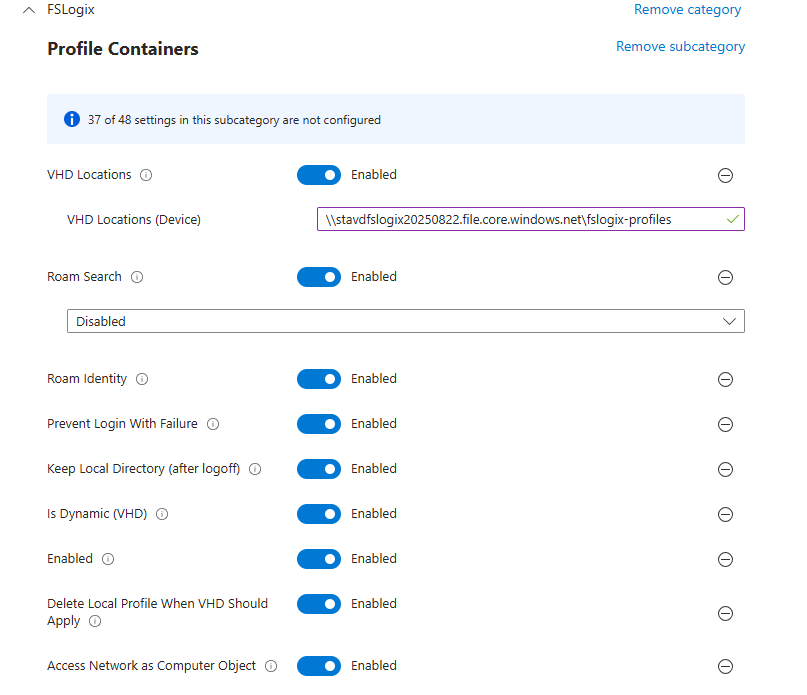
- On the Setting picker tab, search for FSLogix and choose FSLogix Profile Containers. Select the following settings by name and close the popup window. Once done, match the following setting values from the table:
| Setting Name | Value | Description |
|---|---|---|
| Access Network as Computer Object | Enabled | CRITICAL – Allows system account access |
| Delete Local Profile When VHD Should Apply | Enabled | Prevents profile conflicts |
| Enabled | Enabled | REQUIRED – Turns on FSLogix |
| Is Dynamic (VHD) | Enabled | Dynamic container sizing |
| Keep Local Directory (after logoff) | Enabled | Profile persistence |
| Prevent Login With Failure | Enabled | Error handling |
| Roam Identity | Enabled | Identity roaming |
| Roam Search | Disabled | Search index handling |
| VHD Locations | \\\\stavdfslogix001.file.core.windows.net\\fslogix-profiles | Storage location |
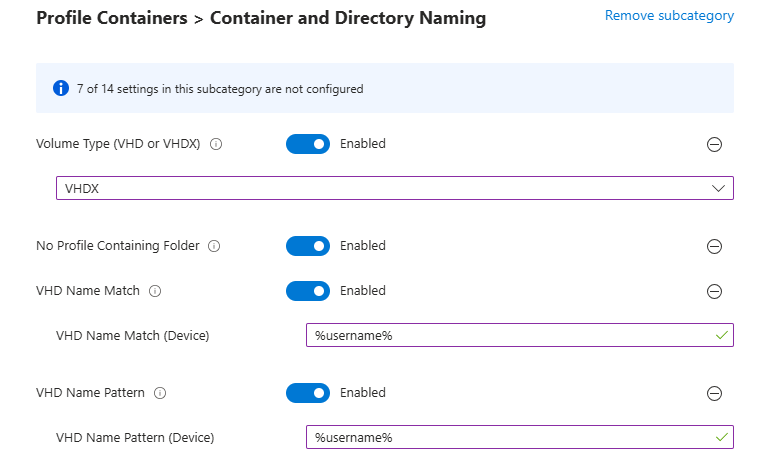
- Click Add Settings again and search for FSLogix, under FSLogix Profile Containers Container and Directory Naming, select and choose the following 4 options and set the values once selected on the settings page:
| Setting Name | Value |
|---|---|
| No Profile Containing Folder | Enabled |
| VHD Name Match | %username% |
| VHD Name Pattern | %username% |
| Volume Type (VHD or VHDX) | VHDX |
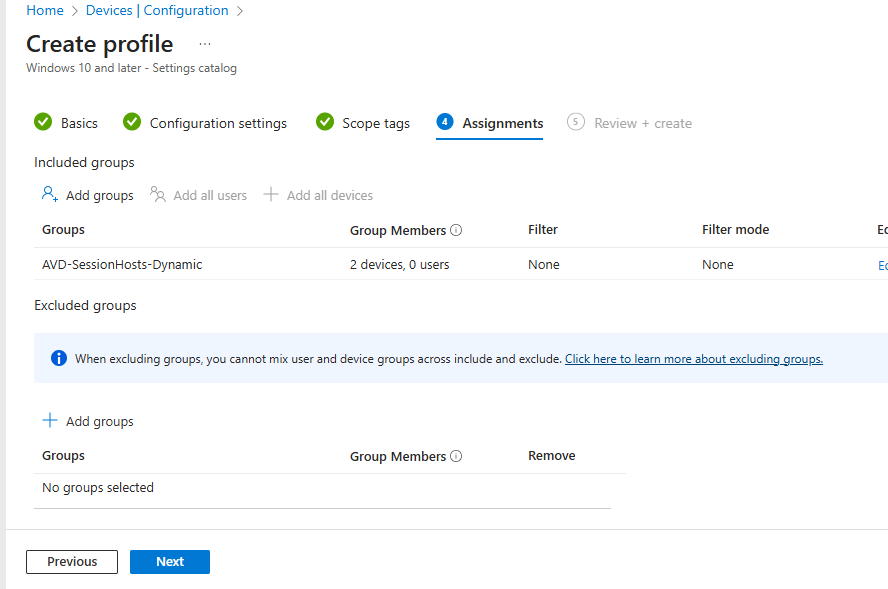
- Continue through scope tags to the Assignments tab, select the Add groups and choose the AVD-SessionHosts-Dynamic for the assignment:
- Finally, click Create on Review + Create tab and complete the policy setup.
Step 12: Configure Azure AD Cloud Kerberos Settings
Click on create policy again to create this policy to enforce and configure Cloud Kerberos with Azure AD Login on the Intune managed devices now.
This setting is critical for Microsoft Entra Kerberos authentication to work properly with roaming profiles.
Accessing Azure Virtual Desktop
Ensure that any user trying to access the AVD must have a valid license assigned.
- Navigate to the following URL in a new tab and login with an account that is part of the AVD-Users group create in the Entra ID:Windows App
- Click Connect on the listed SessionsDesktop:
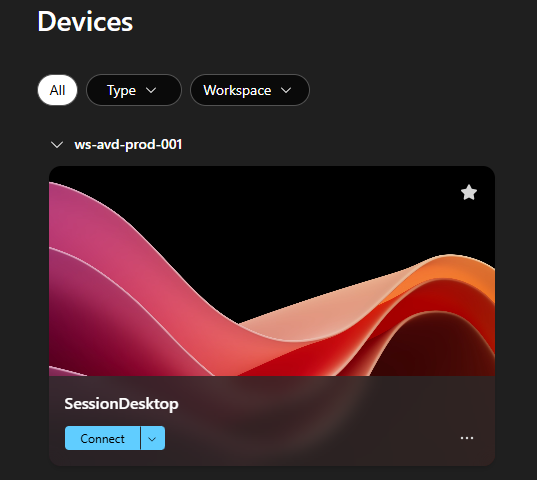
- Sign in to your Microsoft Account if prompted and you will be on the desktop soon.
Conclusion
Building Azure Virtual Desktop with cloud-only users and Intune management eliminates the complexity of traditional VDI while delivering enterprise-grade functionality. This cloud-native approach removes dependencies on domain controllers, simplifies identity management, and provides users with seamless single sign-on experiences.
The key to success lies in proper configuration of critical components: RDP single sign-on settings, FSLogix registry configurations, and appropriate RBAC assignments. Take time to validate each step before moving to production, and use the troubleshooting commands provided to verify your configuration.
By following this guide, you now have a robust foundation for modern virtual desktop infrastructure that scales with your business needs while reducing operational complexity. The total setup time is typically 2-3 hours, but the long-term benefits of simplified management and enhanced user experiences make it a worthwhile investment.
If you like reading this article, consider subscribing to my newsletter and stay tuned for the upcoming articles soon!
Discover more from Parveen Singh
Subscribe to get the latest posts sent to your email.