By Developer
Nov 11, 2025
Getting started with any database technology can be daunting, and nothing is ever as easy as a snap of the fingers. With InfluxDB 3, we’ve made it as painless as possible. If you want to do some testing, development, or exploration, you’ve read the title: you should be up and running in under 10 minutes with very little hassle. This blog walks you through a couple different ways to download and get started with Core, including both quick start and the Docker container, and then guides you through loading data and running queries with the UI and CLI.
Option 1: Install & run the simple download
The fastest way to get started with InfluxDB 3 is to use a provided shell script. You can download and run the…
By Developer
Nov 11, 2025
Getting started with any database technology can be daunting, and nothing is ever as easy as a snap of the fingers. With InfluxDB 3, we’ve made it as painless as possible. If you want to do some testing, development, or exploration, you’ve read the title: you should be up and running in under 10 minutes with very little hassle. This blog walks you through a couple different ways to download and get started with Core, including both quick start and the Docker container, and then guides you through loading data and running queries with the UI and CLI.
Option 1: Install & run the simple download
The fastest way to get started with InfluxDB 3 is to use a provided shell script. You can download and run the install script from the command line:
curl -O https://www.influxdata.com/d/install_influxdb3.sh \
&& sh install_influxdb3.sh
When prompted in your terminal window, enter 2 to select the simple download, and then 1 to select quick start.
Once you’ve done that, you can validate it’s installed with influxdb3 --version, then run the command influxdb3.
If this doesn’t work, the terminal output lists next steps: the first step is to make sure the Influxdb3 command is included in your shell’s configuration file with source. Follow that instruction, and if the file doesn’t exist, run the touch command on that file before rerunning sh install_influxdb3.sh.
The following steps—generating an admin token and writing data—are covered in detail in this blog, so you can skip past the next section (installing with Docker) for more details.
Option 2: Install & run with Docker
Unsurprisingly, the prerequisite for using the Docker image is to have Docker installed. If you’re on a personal computer, it’s recommended to use Docker desktop. If you’re on a Linux server or a remote instance where you’re only interacting via the command line, then you’ll want to use Docker engine. Make sure one of the above is installed on your system.
Once you have Docker installed, open a terminal to download the latest InfluxDB 3 Core Docker image:
docker pull influxdb:3-core
Once the download is complete, you can start the Docker image with the following command:
docker run -it -p 8181:8181 --name influxdb3-container \
--volume ~/.influxdb3_data:/.data --volume ~/.influxdb3_plugins:/plugins
influxdb:3-core \
influxdb3
Note that this command names the container “influxdb3-container,” and we’re still using the built-in Quick Start to start InfluxDB with the simple influxdb3 command.
A note on quick start
Using the quick start and the default configuration options that come with it is the simplest way to get started. This will set your node ID to {hostname}-node, use the file object store, and store data in the ~/.influxdb directory. For production deployments and other circumstances where you want to configure how Influx runs, use the serve command and specify configuration options, including explicitly setting your node ID and object store.
Generate an admin token
Whether you’ve done the quick download or used Docker, you’re now running InfluxDB 3 Core. The next step is to generate an admin token to connect to and authenticate with the InfluxDB server. Open a new terminal window, and…
If you used the quick start, run:
influxdb3 create token --admin
If you used Docker, run:
docker exec -it influxdb3-container influxdb3 create token --admin
This will output a token and an HTTP requests header that can be used to connect to your container. Make sure to save both of these somewhere safe—ideally with password management software of some kind. You can create other types of tokens, but here we’re generating an admin token to keep things simple and ensure we have all permissions for further testing and development.
Connect, load, & query data
With the server running and a token generated to connect to it, the last thing we need to do is actually connect.
Option 1: Explorer UI
For this guide, we use the Explorer UI, which is the simplest way to connect to InfluxDB. The UI is only available via Docker, so if you used the simple download earlier and don’t have Docker installed yet, you’ll need it.
The UI comes in a separate Docker image, so to get started, open a new terminal window and download the latest version from Docker:
docker pull influxdata/influxdb3-ui
Then run the Docker container for Explorer:
docker run \
--name influxdb3-explorer \
--publish 8888:80 \
--publish 8889:8888 \
influxdata/influxdb3-ui \
--mode=admin
Once it’s connected, open your web browser (e.g., Chrome) and enter localhost:8888 into the address bar—this should load the UI:
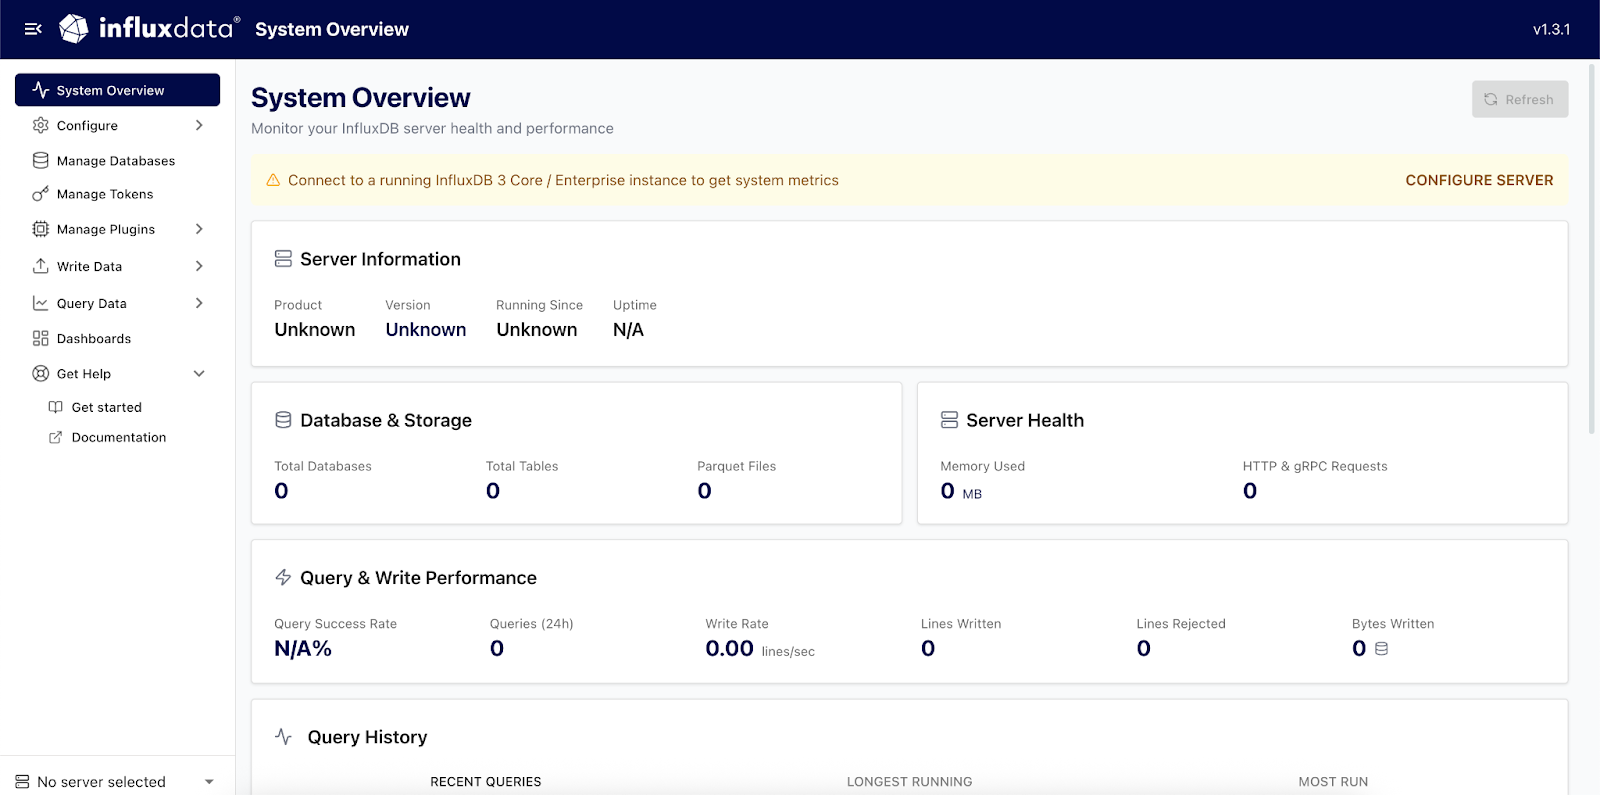 Click on “configure server” towards the top right, then click on “connect your first server.” Enter a name of your choosing for your server (e.g., “Test Server”). Enter either
 localhost:8181 or host.docker.internal:8181 for your server URL, depending on whether you used the simple download or Docker container. Then enter the admin token you generated and copied earlier as your token, which should start with apiv3_. 
Once you fill out all the fields, click “Add Server.” When you navigate back to System Overview in the UI, you should see that you’re connected to the server that you’re running on the machine. Your UI is up and running, so it’s time to write data.
To do so, navigate to the “Write Data” -> “Sample/Dev Data” dropdown on the left menu of the UI. This guide uses the noaa-weather sample dataset, but you can choose other samples or load your own CSV/JSON data. To load a sample dataset, simply click on it, then click “Write Sample Data.” Instructions for loading CSV/JSON data are provided in the UI if you want to use data of your own.
Once data is written, it’s time to query. Navigate to “Query Data” -> “Data Explorer” on the left menu of the UI, select the schema you loaded data into from the dropdown, and then you can start querying. To explore the schema, you can start with something simple, such as querying all records from within the past day:
SELECT * FROM weather
WHERE time >= now() - INTERVAL '1 day';
If you want to get a little more complicated, a query to check locations where weather hasn’t been sunny in the last day might look like:
SELECT location, condition FROM weather
WHERE
time >= now() - INTERVAL '1 day'
AND condition "" 'sunny'
ORDER BY location;
Just like that, you’ve started up InfluxDB 3 Core, loaded data, and queried that data: 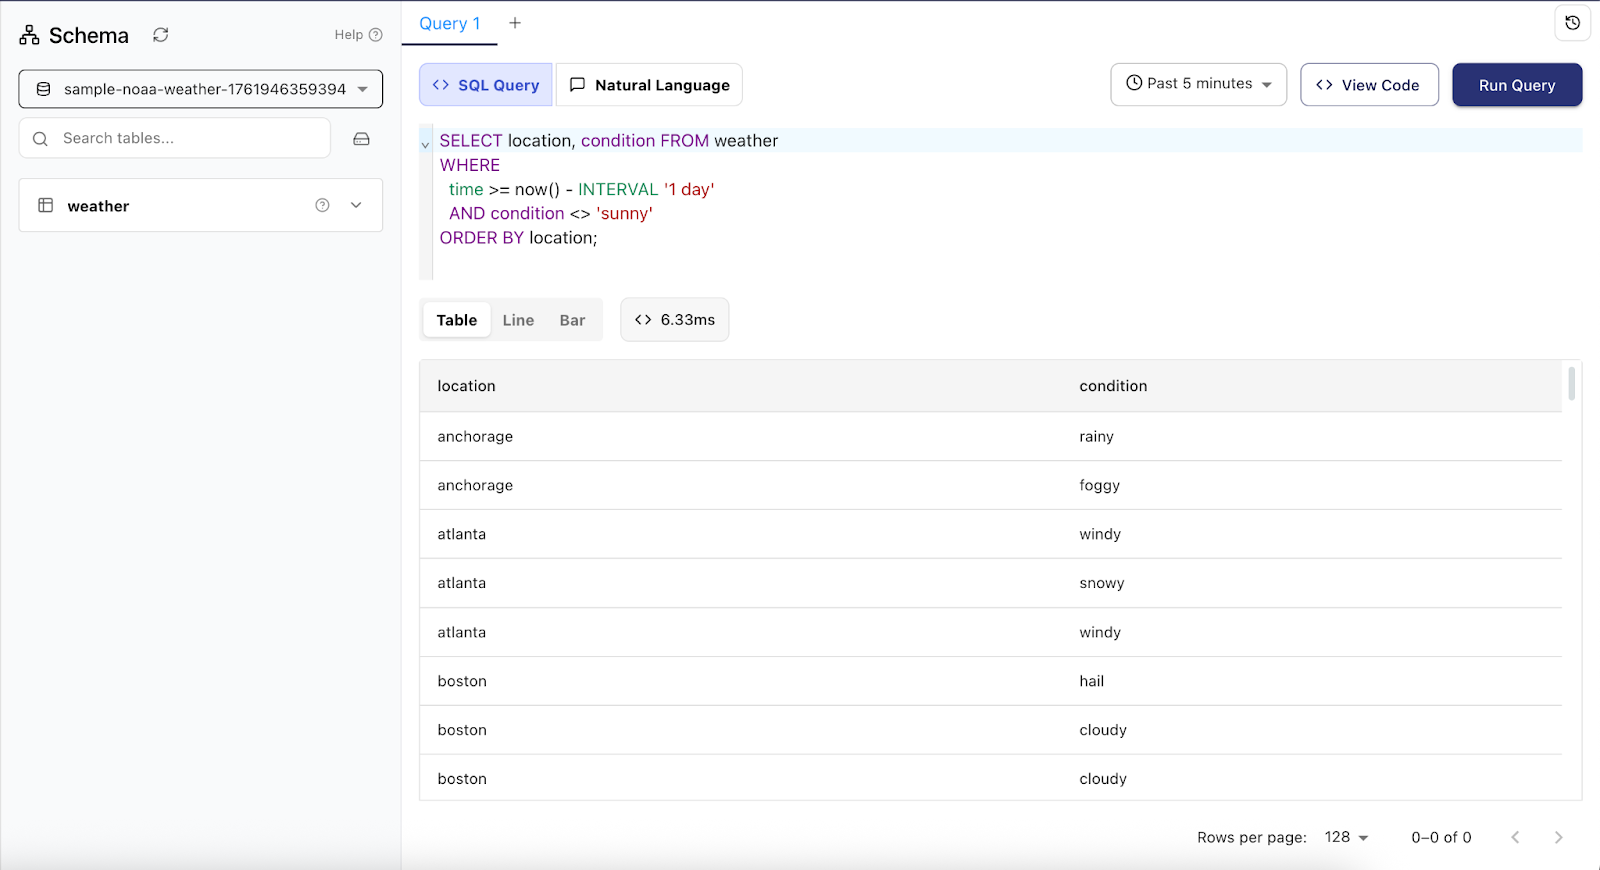
Option 2: CLI
If you don’t want to install Docker or you’re using a machine without a UI, the CLI is the key way to write and query data. If you’re running the InfluxDB server in a Docker container, you’ll need to prefix your commands with docker exec -it influxdb3-container. Aside from that, it’ll work the same either way.
Use the write command to load a sample dataset (different from the weather dataset above), replacing "AUTH_TOKEN" with the token you generated earlier. Note that this will automatically create a database named “weather” as well.
influxdb3 write \
--token "AUTH_TOKEN" \
--database weather \
"$(curl --request GET https://docs.influxdata.com/downloads/bay-area-weather.lp)"
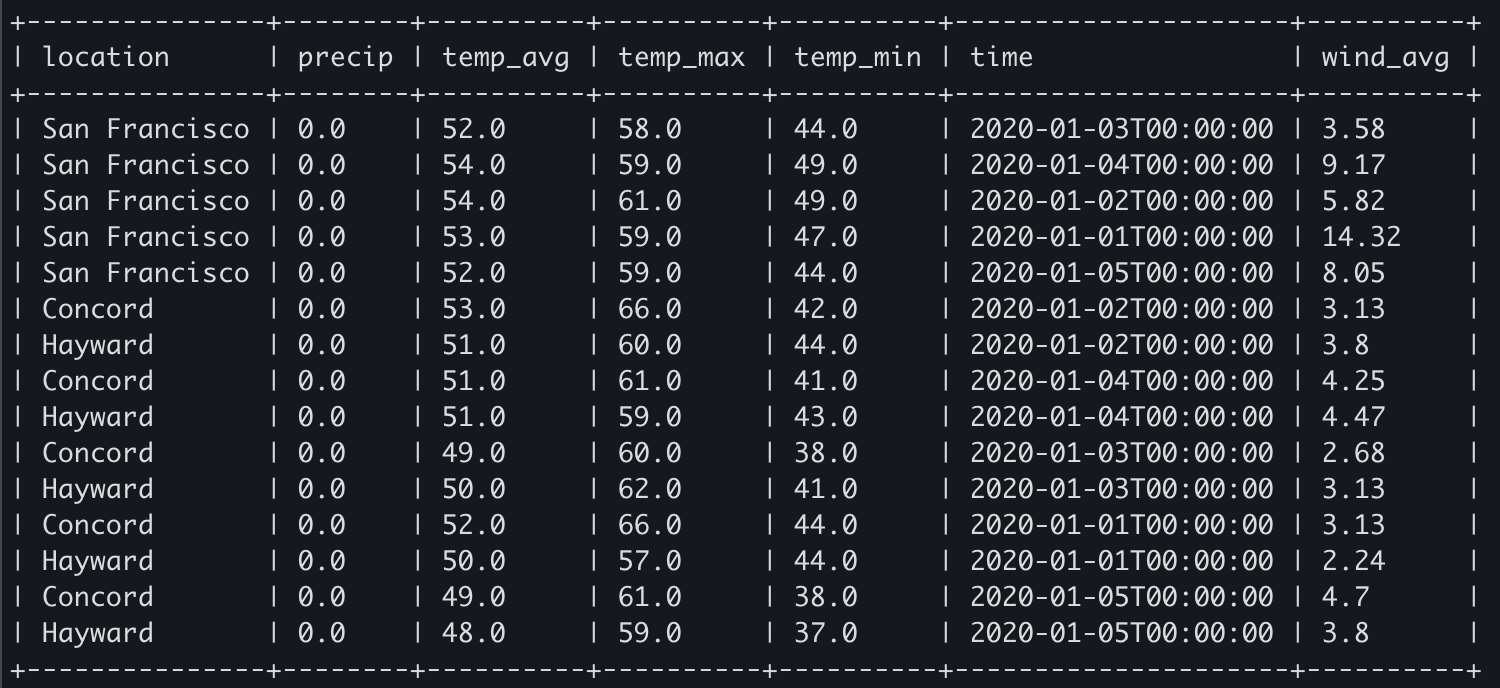
If you want to load your own data, you can use the line protocol to format and load any time-series dataset. Once it’s loaded, you can run a query command to read the data:
influxdb3 query \
--database weather \
--token "AUTH_TOKEN" \
"SELECT * FROM weather WHERE time "= '2020-01-01T00:00:00' AND time "= '2020-01-05T00:00:00';"
Once you run that, you should see query results:
Next steps
Now that you’ve started up InfluxDB, loaded and queried data, there are a few next steps to explore. If you want to configure your InfluxDB server, make sure to use the serve command the next time you start it up. You can set up Telegraf to load real data into your Influx server. Or you can connect a data visualization tool like Grafana to do more than run one-off queries on your data. If you need help, have questions, or want to share feedback, you can join the InfluxDB Discord.