** November 3, 2025
Last year in April, I got myself a Creality Ender 3 V3 SE 3D printer.

It was a steep learning curve at first - after learning about leveling (apparently needed from time to time), z-offset (not the same as leveling), different filaments (regular PLA works fine for my printer, wooden PLA not so much) and over-extrusion (apparently the case for my printer), I continued …
** November 3, 2025
Last year in April, I got myself a Creality Ender 3 V3 SE 3D printer.
It was a steep learning curve at first - after learning about leveling (apparently needed from time to time), z-offset (not the same as leveling), different filaments (regular PLA works fine for my printer, wooden PLA not so much) and over-extrusion (apparently the case for my printer), I continued to make progress on getting the prints I wanted.
Now a great way to get started were the various pages which provide models like Thingiverse. In the beginning, I was really printing a lot of what I just randomly stumbled upon or what I thought might be handy or fun. After printing the 7th or so fidget toy I started to wonder, how difficult would it be to design my own models?
My first attempts were with Sketchup to replace a piece for a Hexagon puzzle, but after getting the dimension wrong (radius and diameter, aren’t they almost the same?) and having to redo the whole thing, I learnt about parametric modelling, which just is a really great thing™, so I started out learning Onshape.
Train tracks (3x)
After watching a tutorial video about Onshape, I think one of my first designs was a train track. We have a BRIO train track system at home, so it was a nice entry point to measure a train track and trying to replicate it as a 3D model.

It was really new to me, but an interesting thought process: How can I replicate a shape? For example, start out with a rectangle, add a circle to it, and cut away another small rectangle to get the part where the train tracks can be connected:

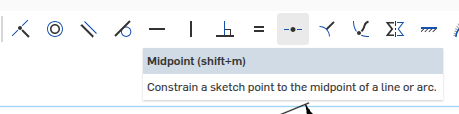
I find it fascinating that with a few constraints, you can define most of your layout. In Onshape, you can define constraints like two lines being of equal length, a point being in the middle of a line, etc.:
Along the way, you also learn about the real-world model you’re studying. For example, did you know that train tracks have V-shaped indentations for the train wheels?

After noticing that most edges where not a perfect 90°, I started seeing (and also using) Chamfer in many places:

The next step was to try something with not only straight lines in it, so I started replicating a curved track. It was nice to learn about curved lines defined by their radius, and for example the Offset feature:

After that, I wanted to actually create something new: An intersection! As we didn’t have it at the time (but really needed it, according to me and my son :-)), I had no exact model to replicate.

I ended up with 3 different models in total:
Sandbox shovels (3x)
After finishing the train tracks, I wanted to be a bit more creative and actually come up with something myself. As my young kids spent a lot of time in the sand box (and therefore me too), I tried to model some Sandbox shovels:

The first shovel was flat underneath:
But that didn’t feel quite right when using it with sand. I noticed that it was much better when there was kind of a “bowel”, a scooped shovel:
Much better! It was fun to iterate and try things out, especially to also let others test what they liked best.
I also learned about Fillet and using Extrude to cut off the upper part of the shovel.
Box with magnets
My next project was a small box for a labyrinth card game, and I did a small study on hinges. I am always impressed with the “print-in-place” things you can find on Thingiverse and alike, and I tried coming up with one on my own: Two parts of a box which are connected with a small hinge, not directly connected, but placed in a way that the two parts were being held together.
It turned out actually working:
It wasn’t that practical, unfortunately, because there was a lot of wiggle room and the box would close properly, the edges would just overlap and shift around.
I then switched to use 2 strong magnets on the side, so it would “snap” nicely when put together:
This was the final result (I had some first-layer issues with the part with the “L” on it, but decided that it was good enough):
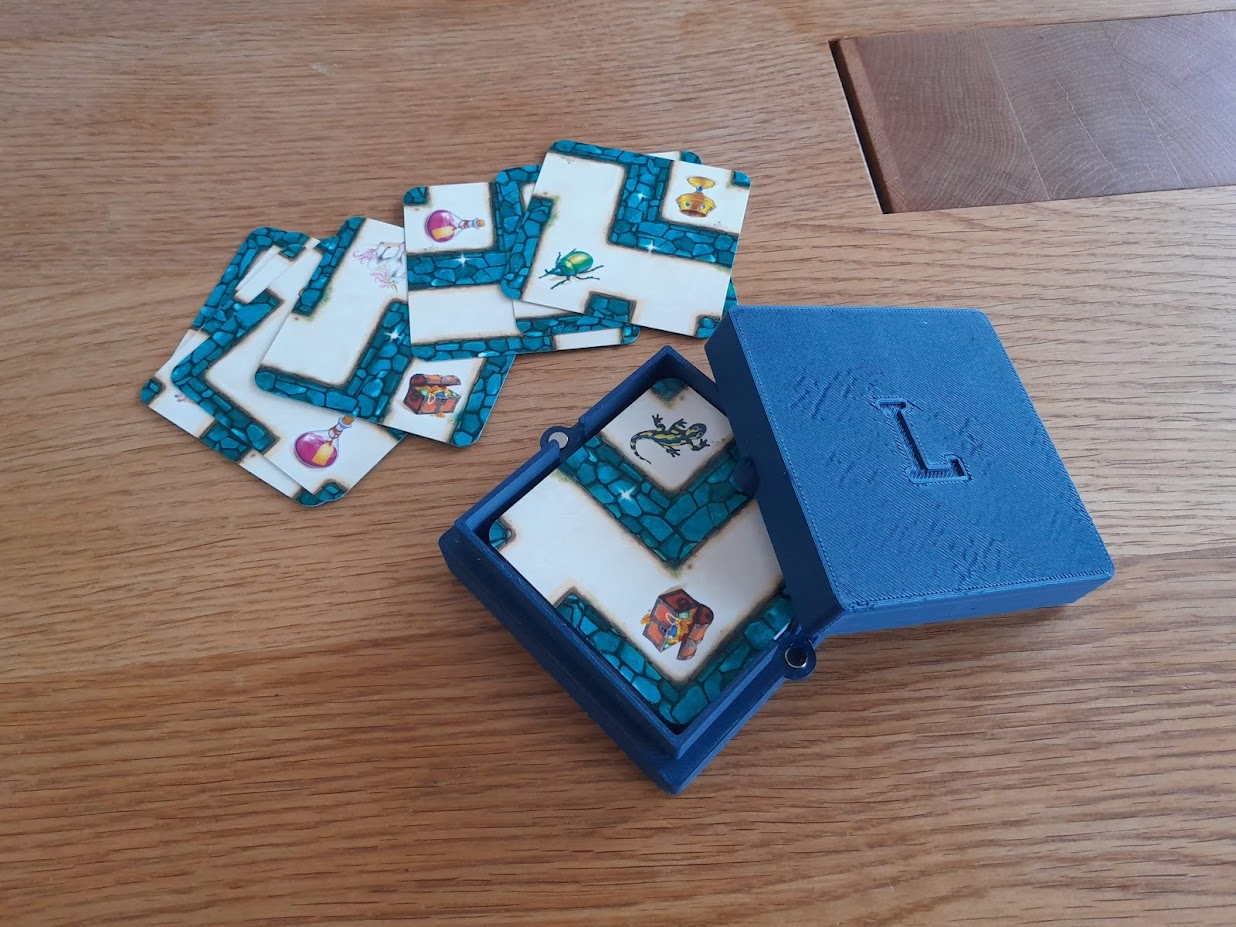
You can find the model here: Box for Labyrinth Card Game
Banana case
The last thing I’d like to share is a Banana protector case - after having several bananas squished when going to the playground with my kids I tried to come up with a design to protect a banana from getting squashed. This is the final result:

It was fun iterating through some ideas, for example:
- a pentagonal shape matching the banana (but unreasonable to print)
- halving the case laterally (impractical to close because of the round banana shape)
- having a small, removable top (not handy to put in banana)
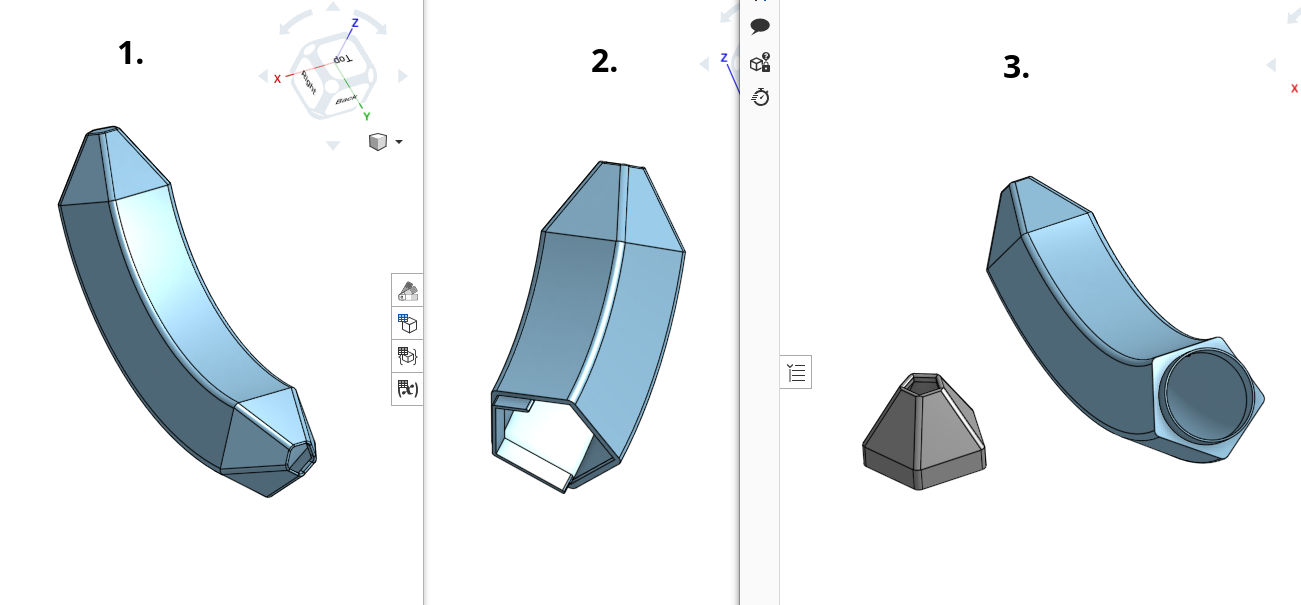
One feature I really liked here was Sweep, which can make a volume from a 2D drawing, following a (rounded!) line:
This is the final STL, which can be moved and zoomed!
You can also check out some other, smaller models I made:
Thanks for reading and happy printing!